|
| The loading building is more impressive than I recalled |
This for some “real” Hedley-Junction updates about the Murray Bay Subdivision. Over the springtime, our efforts focussed on completing the Ciment St-Laurent structures. These buildings are both huge and somewhat complicated. This is the last big signature piece of the layout and as such, cutting corners isn’t an option. We also tried to install a working rotary beacon on the GE 44-ton switcher, but this is a story for another time!
 |
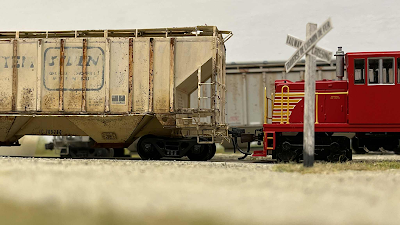
| The visual impact over the yard is quite dramatic |
The cement plant silos are a complex assemblage of PVC drain pipes, MDF and dowels. Louis-Marie outdid himself with his carpentry wizard skills. Honestly, I’m surprised he succeeded so well given the complexity of this structure. The result is an impressive and almost overpowering entity that towers over Villeneuve yard. For sure, that’s only the outer shell and asbestos cladding, railings and gangways will need to be added to finish the model.
The bagging plant structure was completed, albeit missing its weathering. Fascia and canopy supports were added to complete it. I’m really pleased with this somewhat mundane but useful structure that adds interesting operation opportunities.
 |
| Cardboard mockups are your friends in case of doubt! |
We also built a MDF core for the office and laboratory building. It was the brain of the plant back in the days. However, this structure will require more attention to its finishes since it was built in typical 1950s style with curtain walls and yellow brick. It is a project that can only be achieve from the comfort of my workbench.
 |
| Testing the spacing between the mock and siding |
The final structure is the workshops which were located east from the laboratory. It was used to repair trucks and machinery. Originally, it was rail served, but in our era the siding had long been pulled off. This building is also very mundane but required a good level of scene composition. Jérôme made a cardboard mockup and moved it around until it looked right. The layout is too small to replicate the full structure, and it was several dozen feet away from the yard. We really wanted a small access road to run along the shops as seen on the prototype.
 |
| The final MDF core in place |
A MDF core was then built, and we then again tried to nail down the exact dimensions. We found out that if we removed about 3/8” at the back of the building, it would look perfect. So, the entire structure met the table saw and lost some deadweight! As usual, the asbestos cladding was done with fine corrugated cardboard.
 |
| The core was too close to the track... thus we had to cut it! |
With all the plant structure cores done, it’s just a matter of adding finish, painting and weathering. That will probably be a big project that will need to be done at my home.