Tuesday, September 30, 2014

The Bridge on the River Malbaie - Part 10

As stated in a previous post, I wasn't satisfied at all with my bridge abutments on Malbaie River. They were built with styrene sheet painted with Humbrol oil paint and talcum powder to give it some texture. We quickly found out this texture wasn't very durable under normal use. I mean it easily scratches. Maybe it's because I didn't prime the styrene, but I doubt it would have been that good. Most matte paint job are always easy to scratch as a matter of fact. I'm a little bit worried it will be worse as we do scenery works over this area.

Original styrene bridge pile
Thus, I decided to replace the central pile which is exposed to more risks than the bridge abutments. Figuring out how to cast such a complicated shape with a mold wasn't easy at first. But after giving it some thoughts, I came out with a simpler idea and follow real prototypes: cast the original rectangular pile then cast the concrete ice breaker during a second phase.

Casting the ice breaker
I used the same method described in a previous post about making plaster abutments. I think is works wonders with little effort and time invested. I didn't care about making the top surface of the ice breaker perfect because the prototype is irregular. I smoothed the surface the best I could, trying to get a little slope to help water rundown into the river.

Stippled concrete effect on fresh plaster
While the plaster was still fresh, I used an old stiff brush to stipple the surface and get an old concrete effect. also, using a scrap of styrene, I bevelled the edge of the pile following the prototype. Then I stipple again the bevels to make them look older.

The real prototype as seen in July 2014
 Now, I just need to let it dry for a few days before painting and weathering it. I'm seriously thinking about redoing the styrene abutments in plaster too. It means I'll have to rip off the old ones and repair the scenic shell once again. I feel it's now or never. If I wait after we lay track in Clermont, it will be too late. I'm also worry the texture and colors will vary greatly between the central pile and abutments.

Here you can see a comparison between the old pile and the new one. It speaks for itself.


Donohue: Mission Completed


Finally, there’s some light at the end of the tunnel. A first section of the layout is fully track layed. Once again, paper plan was just an indication and things were worked around a little bit on site to get the most from the available space.
 

So far, I’m particularly satisfied. The track plan may look complex but is in fact very simple and easy to work.  There’s enough activity there to suggest this is a very large mill desserving to be the powerhouse of the subdivision.

I like the two long sidings used to store chemicals and woodchips. I didn’t thought it would look so good and see a lot of scenic potential there.


Locating the woodchips unloader wasn’t an easy task and I tried 3 configurations before I was fully satisfied. I wanted the building to be far enough from the fascia to be able to model the little dirt access road running parallel to it. I’m not that fond of buildings located too much in the foreground. The remaining space between the two sidings and the long storage track in the background will be occupied by different sheds and tools just like the prototype.


I made the storage track a little bit wavy to give it some visual interest and optimize the space for the sheds and woodchips piles. 

Operation wise, I think the best option is the following. CN pulls outbound cars directly from Donohue and replaced them with inbound cars. That means no need for complex operations at Clermont.  This diminutive yard is too small to handle long freight trains (more than 10 cars). I would also make the layout cluttered. Instead, Clermont will be considered a passing siding and the small siding as team track for various customers in Clermont. This way, the new team track will be a good opportunity to model typical activities from Murray Bay Sub we couldn’t do before: oil, finished lumber, propane, electric wire (General Cable), crushed stone, grain, fertilizers and others. This is a very small part of traffic, but gives some variety. One must remember there’s an industrial park in Clermont located at Wieland where you could find many rail-served industries (feeds mill, lumber loading area, propane dealer, General Cable and a few others). I feel it really gives Clermont the importance it needs to be the end of the line top station. Better, it means the crew operating the 522-523 train have real switching duties which makes running this train more than picking up cars at large industries.  


I also filled the parking lot with various cars and trucks typical of the era I had acquired over the years. Didn’t know I had so much of them! I’ll need to get more pick-up trucks because they are so popular in remote areas like Clermont.


As you can see, I’m starting to almost like the Atlas CN GP40 with their badly shaped cab nose. I’ll have to give some thought about weathering and upgrading them.

Next time, we will wire and test the track.

Sunday, September 28, 2014

Loaded Tank Cars


I recently acquired 5 Atlas kaolin tank cars to serve Donuhue plant. Most of them are old runs from the early 2000s equipped with x2f couplers, others have AccuMate couplers.. All are brand new and were acquired at there original MSRP from the time (about 15$). Nowadays, those cars can fetch prices in the 30$ for second hand item. Even the unprototypical Walthers kaolin car knock off is pricey! It's crazy to think 30$ is now the floor price to get a decent model.
 
A smashed Atlas kaolin tank car.
The last one I got is a J.M. Huber car. Those were regular visitors on Murray Bay Subdivision back in the days. Unfortunately, this very car was partially smashed during shipping. A few parts were broken, the car's A end was dismantled and the pin securing the car's steel weights was broken. Fortunately, the paint wasn't badly damaged and after half an hour, the car was ready to roll. The seller was kind enough to offer full refund on the item which surprised me. Looks like there's still people keeping their words out there.


The black stains on the car end was easily removed with a brush and a little bit of Solvaset. I decided to fill few tank cars with sand to give them more weight. This can be easily done by removing the tank cover. The hole isn't that large but you can easily fill the car in about 45 minutes! Yes, you read 45 minutes! That's a lot of time, but it helped me take them from 3.6 oz. to 7.1 oz.


I also decided to finally update my Intermountain CGTX tank cars a little bit. They are more suited to the layout era because they have modern AB brake on them and not the old K brake system found on Tichy cars. However, the lettering is typical of a pre-50s car. From the 50s onward, CGTX dropped the full name on their car. These cars had a very long revenue life, from the late 20s/early 30s to the mid-80s.


Here's the final result. Intermountain lettering can be easily removed without damaging paint by soaking the lettering with Solvaset for about 5 minutes or more and scrubbing with a wet Q-tips. I've been recently using this trick on a few cars and him always pleased with the result. Really makes life easier.

Railfanning Cap Tourmente

The "Bee" at St-Joachim. Mont-Sainte-Anne visible in the background.

Yesterday was an exceptional Indian summer day. Autumn's colors were particularly vibrant. Weather was excellent and it was decided to have a day off at Cap Tourmente - the very place where Murray Bay Subdivision enters the cliffs of Charlevoix. It was an excellent occasion to take picture of tracks, vegetation, signs and other little details to bring life to the layout.

Mile Post 29 - Cap Tourmente in the background
 I was lucky enough to catch a few shots of Le Massif de Charlevoix's touristic train. As usual, the train was half-empty or half-full depending your point of view. It was probably the best day of the year to take this train. Autumn's foliage in Charlevoix is habitually spectacular!

The last protected crossing in Côte-de-Beaupré area.

Saturday, September 27, 2014

Laying Tracks at Donohue

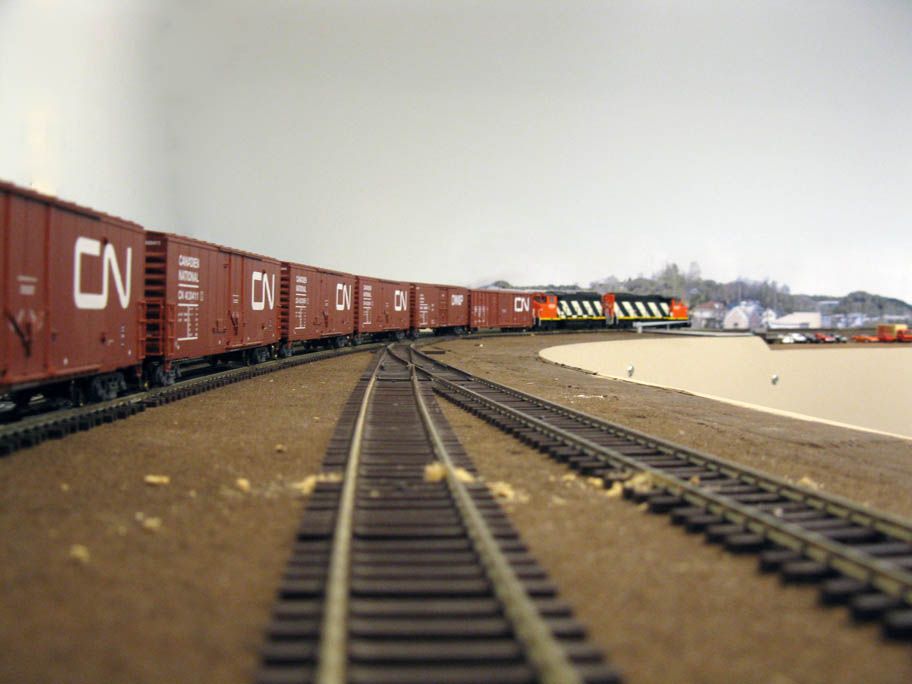
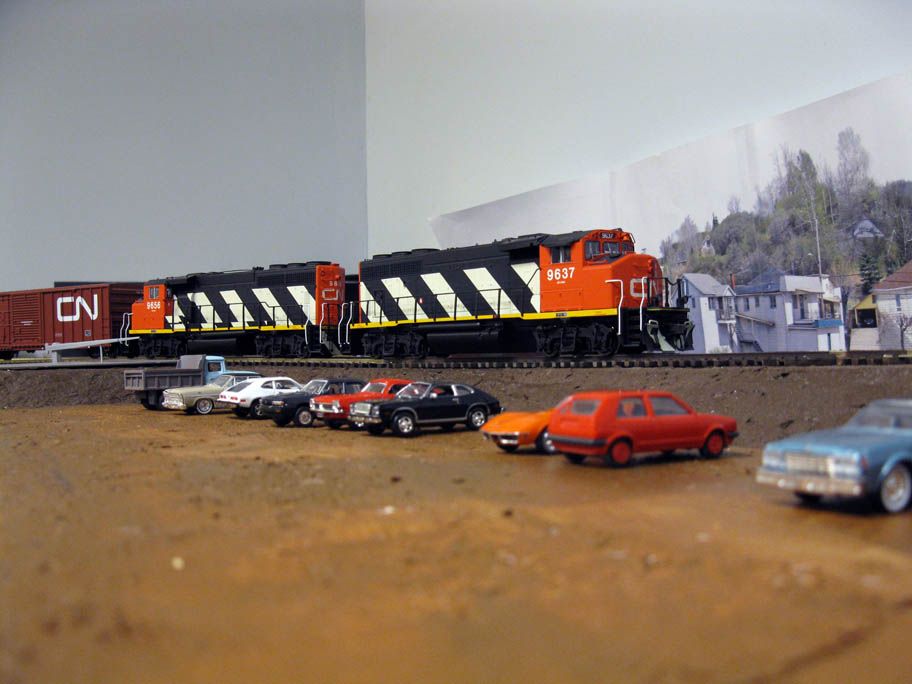
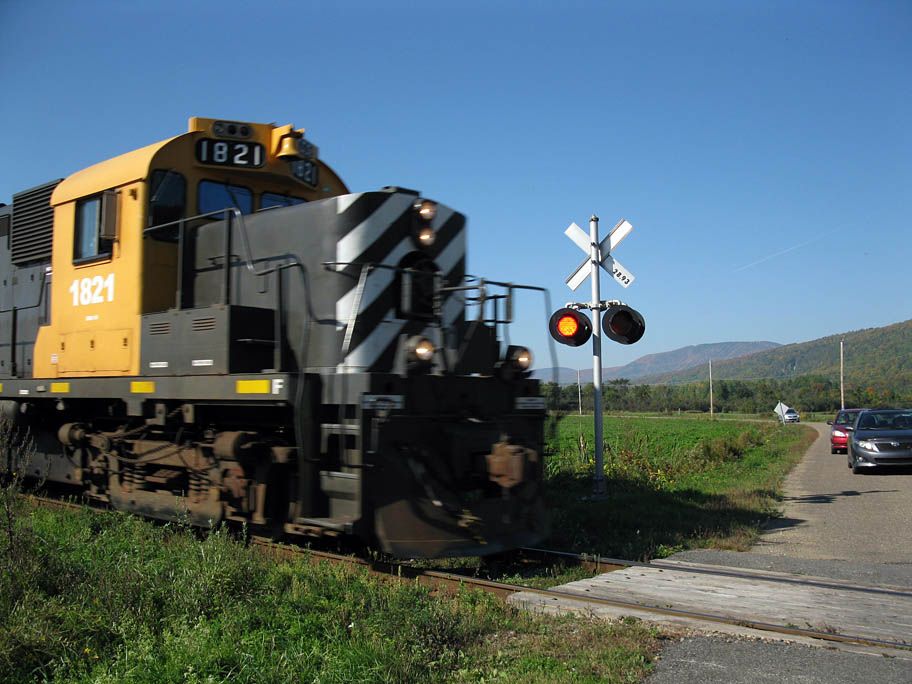
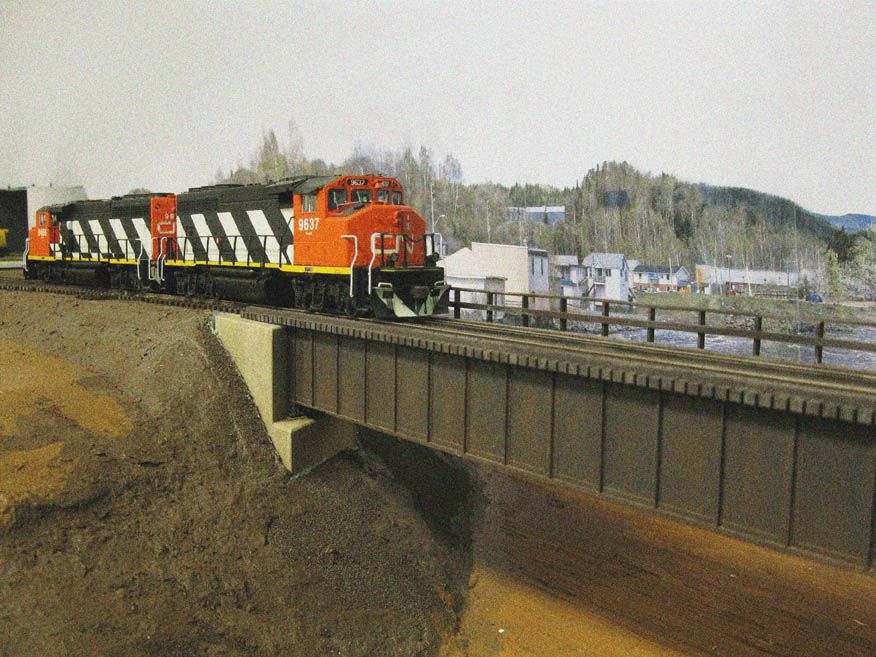
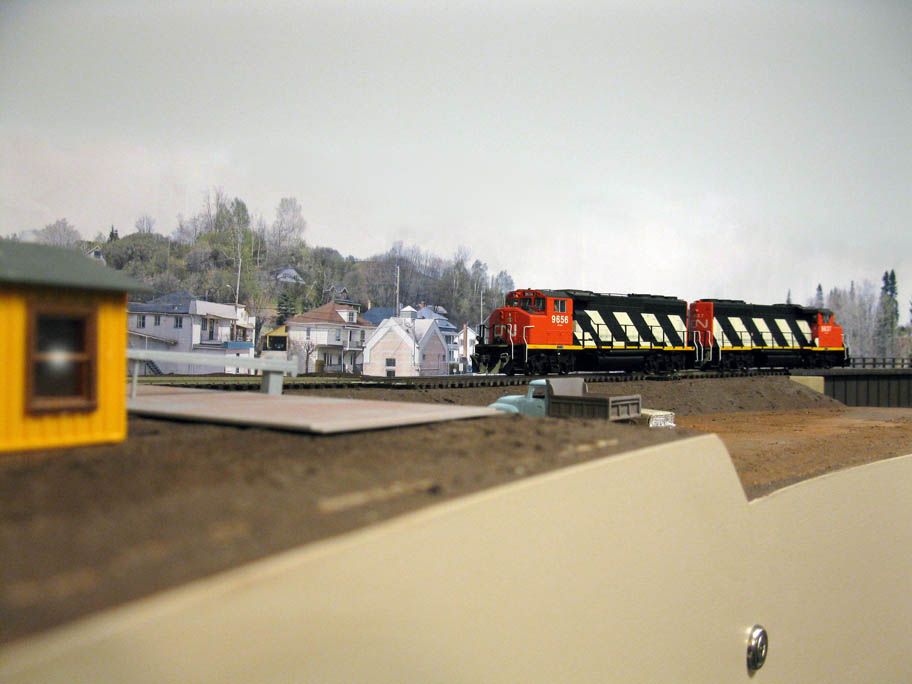
CN 523 just crossed Malbaie River bridge to pick up a cut of loaded boxcars.
This is the 100th blog entry. In itselft, it doesn't really mean nothing. It doesn't coincide with some anniversary nor means we have reach a certain level of achievement. However, it is a good opportunity to look back and find out how things changed since the first installment. Better, it is a proof the project - sometimes crippled with bad planning or shortcomings - did continue and is still alive and interesting after four years.

So far, about 16 000 visitors came here and I'm surprised to see anonymous regulars still coming here. Not that I'm writing for fame - this merely a means to document my modeling perspective from an archivistic standpoint - but it is nice to see that it is not as trivial as we may find it from the pits of our basement. You really start to understand what you are doing when you try to explain it to others. This is probably the most positive side of keeping a blog.

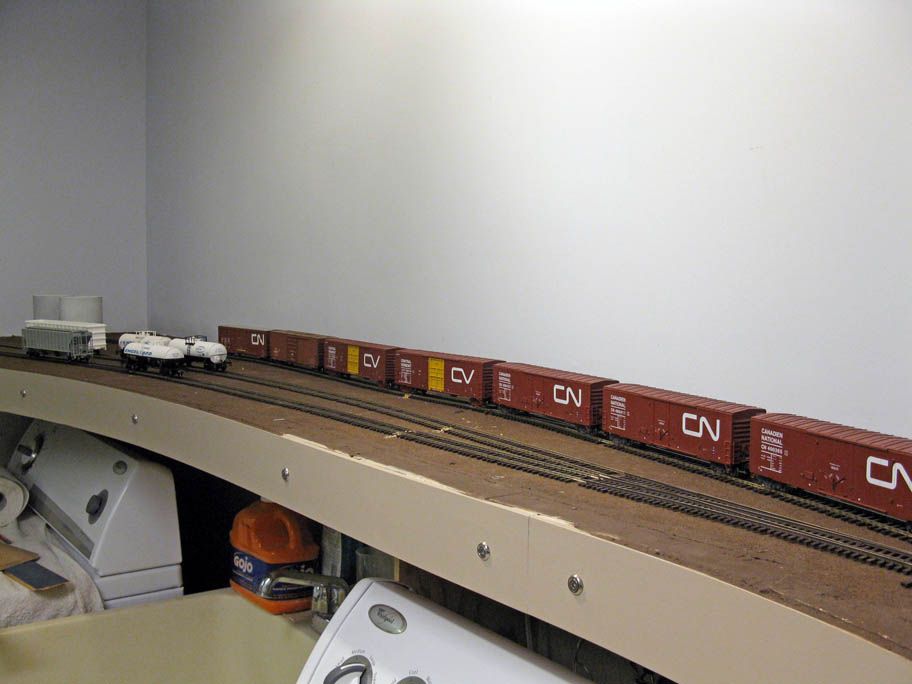
CN 523 waiting near Donohue's employees parking lot
 
It is fun to go back to the first blog entry and find out how much things changed. You can see a glimpse of the original 2007 layout: so crude! Era, industries, rolling stocks, everything changed... but some things are still the same. The first layout was called "Hedley-Junction" but never modelled physically this particular junction. The actual one has the same name and still doesn't model the junction. But think about it, each layout is in fact one side of the junction, depending which destination you want to reach! In fact, both layout are located on each side of the junction!

In fact, the actual layout is a better successor to the original concept written in the first entry. It is now a real tribute to Horace Jansen Beemer - a great railroader from the late 19th century - who built Murray Bay Sub when nobody was caring about this particular area.

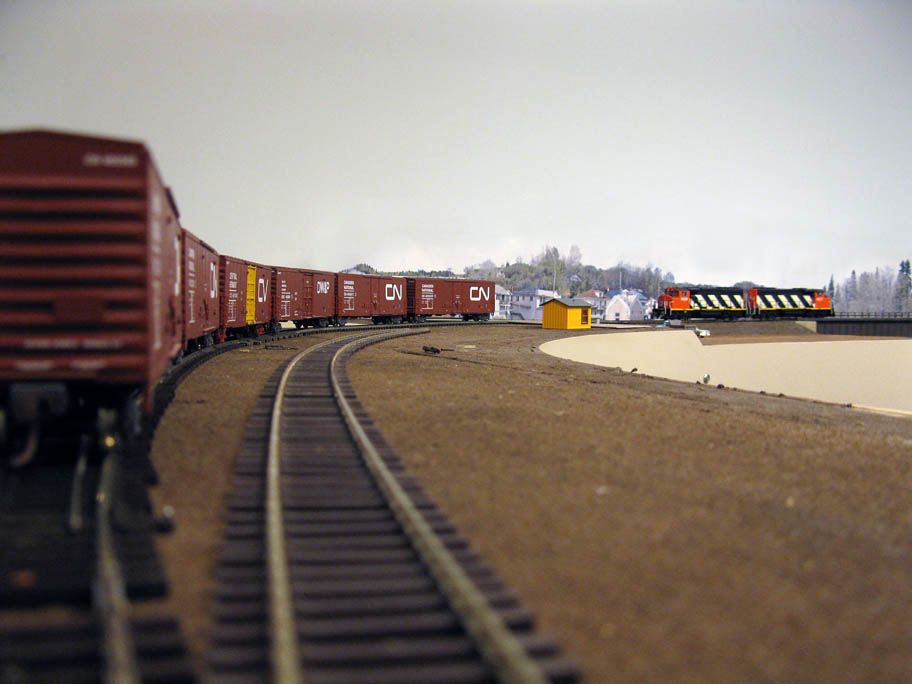
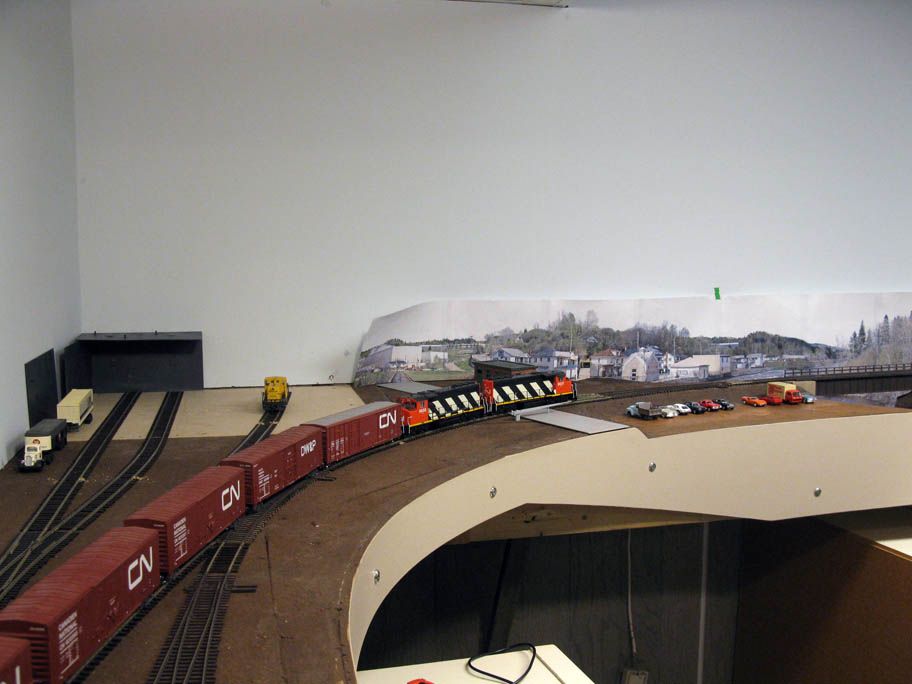
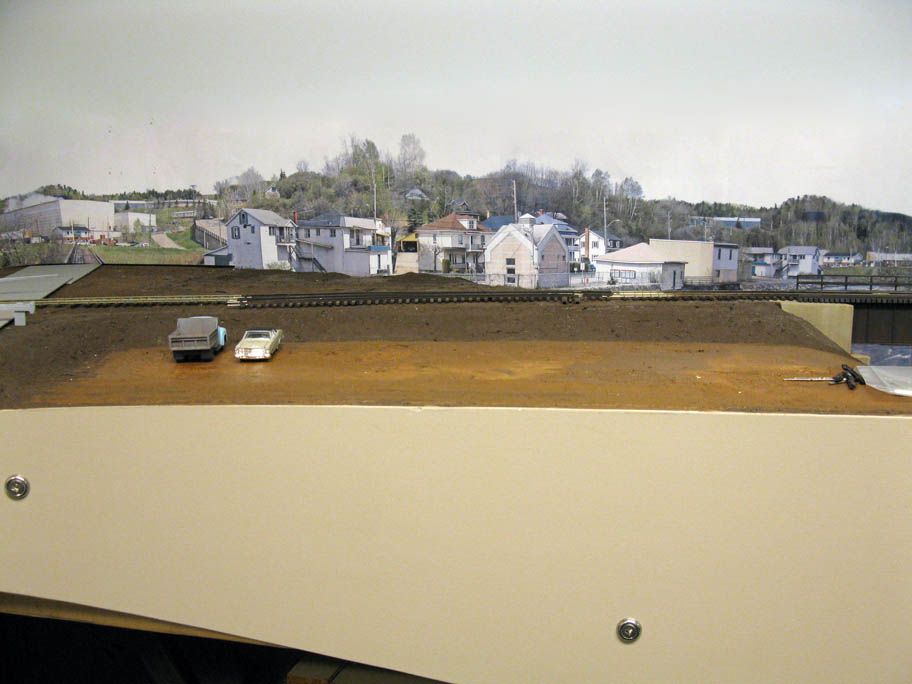
Donohue's yard looking south.


Yesterday was a great day. Jérôme was actually in vacation, visiting Washington D.C. numerous museums and, I'm sure, railfanning at his heart content. Nevertheless, we were minded to lay all track in Donohue before he comes back in a week. Restarting to lay track after ripping almost 95% of trackage feels like we overcome the mountain once for all.

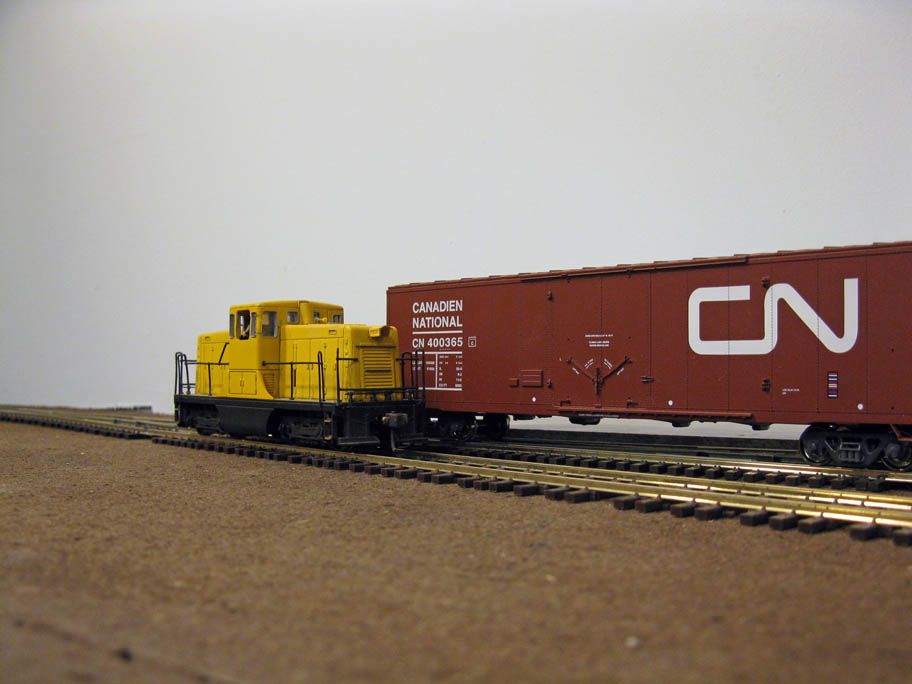
Donohue's switcher passing by a cut of boxcars


The first hour, we prepared the PECO flex track by removing about 1 tie out of 5. After, ties were randomly divided and spread accross the rails to get an industrial look. A small steps often overlooked but that can really change your perception of the scene.
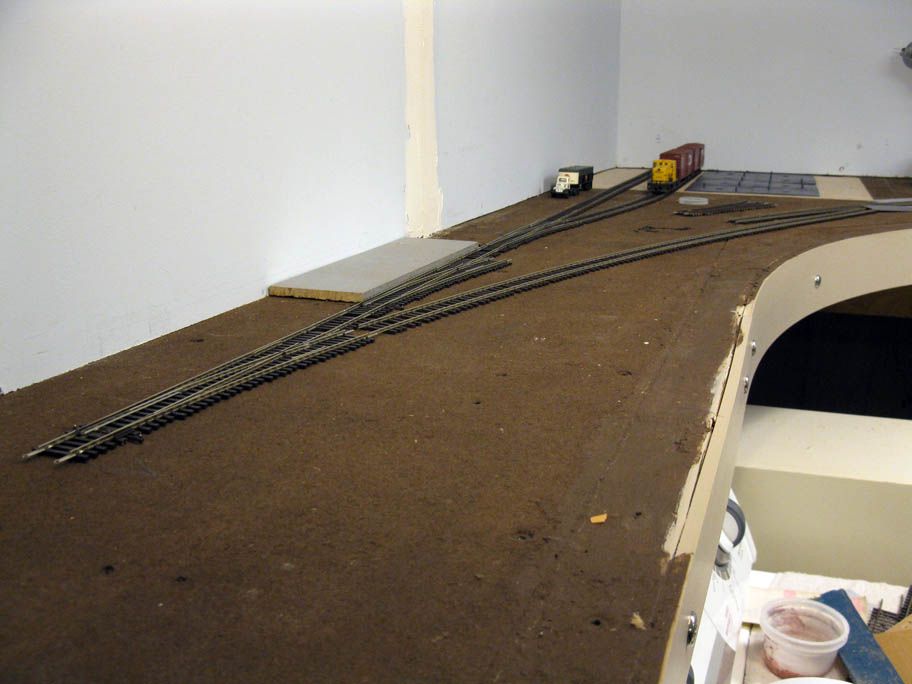
Donohue's yard

Before installing any flex track, I pre-drilled hole in ties about each 8 inches. The track plan is relatively final, but we all know laying it in real need some adjusted. For this reason, I thought it would be foolish to glue the track at this point.

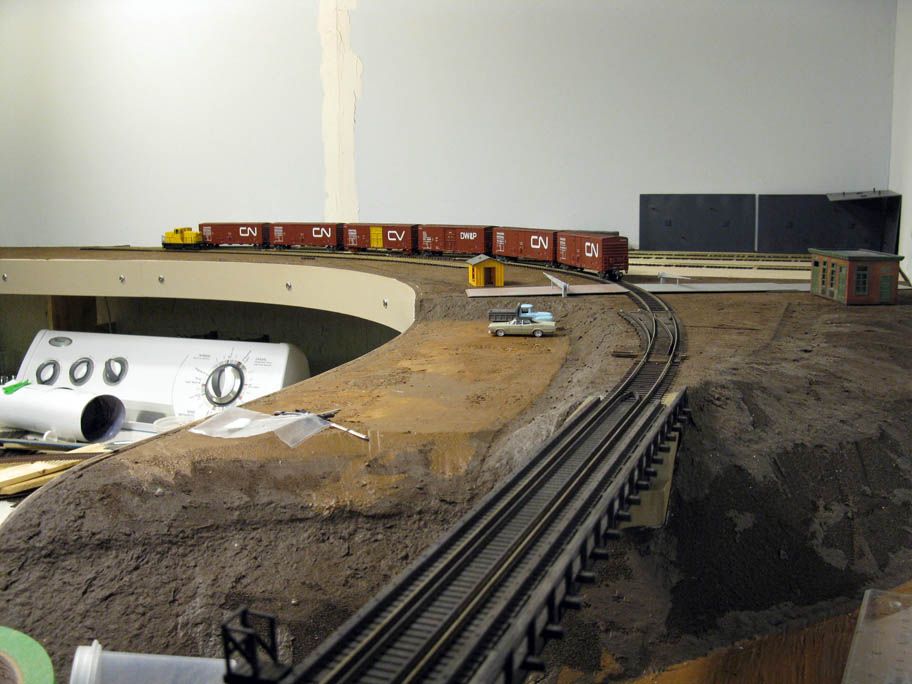
Looking at Donohue from the bridge.


We laid the track near the foreground, including the warehouse tracks, switcher garage track and one leg of the runaround. The bridge is now connected to Donohue. By the way, I removed the central bridge pile. After disccussion, we found out it should be directly glued on the plywood and not on shims. This will be particularly crucial when pouring the river.

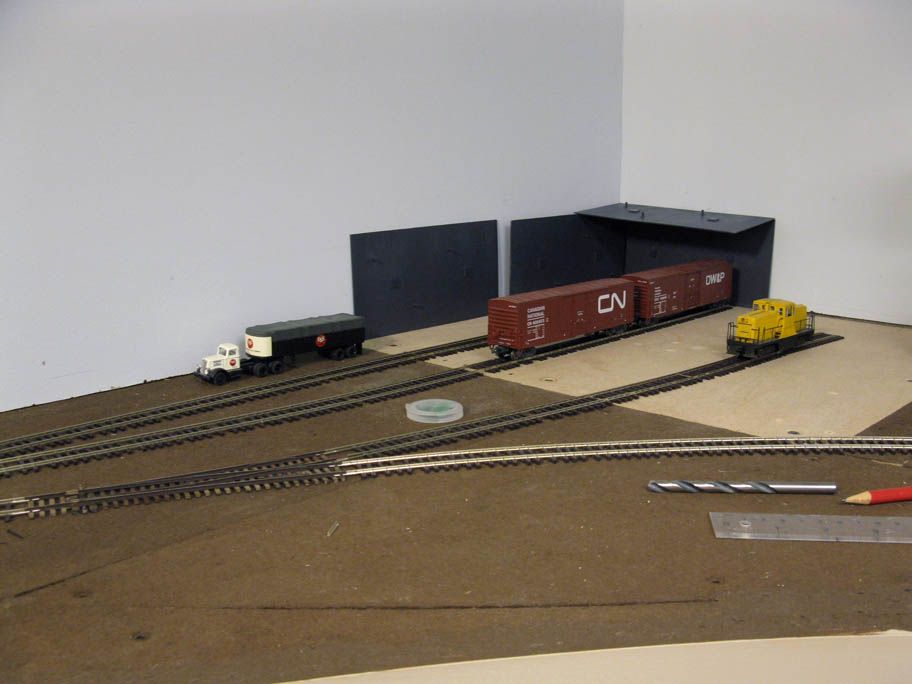
Switcher's garage track and warehouse

We also had some trouble when laying the tracks in the warehouse. The benchwork is quite old there and not level. Cars wobbled over the rail - some could have thought it was Mike Cawdrey's New England in Winter layout (remember the rickety mill branchline).

CN 523 waiting for its next assignment at Donohue.

The issue was a flaw in our old construction technics.  Plywood used was thin and used on the wrong side. It warped badly over time. Also, the fiberboard was built from scraps and bits there. Not a problem for a scenic area, but not the best foundation for a track. First, we added structural members to get rid of the plywood warping and then, fiberboard was replaced by a MDF plank to have a smooth and even surface to built the warehouse over. When time comes, the MDF will be painted to make sure it is sealed.

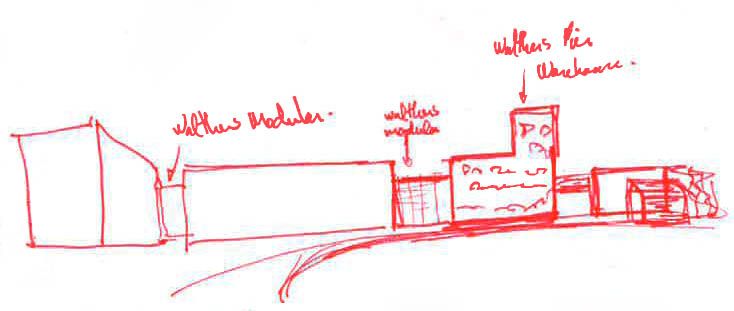
I was also surprised to find out I could finally use a bunch of Walthers modular roof kits I got years ago. They will be perfect to scratchbuilt/kitbash the Donohue's warehouse.


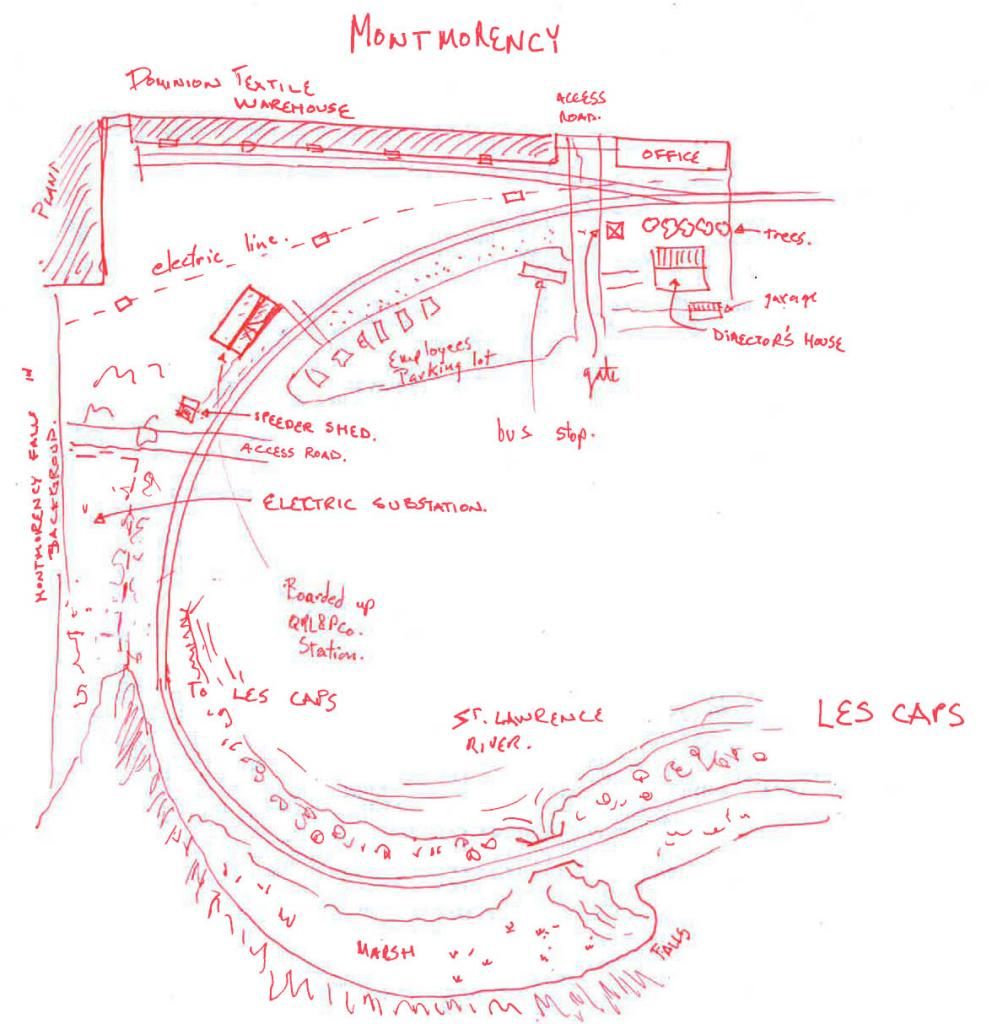
We also mockuped the mill scene with roads and buildings. Crossing gates, like the prototype, were added too. Looks OK, but I think the offices won't be modelled near the background. They break the scene, making it cluttered. The gate shed (Atlas shanty) will be moved over the tracks. The final building will look nothing like this one.


Wednesday, September 24, 2014

Planning Scenes - Dominion Textile

I sketched my ideas about Dominion Textile scene today. Sketching isn't particularly precise, but it's a formidable tool to grasp the essence of something.


I tried to get a large scene with lots of opening over Montmorency River suggested on the backdrop.


I also gave some thoughts about the plant itself. It is very large and conveying the prototype feeling isn't just about slapping a large flat building on the wall.


Thus, I decided to play with foreground and background to make the train - coming through the wall at left - enter the scene naturally. Dominion Textile was famous for its directors' homes built right on the plant property. I decided to place one in the fore ground to hide the tunnel, but also to give some perspective to this very shallow scene.

Tuesday, September 23, 2014

Toward Real Operation


Recently, I can tell Jérôme is anxious to start operating the layout again. Maybe he was a little bit impatient, but looking at this blog archives, it’s been 4 months since the layout was “operable”. Most parts have been under serious rebuilding since last March, some since December 2013. One year later and only a truncated mainline on the peninsula survives (with a dirty siding at Dominion Textile, if that counts). In fact, this only remaining part is ballast which explains it still in place. It would be depressing to pull out the only scenic part of the layout.

All that means it is more than time to lay some tracks over the newly finished benchwork.  I’d like to plan every little detail, but it isn’t realistic. What my short lived Quebec South Shore Railway layout told me is that you can achieve realistic and acceptable scenery and track work without going crazy and spending years. That’s my goal for the next step. Having a function Donohue plant by December would be great and encouraging. I really feel it’s time to see some action because you can quickly lose sight of your goal while trying to over-achieve: operating train. That is another aspect of an achievable layout: it is not something vague lost in the future but a present endeavour.

That said, I’m not sad to have “lost” months over rebuilding. Many things on the layout were going nowhere before we moved on modelling Murray Bay Subdivision in the 80s. My fellow club members aren’t the type of people who write their thoughts and waste evenings trying to plan everything. But this rebuilding process helped them to define better their priorities. With that knowledge gained, it was possible to take account of everyone’s interest in the hobby and try to get a coherent whole. So we may have "lost" a few months of operation, but I feel like the next ones will be more rewarding.

Scenery sketch of Clermont and Donohue


By the way, I started planning which structures will be needed for Clermont. A few houses, a few shanties, gates, offices and loading/unloading facilities. Most of them are already built in some form and will only need to be repainted and bashed as needed when I'll feel doing it. Many are very old kits my parents bought me when I was in elementary school back in the early 90s.

Donohue's building are simplistic steel-clad warehouses with some rudimentary piping. Nothing to fear! Hope to work on them in a foreseeable future. But one thing is sure, the house on the hill in Clermont is gonna stay there for a while.

The Most Simplistic Terminal Out There


Our layout’s Clermont yard is simplified to its bare bones: a single runaround with a small storage track. Seriously, I had a lot of doubts over this design this week, feeling it was ridiculously simplistic. I mean, the real prototype has 4 double-ended tracks and a small storage track. All sidings are equipped with derail near each turnout, a nice thing to model to add realism to operation. Let’s see how everything would work during a normal session.

First, consider Donohue switcher left a cut of loaded cars for pickup in the siding. The incoming daily train will pick up them and replace them with empties for the paper mill.
 
We will break the operation into many steps:

1) Incoming CN train stops before entering the yard. The crew unlock the turnout, throw the bar and open the derail.

2) The entire train start entering the siding and make coupling with the cars in the siding. Brakeman start to release all manual brakes set on the cut of cars.

3) Brakeman walk until he reach the other derail which he opens. He unlocks the turnout and throw the bar. Tests are done to see if the cut of cars trainline and air brakes work properly.

4) When the test is completed and successful, train push the said cut of cars out of the siding until all the inbound cars are on the siding. Brakeman set need manual brakes on the inbound cars to be stored on the siding and move the west turnout into normal position. A brake test is performed until everything stay in place. Locomotives are decoupled from the inbound cars. Notice caboose is kept on the siding.

5) Locomotives and outbound cars exit completely the siding and brakeman activates the derail, moves turnout back in normal position and locks switch stand. Outbound train is almost done.

6) Locomotives and outbound cars moves east and moves over east turnout to pick up caboose. Brakeman throw turnout into siding position and train back off until it couples the caboose which is then uncoupled from the stored inbound cars.

7) When mandatory brake test are done, the train exit the siding and brakeman can activates the derail, throw back the turnout into normal position and lock the switch stand.

8) Crew can rest and take lunch in Clermont until departure time.

9) Outbound train is ready to leave Clermont and will reach Quebec City in a few hours after a long and slow ride along majestic Charlevoix’s mountains and capes.

This operation will probably take at least 20 minutes. Nothing spectacular happened, no switching. And we know the same amount of time will be needed at D’Estimauville – the western terminal. If you take in account the train will travel slowly at 20 mph between each point, it should take about 5 minutes. You get a total of 45 minutes just for simulating a basic freight train. And remember, this train will have probably to switch Dominion Textile which – from actual experience operating it on the layout – can take easily 30 minutes of your time. You now get an operation session taking well over an hour of your time. And I didn’t say you could have to leave or pick up a few cars at St. Lawrence Cement in Villeneuve. This would make a full blown session taking at least an hour and a half. More than enough for a regular evening session.

Sunday, September 21, 2014

Ready to Lay Track

FINALLY! Yesterday, we had a quick but productive work session.

Benchwork was fully painted with our brown basecoat paint to seal the fiberboard.

Benchwork in the tunnel linking Montmorency to Villeneuve

We are particularly satisfied with the new curved fascia in Villeneuve and D'Estimauville. It really makes the scenes flow together naturally.

Villeneuve's benchwork completed. Cement plant will be located at left.
D'Estimauville's benchwork completed. Interchange "yard" will be at right.
It was also an occasion to slim down benchwork at Donahue. When it was a grain elevator, we needed lots of place to have a decent yard lead. It is not required anymore and the extra space was removed. It was a good opportunity to get rid of an annoying protuding part of benchwork. Also, better access to the appliances located under the benchwork.

Before
After
Donohue's parking lot was mudded and painted. Looks far better than the original one. Can't wait to put some soil over it.


 Riverbed also received a generous coat of paint to seal the plywood. It's not the final color! Malbaie River isn't that muddy at all! I'm also seriously thinking about replacing the central bridge pile because it isn't prototypical at all. The base should be V-shaped to reduce water erosion. Anyway, I must admit the idea of using talcum over Humbrol gloss paint on styrene isn't a very durable finish. It works well for porous material, but not on plastic which is exposed to a lot of abuse like a bridge that is often removed during scenery process. Just like any "flat" finish, it is prone to mark and scratch.


Finally, some railfanning in Clermont. Just imagine that pair of Atlas GP40 are M420 and that should be OK! I hope they will soon announce this model available in plastic. I'm pretty sure a few manufacturers are getting tired of hearing modellers asking about this particular model.


Next step will be to adjust the backdrop. We want round corners to have a better visual look. Photoshopping corners on pictures is a lot of wasted time!