Monday, January 29, 2018

Full Throttle & More Scenery

Well, not only we almost completed the overpass last Saturday, but also Julien Boily paid us a nice visit. Julien is probably one of the most serious operator I know and it's always a pleasure to see him fully take advantage of the layout and making it runs like the real thing. Under such circumstances, I'm satisfied to see my modelling efforts paying off in terms of enjoyment.

Julien and Jérôme watching the eastbound train leaving d'Estimauville

The social aspect aside, it was also a good occasion to finally try a well-programmed Loksound Full Throttle decoder on a locomotive. Julien brought his Central Vermont Atlas geep to give a demonstration. This is hardly breaking news, but it was nice to see how the thing performed on our layout. I guess it was a success since Jérôme and Julien switched Donohue three or four times in a row!

Simple tasks such as spotting a single car take another dimension when done right

I didn't try it myself, but I could clearly hear the sound modulation and the notches according to where the locomotive was and what move were performed. I must admit I'm curious to see this decoder coupled with the new Proto Throttle.

How much effort and time required to pull out that boxcar...

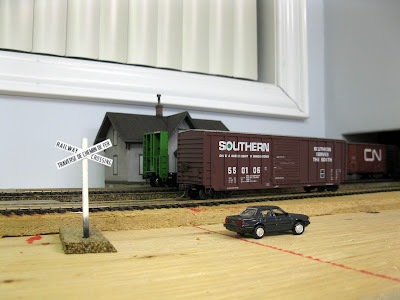
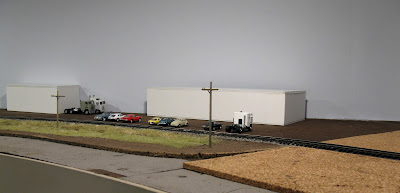
Also, I made a few mockups to see how the repair garage scene would look at D'Estimauville Avenue. After a few tries, I came with this satisfying arrangement. I still have plenty of time until we fully scenic that area.

D'Estimauville's repair garage... in foamcboard.

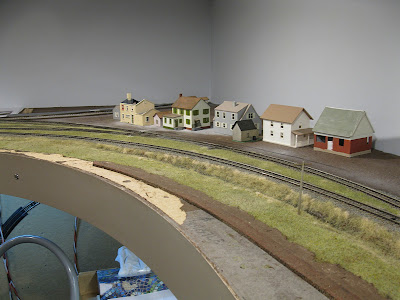
It was also time to see if the new structures built for the residential area were up their game. So far, so good. It looks almost exactly like the real thing. However, thought I thought I could have as much as eleven structures, I think I'll trim it down to 9 structures to keep the scene pleasant to the eyes. It is one of these moments one must use his artistic sensibilities to alter reality. Blindly following the prototype here wouldn't have paid off at all, breaking the balance between structures and scenery.

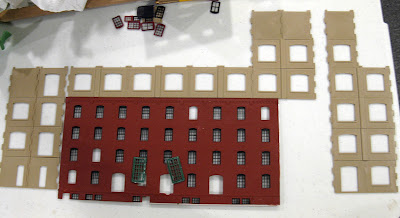
A new apartment building now grace the layout. Six more to build.

What Matters?


Since the last holidays, I’ve been participating in a discussion on MRH forums started by James Six, a well-known modeller from the Midwest. The conversation – centered on one-town layouts – quickly raised fundamental questions about our relation with our hobby and why we do it. James is an accomplished modeller by most standards and built layouts and scrupulously detailed cars for years until he hit a wall and started to put in perspective what he was doing, trying to understand the “why” behind it all. The discussion could have been about sharing success recipes (which incidentally would be too handy to exist), but it became evident that as modellers, we too often prefer to discuss “how to” instead of asking why.

Interestingly enough, fellow modeller Mike Cougill just released a new blog entry about similar subjects. It is well worth a read since and it sums up quite well the topics explored my discussion with James Six in a more readable format.

At the end of the day, isn't it strange that most of us never take the time to ask ourselves what matters for us in this hobby? Blinded by our genuine passion - often fueled by happy-go-lucky consumerism - we often completely forgot what we actually like about trains and the mythos around them... 


Sunday, January 28, 2018

Henri-Bourassa Overpass - Part 2

Work resumed on Henri-Bourassa overpass yesterday. Louis-Marie and I probably put another 4 hours in a row working on it and completing the structural members. Useless to say we are really pleased at how it is slowly taking shape.


Most people would think such details as small cross members are not required since they are invisible, but I think they matter. In fact, if you look at this picture, you'll see they are indeed visible and add a layr of realism to the scene. It is certainly not a waste of time replicating them as they should be.


The model will now be ready for primer, paint and weathering. Asphalt roads, streetlights, railings and drain pipes will be added later to minimize risk to knock these details off during handling.


Jérôme also pointed out we will have to add some lighting to the scene. The overpass cast a shadow on the backdrop that isn't very realistic. The entire city of Quebec is in the dark while the sun shines. We made a little mock and here are the results.

Before:


After:


I think we have an answer! You can see how a well lighted backdrop helps to create an impression of depth. It seems the city is about a mile away, just like it should be. We also found out it takes our attention away from the staging entrance.

Friday, January 26, 2018

Modelling 122th Street - Part 2

Work on 122th Street is progressing well. After drawing the lots on a sheet of fiberboard, I found out I could represent 7 properties out of 10 that are located along the mainline. Not bad when you take in account I use no compression to recreate this scene.


The first structure I built was a small garage that was recently torn down and replaced by a larger structure. While I don't intend to agonize over prototype with this project, I still want my models to set the mood. Here's the real structure.


And here's the model made of styrene. I still have to decide if I'll add the gutters and downspouts.


The next structure is another garage, this time larger.


Once again, there are some variations in details, but overall the building is quite a decent approximation of the real thing.


As you can see, I put substantial effort in modelling correct fascia, soffite and clapboard corner trims. These details are often overlooked by most modellers even if they take very little time and material to implement. Why I bother with them is because they improve realism by looking like the real thing. That may seem obvious, but such details makes models look larger and more delicate. The key being to use material with correct cross section. If done with thicker material, they are bound to look out of place and clunky.

Monday, January 22, 2018

Maizerets Pump House - Part 1


Among the many structures I have to scratchbuild for the layout, the most non descript one is a small 14 ft x 20 ft concrete block pump house located by Henri-Bourassa Boulevard overpass. Far to be interesting, this building nevertheless tells us a story about the industrial nature of the area. In my case, this diminutive building reminds me of deep industrial sounds typical of the area and locomotives idling in Limoilou yard.


Putting together this structure was a matter of a few hours and painting too. Not that I rushed the project, but it was simply easy to do. But beware, this time, instead of painting with straight from the bottle colors, I toned down every color I used by adding roof brown, white or black. It was the best way to get a faded effect without having to resort to overkill weathering.


A few dabs of PanPastel helped to add dirt along the footing and bring some depth to this gray-painted structure. Then, I airbrushed a light coat of Dullcote to fix and seal the pigments. The next step will be to add a few signs on the door and a red-colored cabinet on the right wall according to prototype.

Sunday, January 21, 2018

Modelling 122th Street - Part 1

An entire city block to be modelled here.

Among the many tasks to complete in Villeneuve is a small residential area located by the cement plant made of a few streets, mainly 122th Street. This area is relatively large and densely built, mainly two storey apartment buildings and no commercial kits are available that could reasonably replicate the real thing. For this reason, I'll have to scratchbuilt everything in styrene. While I'm not trying to create a perfect copy, I'll try as much as I can to be close enough without going crazy.


As you can see, about 9 structures will have to be built. The yellow line shows the area I'll have to build to fit the layout. To make thing easiers, I've decided to build this area on a separate plank on my benchwork. This way, it will be easier to design, build and apply scenery. When done, the plank will be permanently attached to the layout.


Most structures are extremely mundane, being clapboard cubes with porchs and verandas built in the 1930s and 1940s. But it doesn't deter me taking the subject matter seriously. While I would loathe such buildings in real life, I believe replicating them in a prototypical manner is the only way to truly capture how the area looks. The gritty working class borough is a nice addition to this part of the layout and I won't cut corners.


So far, I've bought all the supplies and started building structure #1 which is a small garage. My goal is to build the structures in order, place them on the plank then apply scenery. I have no idea how much time it will take, but this is a relatively relaxing job I'll do when I'm motivated. My main focus will remain on completing key structures like the overpass, D'Estimauville Avenue grade crossing and the automobile repair garage there. As for the cement plant, it will likely be the last piece since I'm still gathering data and drawing it.

Saturday, January 20, 2018

Henri-Bourassa Overpass - Continued


Work on Henri-Bourassa Boulevard overpass continued yesterday and I'm glad to announce the core structure in MDF is now completed. Styrene and wood bits will be added then a good coat of paint will turn it into concrete. It was quite a complicated project due to the weird angles, but I'm overall satisfied.

This is as close as you can be to the prototype

On the other hand, I will have to tore down a lot of scenery I did last year to set the overpass in place. Not that I bother as I can see a lot of improvement in my scenery techniques.


I also built a small concrete block pump house that is located a few feet away from the overpass. Using parts from old Life-Like kits, I put together something that is quite similar to the real thing. Very mundane, but it should help to bring some life in that part of the layout.


Finally, we got our 12 Rapido CN cylindrical hoppers. Once again, very beautiful cars that will bring the layout realism further. Crazy to think all that would have been impossible just a few years ago. Now, it's only a matter of a few months until we can run the CFQ SW1200RS and officially operate the layout in 1993.


Friday, January 19, 2018

Dominion Textile - Maybe a Project...

While my efforts are focussed this year on Maizerets and Villeneuve, I recently digged up brick building parts to see if I had enought stuff to build Dominion Textile, the large cotton mill that stood for a century at the feet of Montmorency Falls. Once again, it was another lesson about selective compression and how it can be so tricky.


The answer was almost yes, but I had to settle down o na 3D concept about how I would translate a 200ft x 800ft structure in less than 18" x 16".


My first idea, almost instinctive, was to mash together to section of the building together. Namely the southwestern portion with the high italianate staircase tower and the low profile warehouse. As you can expect, nice idea, but certainly not accurate and looking awkward.


Unsatisfied by the compromise, I thus decided to simply model the thing as it was, only compressing slightly some parts to better fit the space. As predicted, the result was much better in term of proportions. I must admit I really wanted the iconic staircase tower included in my model, but compressing stuff in a cartoony way rarely yields any good things.

Sunday, January 14, 2018

2018 - Back in Villeneuve... Again

The modelling season once again started after an impromptu hiatus during the Holidays. It's a little bit refreshing to put Erie projects aside for a while and work on something that's real. After two days of modelling, we have made substantial project.

Henri-Bourassa Overpass V-shaped pillars

The first one is Henri-Bourassa boulevard overpass near the staging area in Maizerets. I drafted a set of plans while on vacation and Louis-Marie is now cutting all the required parts. As much as this viaduc is quite simplistic, trying to capture the fell of the real thing requires a bit of creativity. But once again, Louis-Marie and his godly table saw and jigsaw amaze me beyond work. He managed to make these neat V-shaped pillars within less than a .25mm error margin. Quite impressive.

Dominion Textile kitbash is going to be a neat project

The second project is finally building the Dominion Textile plant as we should have done many years ago. We have acquired over the years an impressive quantity of useless brick structures and parts. The best candidates for kitbashing are Atlas Middlesex Manufacturing Co. kit and Walthers now-discontinued Modulars walls. We had to use a little bit of modeller licence to get the building look right, but we are now satisfied it captures the prototype nice late 19th century character. The italianate staircase tower is going to be a beautiful feature.

However, I'm in a pinch since Walthers modular walls are discontinued since a long time. I searched the web during two days with finding any remaining stock. So, I take a chance and ask fellow modellers if they have any unused remains at home. It can be complete kits or simply leftover parts. The required parts are: Walthers Cornerstone Modulars Large Walls w/Single Large Arched Window 933-3734 and Wall Columns & Caps 933-3725.


Finally, the third project was to complete grass application over Villeneuve tracks. Using pictures of the era and videos, I was able to determine quite precisely the extent of vegetation over tracks. Only the mainline was clean, the rest was slowly sinking into mud and grass. Just to give you an idea, the grass covered surface is about 16 square feet. However, it only took two hours to do that after I figured out a way to put the glue on efficiently.


At first, I used a brush to spread diluted glue over the area to cover. It took a lot of time yet the contours didn't look natural. Next, I tried with a pipette, which was again a foolish attempt has it delivered very little stuff at one time. Then, I saw the light, took my yogurt container full of diluted white glue and carefully poured it over the ballast and the track where I wanted it. Since the ballast isn't absolutely regular, the glue found its way in all the depressions, creating a natural contour. An unexpected by happy effect was the glue soaked the ballast between the tracks too.


I can now consider the grass in Villeneuve trackage done. when Alkem chain link fences will be installed, small bushes will be added to bring some more life in the scene.


Speaking of life, we also made a mock up of the residential area that still exists near the cement plant. Using Google Earth and old kits, we were able to define better the property lines. Quite frankly, we were surprised to see some houses to be built so close to the track, at the point that one house's deck looks like a passenger station pier.


Unfortunately for us, all these houses will have to be kitbashed since I couldn't locate any two-storey high flat topped wood apartment house. Simply put, these houses are simply boxes with windows and doors!

Wednesday, January 3, 2018

Modelling a Junction: An Updated Concept

For some reasons, I spent December 31th painting and building freight cars for Harlem Station while revisiting the interchange layout I was working on. Though these designs have probably no chance to see the light, I find the process amusing and I always learn something while doing so.

With this first concept, I ask myself what would become of this layout if it was located in a small 10’ x 12’ room and incorporated continuous run capabilities. Also, I thought it could be set in the steam era just for fun. Then came the idea to base the design on Erie, PRR and NYC. Mind you I didn’t bother with any prototype and used my common sense railroad knowledge. It was a matter of setting the flavor and having a good reason for double mainline and important junction. As a matter of fact, when I later checked up old Erie track diagrams and Morning Sun books, it became apparent I nailed what used to be a common sight on Erie (and any railroad in North America).
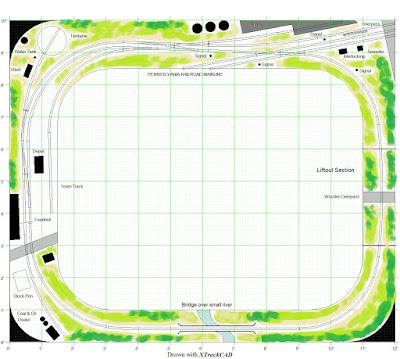
A small town in 10' x 12'

Basically, the layout represents a small town located at an interchange between a major double mainline (imagine Erie New York-Chicago trunk line) and a small feeder line that probably link some other railroad, probably PRR. I drew inspiration from areas in Pennsylvania, including the large bridge over Erie tracks in Corry and Erie’s nearby branchlines.

Now, imagine you start your session with an 8-car freight train pulled by a 2-8-0, it could even be a mixed freight if you want. The starting point is somewhere near the liftout bridges and you run “eastward” crossing the large arched steel bridge over a PRR main line. Once in town, you take your orders so you can pull and set cars on the interchange with the trunk line. Once done, you can start switching the various industries before calling it a day, reversing the loco on the turntable, fueling the tender and preparing yourself for the trip back to your originating point. Nothing complicated, but nothing boring either. The operation involves many different moves and can quickly get time consuming.

The layout itself is built around “vignettes”. It’s a figment of my imagination. However, it tries to incorporate stuff that would make sense back then in one single town. You basically have the “Junction”, the “Depot” and the “Countryside”.

Handling coal can be as simple as can be (credit: picture shared by Jim Six on MRH)

As for the industries, one large plant exists near the interchange where it is logical to find it. With its 5 different car spots, it requires planning to be served adequately. The other industries are a bunch of classic small town customers found in any rural district. While I put a few on the track plan, they could be anything else and organized in a different manner. This is the kind of stuff you adjust while building the layout. But generally, stuff like a feedmill, a grain elevator, an oil & coal dealer, a freight shed or a lumber yard would do the job. Using valuation maps or old photographs of a real place could help.

A generic 50s rural community annoted by Jim Hediger in Model Railroader (credit: Kalmbach)

Then we have the station’s team track. It could be an interchange with another branchline or connecting road… or just a track behind the station where you can handle all kind of freight. The “behind-the-station” team track used to be a common sight not so long ago and it always looks good on a layout. Once again, the modeler will have to decide for himself. As for me, I’m up to keeping things simple here. I consider one long team track would be quite enough. I imagine a few LCL boxcars there, maybe a small loading ramp and a few coal hoppers with a conveyor.

Water tank in Pine Valley Yard, Dillonvale, OH (credit: unknown)

The engine facilities are Spartan. The reason is simple; Erie was converting to diesel quite fast in the early 1950s. By 1952, only a handful of steam locomotives were on revenue service. Thus I consider the facilities have been demolished to a great extent few years ago, only keeping the weed-filled turntable, the steel water tank and water spout. One could add more structures like a tool shed, but I feel keeping things minimal will make them believable. Also, a smaller facility can be blended easily into the surrounding scenery while dealing with a roundhouse can be a slippery road.

In that regard, Don Hanley recently commented on MRH Forums about Jim Six's layout that:

"Small turntables like ones the photos you posted were not limited to end of the line. The Erie used these to turn the locomotive of the locals at the end of their run so they could head back to the appropriate yard. I suspect that in the time period you are modeling there would be recycled turntables scattered along the line of just about any railroad for the same purpose. I don't recall ever seeing this feature is modeled on layouts I have visited. and it's a shame. Turntables do not need to be limited to the terminal area only as most model railroaders seem to do."

Don's comment also listed a few recycled small turntables that were located near interlocking towers and junctions along the Erie mainline, in a same fashion as implemented on my layout. Once again, I certainly share Don's view that lone turntable in the wild are one of the most underrated element in model railroading.

Erie train over Wanaque River bridge (Credit: David Mainey, www.steamlocomotive.com)

From a scenic perspective, most areas would be surrounded by fields, woods and fences. I would keep things mundane as much as possible. However, the junction with the trunk line would be a good place to go forward with detailing and signaling (probably dummy but functional). Also, on the other wall, I added a long steel bridge over a marshy river. This kind of scene is generic yet always powerfully evocative. It could also be replaced by a low wood trestle, a stone culvert or a concrete underpass.

Keep grade crossings simple (credit: unknown)

You’ll notice I try to keep grade crossings at minimum. While they are interesting visually and during operation, when you have too much of them on a very small continuous loop, they quickly get tiring. Better build a great one that becomes a railfan spot than multiply mediocre ones. It’s the reason why I prefer to install a small wooden overpass on the liftout section to work as a scenic divider.

Salem Road Overpass (credit: Scott Steeves, www.historicbridges.com)

Finally, I designed the layout in such a way readily available items could be used. The reason is that most modellers don’t have time to do everything. As much as I love replicating prototypes as close as I can, we all face limitations. Since this layout isn’t based on nothing real, I think it could be built using commercial parts. Tracks are PECO code 83 so there is no need for ugly ground throw or motors. Curves are large and gentle to ensure smooth operation and realistic appearance, mainly about a 36” radius on average. Buildings are mainly picked among the Walthers Cornerstone series. While I generally get sick seeing these buildings everywhere, a few of them are so grounded in real life prototype they do the job neatly. My personal choice would be the Golden Valley depot, the interlocking tower and speeder shed kit (which provide grade crossing gates too), the small concrete coaling tower, various rural customers (oil dealer, grain elevator, stock pen, etc.) and their team track accessories kit. Walthers brick industries or DMP modular parts could be used to build the large plant. A brick chimney could be added. Oil tanks and road overpass could be built using Rix Products offerings while the large bridge could be Central Valley 200’ long arched bridge which would make a beautiful and challenging model to build. Other Central Valley, Microengineering or Walthers type of bridge could be used too. Add a Tichy steel water tower and a few non-working signals near the diamond and you can call it a day.

Bachmann 2-8-0 could be a starting point (credit: Donald W. Furler photo, David Mainey collection)


While I certainly suggest commercial components, the modeler should try to improve and customize them. Credible paint job, careful weathering, small details, slight modifications and kitbashing can improve many models. This is generally the level of work that most people find enjoyable and rewarding without taking a lifetime.
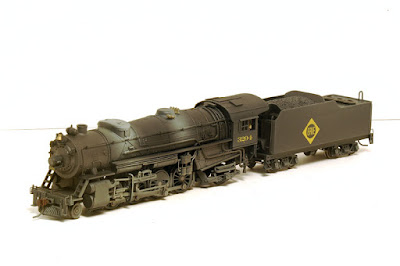
BLI HO Erie USRA Heavy 2-8-2 weathered by J. Rinker (credit: J. Rinker)

As you can see, this is not prototype modelling. However, it is grounded in prototype practices and even if it is a figment of my imagination, this setting was widespread, common and represent what used to be the ordinary railroading life until automobiles wrecked the balance of forces. It may not be a real place, but the final goal is the same: running realistic trains in a realistic setting. The reason why I propose such a design is because going full prototype isn’t for everyone. And at some point, we all want to see progress and results. Part of the fun is the process; part of the fun is enjoying the damn thing. With this design, I try to merge an enjoyable small switching layout with continuous running and iconic “American railroad” vistas. Something that can be built in over a realistic span of time, at a reasonable cost, be fun for a solo operator of a bunch of friends and provide modelling opportunities over the years.

Erie welded Dunmore Shops caboose (credit: JJL Model)

In term of operation and motive power, one could use 2-8-0, 2-8-2, 2-10-0 or even 0-8-0 (if replicating transfer runs). E-L Historical Society put together a very helpful roster of Erie steam locomotives that can help to narrow down suitable engines. Bachmann, BLI and Proto 2000 made good plastic models that could be improved and slightly bashed to better represents the prototype. Also, one could simply buy a prototypical brass engine and start from there. Since the locomotive budget won't be high, it could be a good idea. You will note these locomotives all have in common to be relatively small yet bulky enough to have that "big steam" look that we love so much. It makes them perfectly at home on a relatively small layout. As for the caboose, JLL Model's new owners retooled their original resin kits so they can be produced in plastic. Erie wood and welded Dunmore designs will then be available - they hope - by mid-2018. It is certainly welcomed, particularly since Erie was a very large railroad yet very few helpful models are available.


Another positive aspect of such a generic layout is that it can be easily set in another era or improved over time without having to trash everything. By the way, amateurs of big mainline could simply double track the mainline and keep everything else. As for motive power, what suits your need will do the job since this isn’t a particular division with specific restrictions. Using common sense and personal interests  should yield good results.

EDIT:

Some people expressed concerns about staging. I generally believe staging to be overrated while operating switching layouts. The reason is that there is very little interest in operating several trains on such a simple track arrangement before it looks like a cumbersome gimmick. Given the goal is to operate one train in one town, it is thus superfluous and a waste of time and resources.

That said, I updated the plan to see what could be done if one still wanted stating. I opted to not include more turnout on the layout, thus the staging area is located outside the room and take advantage of the junction, making it a real working wye, which makes it possible to remove the turntable. However, you will quickly find out using the wye would require to go outside the room. Worst, when the liftout section is in place, going to the staging area will be a real issue. Thus, I believe you will understand why I don't care about staging, particularly when "hidden". It's a good conceptual idea, but the most frustrating contraption on a layout. Keep things simple!