Recently, I had the occasion to discuss with a gentleman from Montmorency about locomotives running over Murray Bay Sub during the 60s-70s-80s.
The fleet was quite small as I once explained on this blog, after information from Mr. Denis Fortier where handled to me. Here you'll find a loose translation of Mr. Fortier's explanation:
"Locomotives used during the 1960s were GMD1, CN 1917 by example - with a built-in steam generator - for passenger trains; RSC-24, CN 1801 by exemple, with A1A-A1A trucks, coupled with a steam generator (see timetable, trains 171-178-179 and 522, photo 1).
Dunring the 70s-80s, RS18 (3100-3700-3800) were mainly sighted, often combined with GP9 (4400), often in group of 3, pulling about 50s freight cars... MR420 3500 (2500 whom fuel tank were shortened to reduce locomotive weight) became prominent... [...]
In 1969, to reduce cost from a ever unprofitable passenger service, CN decided to reduce trains to only railiners (BUDD) #CN 6205 and CN 6206. Even then, these"singing diesels" would make the run in about 2h45, often with only one passenger onboard according to some testimonies!
Passenger service ended in 1977 on Québec-La Malbaie line when VIA Rail was created and Palace Station was closed (see timetable, trains 678-679, photo 2)."
Even if the line saw limited traffic, most iconic canadian locomotives did run on the rails, even the RSC-24, an interest group of oddballs built especially for this line (they later saw use on New Brunswick light-rail lines.
From a modeller standpoint, many of them are nice models. But at the same time, from experience, I know having too much locomotives dilute the fun you can get from them. At some point, you develop a personnal link with an engine while operating. So much it end up being the layout "mascot", incarnating the crew that run the layout. I have very few locomotives that got that special treatment. I remember my CP P2K GP9, my CNR P2K 0-8-0, a cheap weathered Backmann RS3 with sound and a very few selected others.
For this, reason, I reduced my spectrum of locomotive to model, to save on cost, but also to develop a deeper attachment to what is going on on the layout.
So far, the actual fleet is made of 2 superdetailed Bachmann GP9, 3 kitbashed Atlas RS18 and a P1K RS18 (the one with the wrong dimensions!). I'm actually wondering if they are worth investing a few hundreds dollars installing sound in them...
The main thing is to focus on what is essential, normal and ordinary for this line. I must admit I'm not set on the layout era. 1977 with last passenger trains and RS18-GP9 lash up or 1985, with a pair of M420 and a short lived touristic train called Le Tortillard du Saint-Laurent, made up of a chop-nosed GP9 and a few GO Transit Bombardier Bilevel coaches.
For now, I think it is safer to model the 1977 era since I already have the rolling stock needed, except a facultative Budd car. 1985 could be achieved - without altering the layout - when suitable and affordable M420 model will be, I hope, available. Yes, I'm a believer, just like Montreal Canadiens fans' are foolish enough to think this ever loosing team can win back the Stanley Cup after a 20-year hiatus!
Saturday, May 31, 2014
The Bridge on the River Malbaie - Part 2
I determined ME bridge flextrack was unsuitable for my project. I need
to bash it and delrin isn't the best material to glue things on. Also, I
find the wood grain to be unrealistic and I wasn't very excited about
having 3 rail joins on a 24" long bridge. I had a few Central Valley
bridge ties and decided to use them. It will be also easier to install
Peco Code 83 rail on then and Code 75 rail guard. Also, CV ties width is
closer to the prototype than ME.
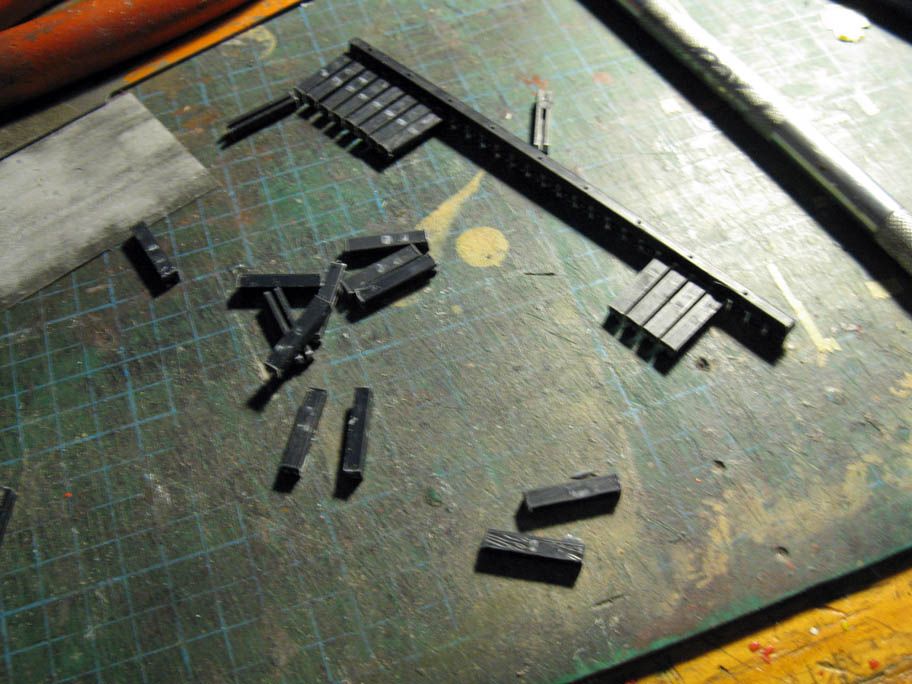
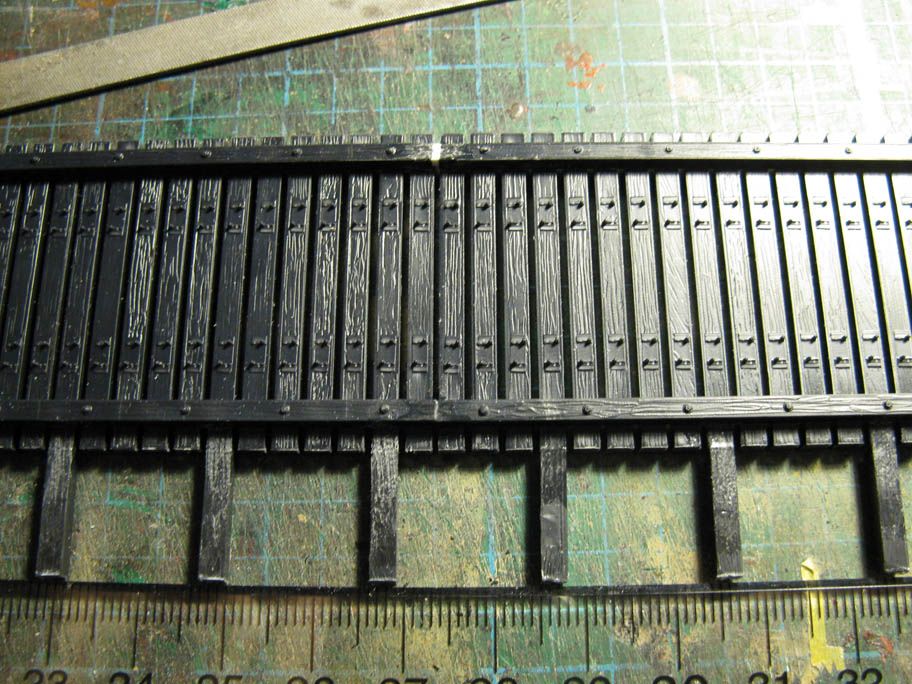 Clermont bridge have a wood plank walkway on a side. This walkway is
bolted on longer ties every 5 ties. I cut a few CV bridge ties in halves
and glued them on the bridge ties.
Clermont bridge have a wood plank walkway on a side. This walkway is
bolted on longer ties every 5 ties. I cut a few CV bridge ties in halves
and glued them on the bridge ties.
Then, I glued the bridge ties to the bridge itself. It should be noted the bridge previously received a coat of base color: Krylon Camouflage Brown. The bridge final color will be a heavily weathered coat of black. I'll try the salt weathering technic for this one. Hope it will turn out well.
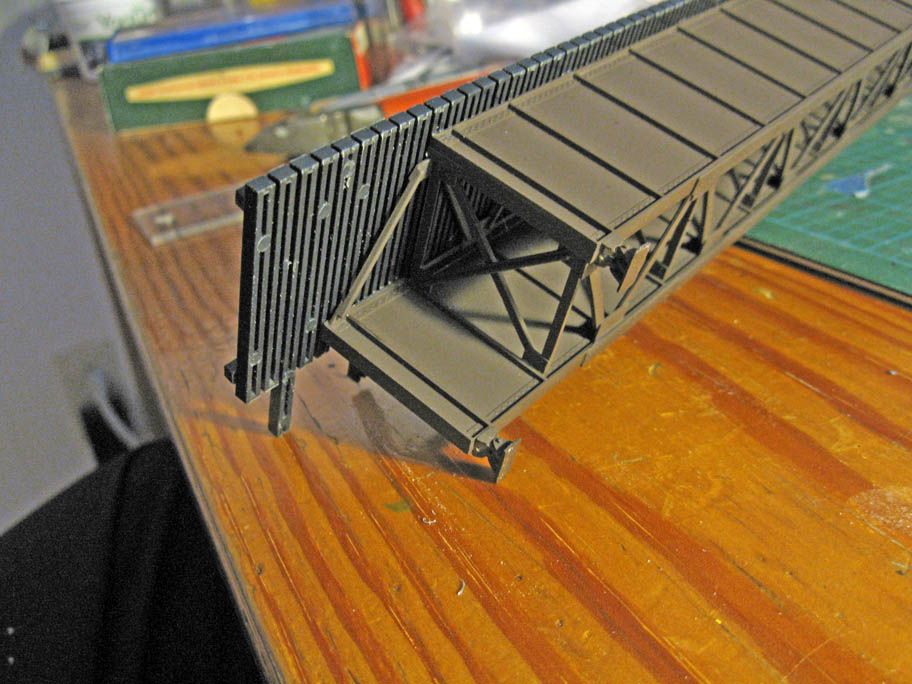
An interesting detail of this bridge is how the ties extend well over the concrete abutment. I don't now the exact reason for this detail, it is quite a rare sight, but I thought it would give some personality to this project.
Railing will be made out of styrene, Evergreen or Plastruct, but I need to buy some more at the LHS. I'm not sure if I will make the plank in wood. I prefer to use styrene because the glue bond will be far better.
Then, I glued the bridge ties to the bridge itself. It should be noted the bridge previously received a coat of base color: Krylon Camouflage Brown. The bridge final color will be a heavily weathered coat of black. I'll try the salt weathering technic for this one. Hope it will turn out well.
An interesting detail of this bridge is how the ties extend well over the concrete abutment. I don't now the exact reason for this detail, it is quite a rare sight, but I thought it would give some personality to this project.
Railing will be made out of styrene, Evergreen or Plastruct, but I need to buy some more at the LHS. I'm not sure if I will make the plank in wood. I prefer to use styrene because the glue bond will be far better.
Tuesday, May 27, 2014
The Bridge on the River Malbaie - Part 1
Nothing fancy here. I need a deck bridge over Malbaie River on the club layout.
I've been wanting to model this bridge since I saw it as a teenager in the late 90s. The prototype is located over Malbaie River, in Clermont, and is an essential link to get access to the paper mill since 1909.
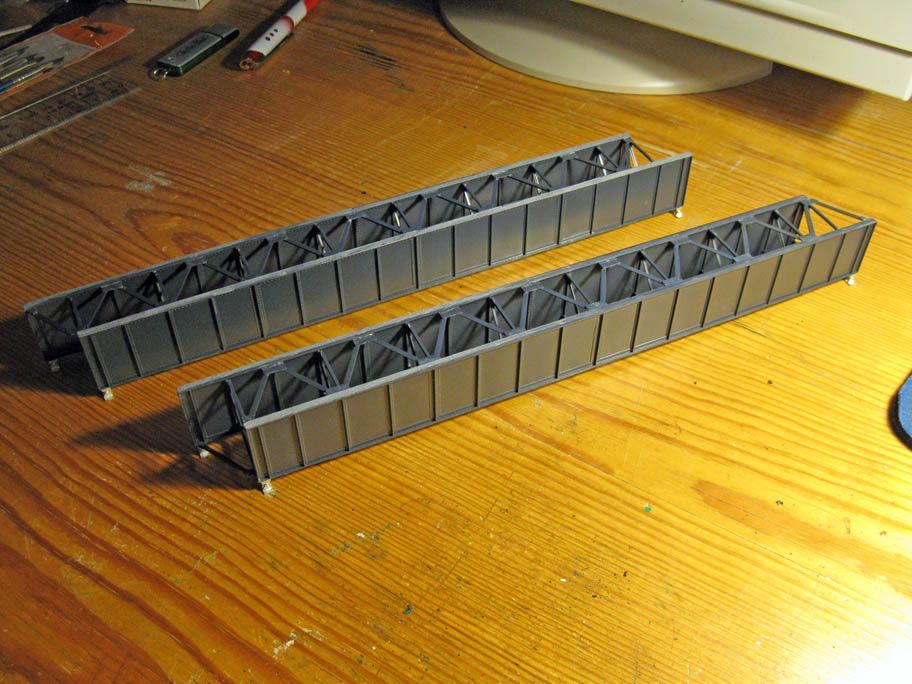
I recently ordered a pair of 85' bridge from Micro Engineering, thinking I would simply build it per instruction. However, a recent visit at Clermont shown me the bridge is a skewed one and slightly longer Thus, I decided to tackle the challenge of modifying the original kit, add a walkway along the bridge (as per prototype) and scratchbuilt concrete piers from MDF.
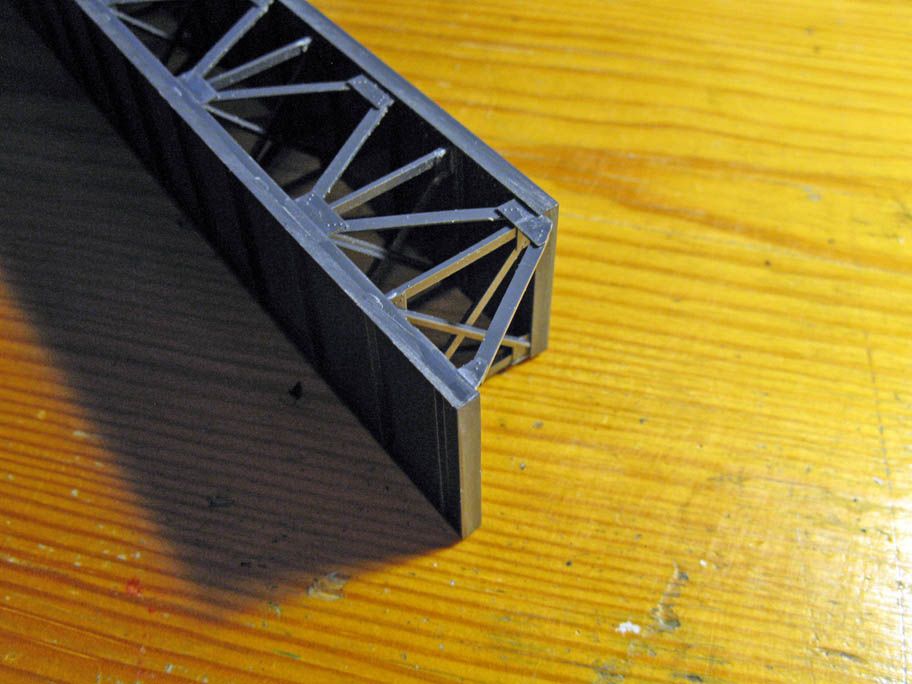
So far, modifying the bridge was an easy affair. No need to hack and saw the parts, I just glued them together differently to get a nice angle look. The bridge will be painted black... heavily weathered black with peeling paint effect if I can manage it. I'm not very fond of ME bridge track. Honestly, I don't understand why they make it in such short lenght, except to safe package.I already can see a challenge there.
I've been wanting to model this bridge since I saw it as a teenager in the late 90s. The prototype is located over Malbaie River, in Clermont, and is an essential link to get access to the paper mill since 1909.
I recently ordered a pair of 85' bridge from Micro Engineering, thinking I would simply build it per instruction. However, a recent visit at Clermont shown me the bridge is a skewed one and slightly longer Thus, I decided to tackle the challenge of modifying the original kit, add a walkway along the bridge (as per prototype) and scratchbuilt concrete piers from MDF.
So far, modifying the bridge was an easy affair. No need to hack and saw the parts, I just glued them together differently to get a nice angle look. The bridge will be painted black... heavily weathered black with peeling paint effect if I can manage it. I'm not very fond of ME bridge track. Honestly, I don't understand why they make it in such short lenght, except to safe package.I already can see a challenge there.
Sunday, May 25, 2014
Railfanning and layout
At some point, it is a necessity to visit the place you want to model. Some of us have the eye to interpolate information from pictures, but there's a limit to that. Mike Cawley from Australia is one of them and I guess his experience of observing real-life subjects and painting them helped him to develop this particular skill. But most of us need to see things in 3D to really understand colors, relation between elements and have a sense of space.
Last week, before leaves and flowers blossomed, I went with Louis-Marie up to Clermont to watch the mill. Charlevoix area is probably among the most scenic areas in Eastern Canada, no wonder it was a resort of choice for wealthy Americans a century ago.
One must know there haven't been any freight movement on Murray Bay Sub since 2009, when Le Massif de Charlevoix (LMCX) bought the line. There was talks of an agreement between Le Massif and CN to handle freight but nothing materialized. Thus, the track from La Malbaie to Clermont - the "industrial" part of it - is almost abandoned.
That said, it was a good occasion to better understand the local topography, how track is built and get a general idea of vegetation and soils.
It was also a nice opportunity to understand the paper mill and railway operations. In fact, the line was built in 1909 to serve this particular mill which is located at the end of the steel. Google Earth aerial pictures weren't that precise about the place and it was hard to understand how they handled chemicals.
The mill received many commodities by rail, including chemicals, kaolin slurry, peroxyde, woodchips and sent boxcars full of paper products, often to New York City-based newspapers.
I took plenty of pictures from the other side of the river and photomerged them to make a backdrop. I don't know if I'll used it in the end, but it will definitely be useful to make different buildings à la Mindheim.
Going to Clermont was also a good occasion to see how roads and tracks interacted together there. An interesting set of slopes merge at a crossing near the mill. This scene will definitely find its way on the layout, including the nice stone wall and this will help to blend the scenic divider on the peninsula better with adjacent trackage.
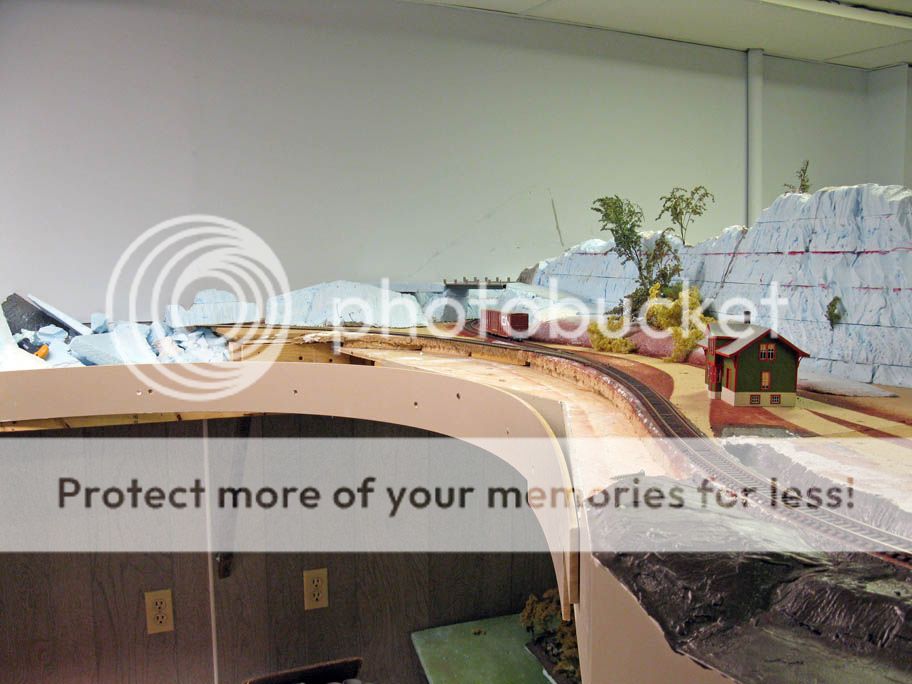
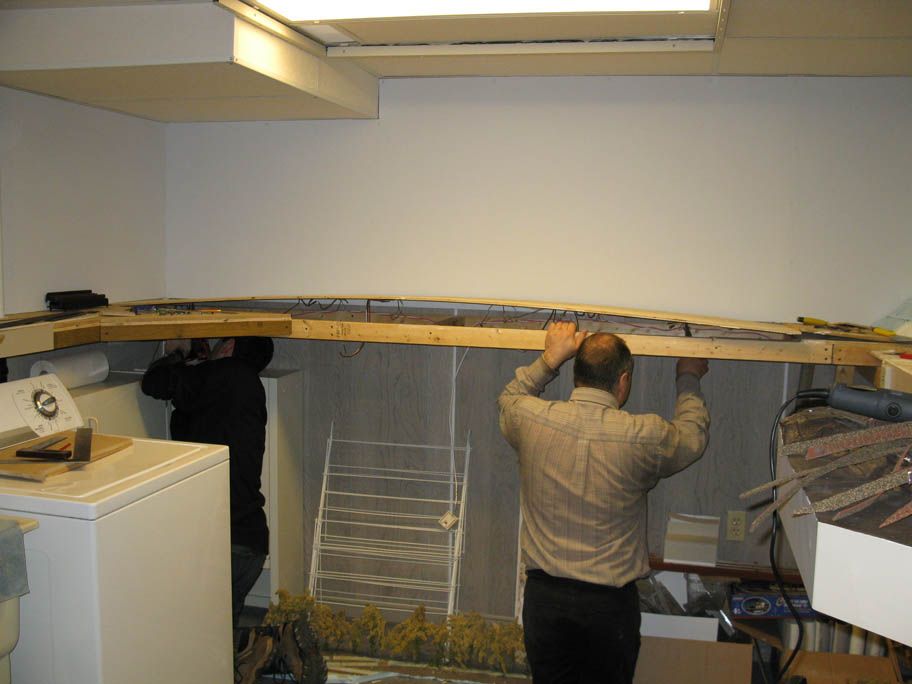
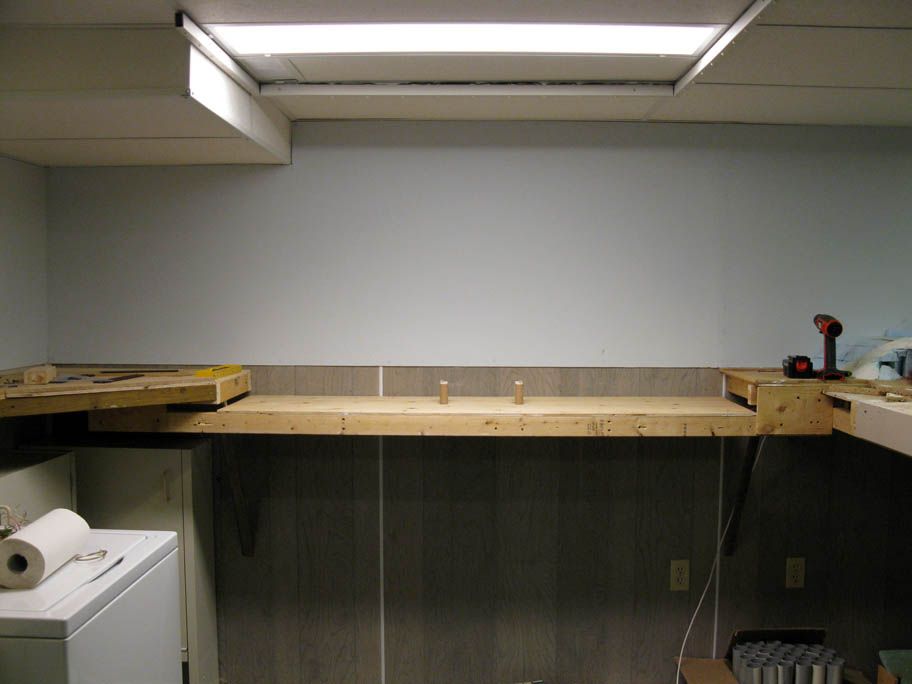
Back to Quebec City, we reworked the layout according to our new finds. The overpass in the background will close the scenery between Montmorency and Clermont. The stone wall will be located along the track between the station and the overpass. I'm not sure if the station will be kept.
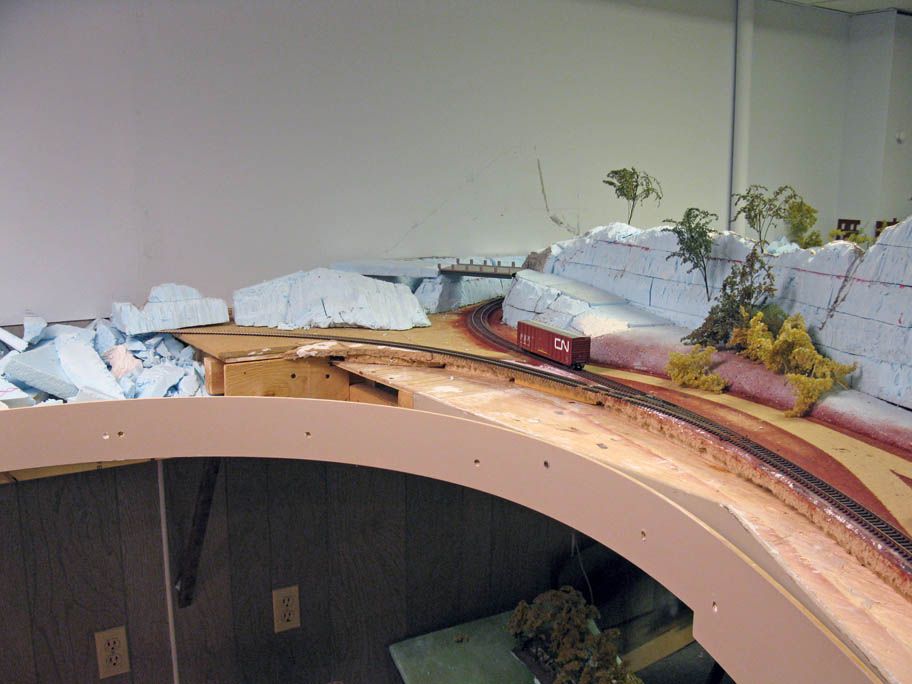
The fascia will also be redone. The old one was straight, but this time, we will curve it to get more space between the track and... a better overall look. I'm actually wondering if I should paint the new fascia dark green or keep the sand tone. We will do some test.
Last week, before leaves and flowers blossomed, I went with Louis-Marie up to Clermont to watch the mill. Charlevoix area is probably among the most scenic areas in Eastern Canada, no wonder it was a resort of choice for wealthy Americans a century ago.
One must know there haven't been any freight movement on Murray Bay Sub since 2009, when Le Massif de Charlevoix (LMCX) bought the line. There was talks of an agreement between Le Massif and CN to handle freight but nothing materialized. Thus, the track from La Malbaie to Clermont - the "industrial" part of it - is almost abandoned.
That said, it was a good occasion to better understand the local topography, how track is built and get a general idea of vegetation and soils.
 |
| Clermont Paper Mill seen from the river. |
| The electric powerhouse and woodchip unloader. |
I took plenty of pictures from the other side of the river and photomerged them to make a backdrop. I don't know if I'll used it in the end, but it will definitely be useful to make different buildings à la Mindheim.
Going to Clermont was also a good occasion to see how roads and tracks interacted together there. An interesting set of slopes merge at a crossing near the mill. This scene will definitely find its way on the layout, including the nice stone wall and this will help to blend the scenic divider on the peninsula better with adjacent trackage.
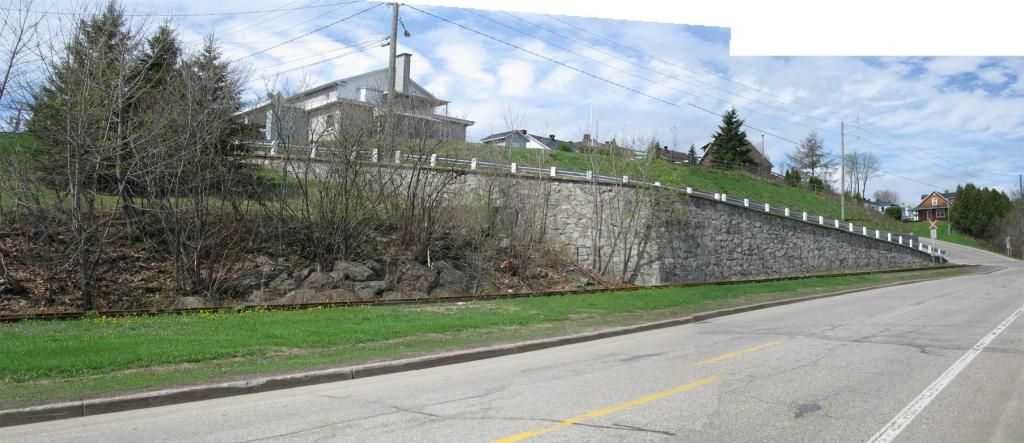 |
| This stone wall gives a lot of character to this typical scene. |
Back to Quebec City, we reworked the layout according to our new finds. The overpass in the background will close the scenery between Montmorency and Clermont. The stone wall will be located along the track between the station and the overpass. I'm not sure if the station will be kept.

The fascia will also be redone. The old one was straight, but this time, we will curve it to get more space between the track and... a better overall look. I'm actually wondering if I should paint the new fascia dark green or keep the sand tone. We will do some test.

Saturday, May 17, 2014
Changing The Old Ways
Some times, old habits die hard... particularly if they are "bad".
Back in 2005, I had my first airbrushing crash course with Albert Mees at MCW Willebroek - a Belgian modelling club located in Flanders, Belgium. BTW, they were a great bunch of fellow to visit on Friday night when I was an exchange student in Mons. That was always a good excuse to make a long train ride to visit them.
Anyway, that evening, I was really impressed at how great results one's could get otu of an airbrush. Later, when I came back to Canada, a friend's friend's of mine offered to sell me his old badger airbrush. From the start, I always suspected all the nozzles were damaged by careless handling and cleaning. Even when thinning paint, the airbrush would clog in no time. I remember wasting countless hours trying to clean up the thing... without better results. I quickly ended up hating airbrushing and decided to develop my brush skills instead and rely to ratlle can for generic colors (black, brown, etc.). Masking was done with good old painter's masking tape. From time to time, I would use the airbrush, but just for weathering purposes and using very light washes that didn't clog the nozzle.
That was fine for a decade and in fact, while doing resin garage kits, I got extremely impressive results out of my brushes.
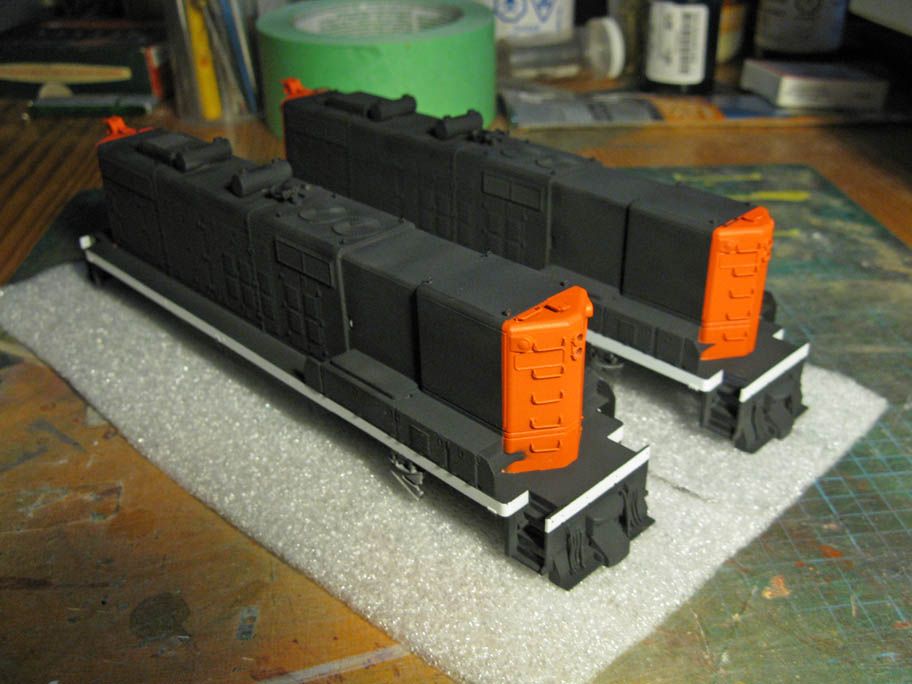
But early this year, I wanted to paint a very large garage kit, the kind you can't do without an airbrush. I tried all I could, but the old Badger was too damaged to do anything good. Thus, I decided it was time to invest in good tools. I got myself a gravity-fed Iwata and a new compressor and invested a few bucks in Tamiya paints, thinner and masking tape. That was in January. Unfortunately, I didn't had a chance to use it until this week end.
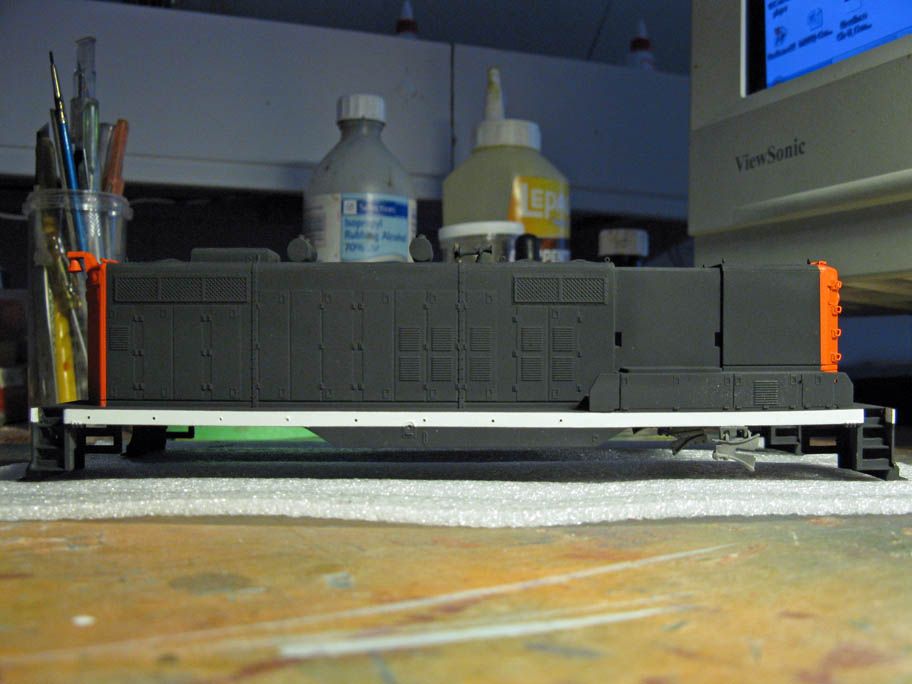
Oh Boy! Let's talk about good results, easy painting and easy cleaning. I'm very satisfied with the results; probably one of my best investment in years. Not that everything went perfect. I made the mistake to use True Line Paint straight out of the bottle and got a grainy finish on my locomotives nose, but that is OK for this time.
I think I'll find painting locomotives much more fun than before. Honestly, I feel I wasted a lot of time keep old ineffective habits. It doesn't mean I'll quit my brushes and rattle cans, but I'll use them when they are the most effective!
Back in 2005, I had my first airbrushing crash course with Albert Mees at MCW Willebroek - a Belgian modelling club located in Flanders, Belgium. BTW, they were a great bunch of fellow to visit on Friday night when I was an exchange student in Mons. That was always a good excuse to make a long train ride to visit them.
Anyway, that evening, I was really impressed at how great results one's could get otu of an airbrush. Later, when I came back to Canada, a friend's friend's of mine offered to sell me his old badger airbrush. From the start, I always suspected all the nozzles were damaged by careless handling and cleaning. Even when thinning paint, the airbrush would clog in no time. I remember wasting countless hours trying to clean up the thing... without better results. I quickly ended up hating airbrushing and decided to develop my brush skills instead and rely to ratlle can for generic colors (black, brown, etc.). Masking was done with good old painter's masking tape. From time to time, I would use the airbrush, but just for weathering purposes and using very light washes that didn't clog the nozzle.
That was fine for a decade and in fact, while doing resin garage kits, I got extremely impressive results out of my brushes.
But early this year, I wanted to paint a very large garage kit, the kind you can't do without an airbrush. I tried all I could, but the old Badger was too damaged to do anything good. Thus, I decided it was time to invest in good tools. I got myself a gravity-fed Iwata and a new compressor and invested a few bucks in Tamiya paints, thinner and masking tape. That was in January. Unfortunately, I didn't had a chance to use it until this week end.
Oh Boy! Let's talk about good results, easy painting and easy cleaning. I'm very satisfied with the results; probably one of my best investment in years. Not that everything went perfect. I made the mistake to use True Line Paint straight out of the bottle and got a grainy finish on my locomotives nose, but that is OK for this time.
I think I'll find painting locomotives much more fun than before. Honestly, I feel I wasted a lot of time keep old ineffective habits. It doesn't mean I'll quit my brushes and rattle cans, but I'll use them when they are the most effective!
Saturday, May 10, 2014
Malbaie River - Part 1
Yesterday, we dismantled the remaining portion of Bunge grain elevator and carfloat area. All remnants of port operation are now definitely gone. It was quite ironic to see that as soon the elevator was built, it was tore down.
This will now be the new paper mill area. The locale will be a mashup of Beaupré and Clermont paper mills on Murray Bay sub. Both were built beyond a large river. The mill, which is on a long narrow shelf will be protofreelanced according to Clermont's Donohue mill while the bridge will be closer in look to Beaupré's one.
Where the port yard was standing will be located the river. For this purpose, the layout deck was lowered about 4" to have enough space to model the river properly.
Clermont's Donohue paper mill will be located left to the bridge while a junction - Wieland - with the mainline will be at right.
 |
| Dismantling the former Bassin Louise yard |
This will now be the new paper mill area. The locale will be a mashup of Beaupré and Clermont paper mills on Murray Bay sub. Both were built beyond a large river. The mill, which is on a long narrow shelf will be protofreelanced according to Clermont's Donohue mill while the bridge will be closer in look to Beaupré's one.
 |
| Malbaie's riverbed in place |
Where the port yard was standing will be located the river. For this purpose, the layout deck was lowered about 4" to have enough space to model the river properly.
Clermont's Donohue paper mill will be located left to the bridge while a junction - Wieland - with the mainline will be at right.
Saturday, May 3, 2014
The Branchline Adventure is Starting
Sorry, no picture this week. We've been busy, over the last week, deciding the fate of the new layout and its theme. There was huge support to rebuild something based on our original intentions: Quebec City Harbour. However, lack of place, or to be precise, the room geometry, wasn't very forgiving. Many propositions were made, but most were disappointing. One can wonder how we were able, 7 years ago to do this feat on three 3' x 8' plywood sheets. The secret was Atlas SnapSwithes in a maze-like spaghetti-bowl.
After these failed trials, it became clearly apparent to us building a layout inspired by a smaller branchline would be easier to model and maybe more satisfying. Thus, the Murray Bay subdivision track plan designed over the last month was brought back to life.
See you next week!
Matt
After these failed trials, it became clearly apparent to us building a layout inspired by a smaller branchline would be easier to model and maybe more satisfying. Thus, the Murray Bay subdivision track plan designed over the last month was brought back to life.
See you next week!
Matt
Subscribe to:
Posts (Atom)