Saturday, December 31, 2016

2016 Wrap Up

Today, I took some time to look back at the blog and see what was achieved during the last twelve months in model railroading. While 2016 was a weird and disruptive year in other aspect of our lives, I must confess that from a model railroading standpoint, I really felt I raised the bar. As a railway modeller, I no longer fear to experiment or tackle complex projects, I also learned to lower my expectations on some aspect of the hobby to ensure I can get results. This was a huge set back for me during so many years and now I can truly find some freedom. Better moving forward than sitting in the armchair and fearing failure.

Here I'll be reviewing what was accomplished over the course of 2016:

Clermont


Among the biggest results of this year was how I finally found an answer how to use the peninsula. Leaving the prototype aside and working with the actual benchwork made things far easier while staying true with the sense of the place.

This is the first time I was able to model a scene following my principle of less is more and it paid off. In a matter of a few weeks I was able to build 3 realistic structures (a house, a feedmill and a dilapidated shed), which prooves it's better to keep things simple and strike for quality.

The track plan was also simplified as much as I could without impairing the operation potential. Jérôme worked out many operating sessions and no problem related to diminutive trackage ever materialized.
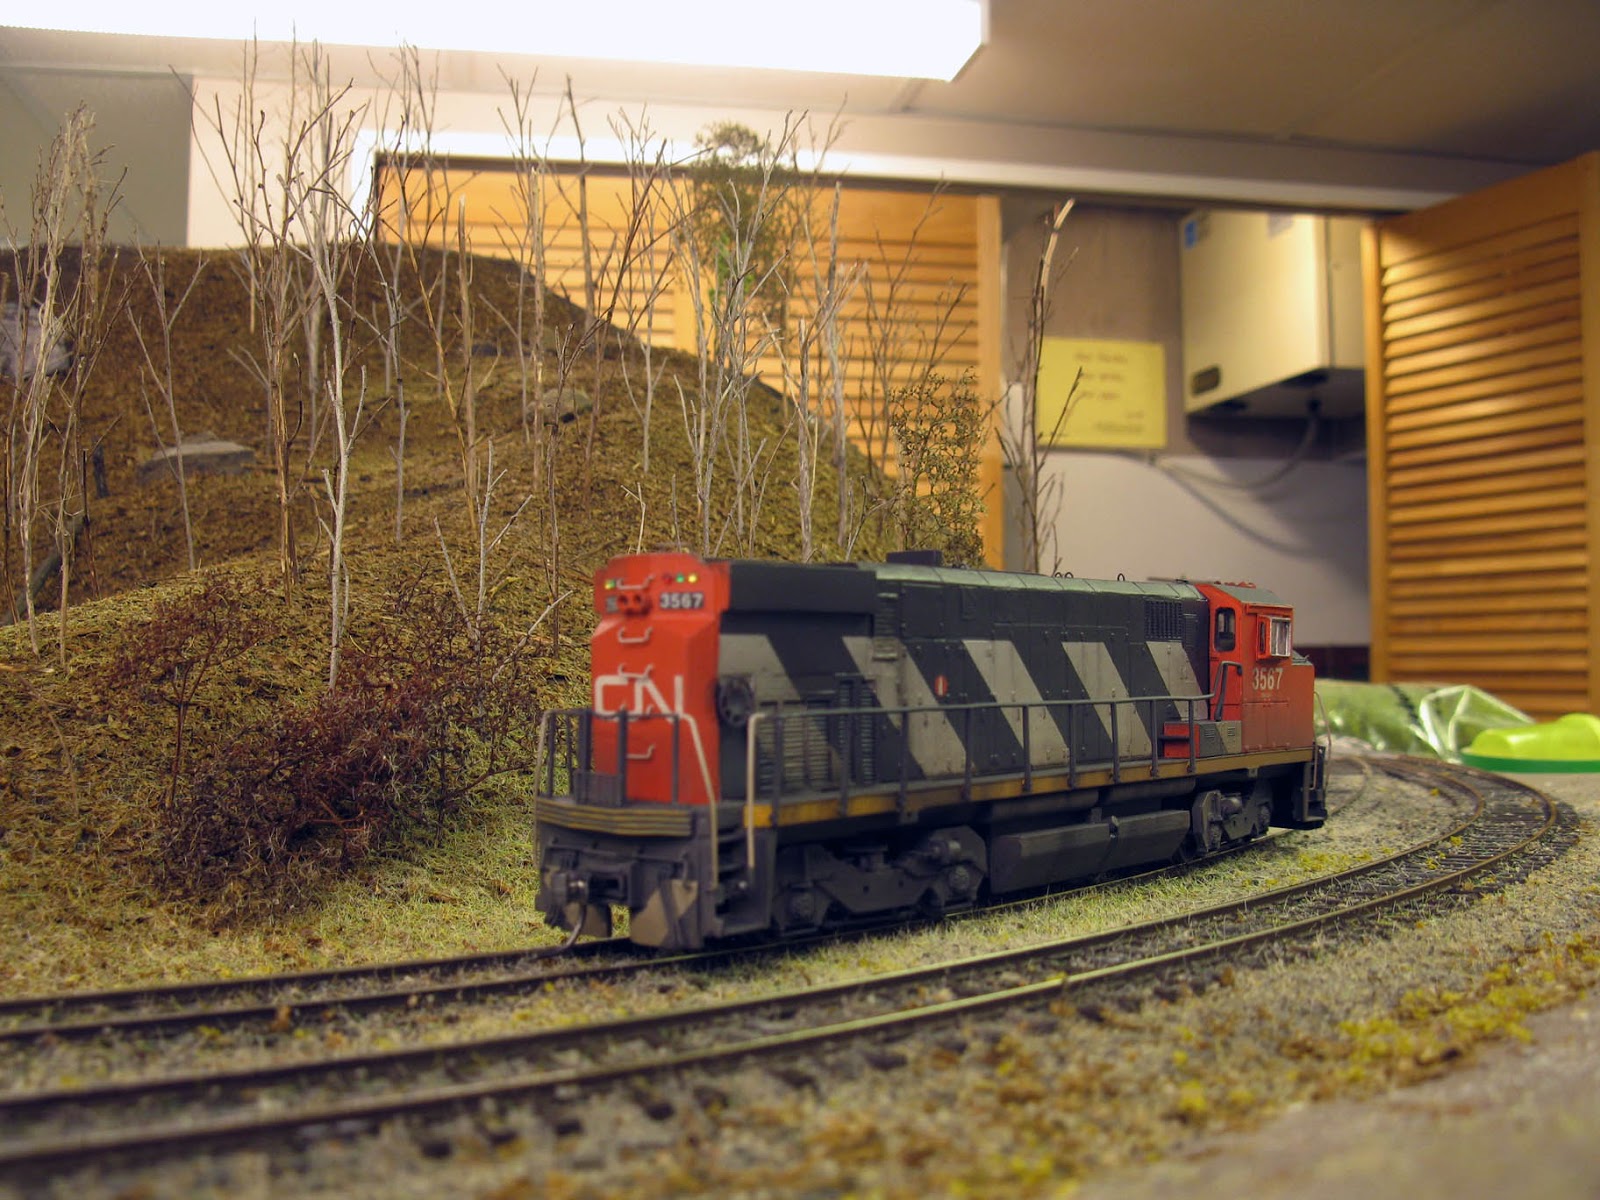
Scenery


It was also the occasion to finally experiment true scenery. I kind of found my own style of doing scenery. It's very personnal and intuitive, partially inspired by Mike Confalone and my observation of nature over the last few years. I'm happy it received a positive welcome among fellow Canadian modellers.

D'Estimauville was the test bed and Clermont the large scale application of my new technics. I certainly see a lot of room for improvement and can't wait to do it. But before moving forward, I have to finalized once for all the printed photo backdrops which plays a huge part in setting the mood. I certainly took the hardest way when I decided to set the layout in early spring when leaves start to appear. Getting the color right isn't always fun, but at least the results are attractive.

I must also add we built our own static grass applicator, which is truly a good tool to have when you want to seriously do scenery work.


MLW M420 & other locomotives


I would have never thought this 15 year old project would finally see it's end. It sure took a lot of time, but I think it was OK because I didn't had the skills to make it good before. It was also one of these projects when you learn again and again that a model you put your soul into it is much more fun to operate than the nicest RTR model. Not that I hate RTR, far from it, but I prefer when my models have a little personal touch. It may be detailing, bashing or simply a good weathering.

I also started to work on 4 other MLW RS-18 to expand the fleet and permit us to operate in other decades. Sourcing part is also in progress for building a fleet of RSC-24. This will be my biggest locomotive challenge ever and it is only possible because other modellers like Chris Mears and Taylor Main did a wonderful job providing parts to make this possible.

Kitbashing rolling stock


A lot was accomplished this year. Many for another project (Erie Harlem Station). A lot of woodchip cars were put in service and I even completed a 3D model for a correct CN Transcona woodchip gondola. I do hope this model will find it's way in kit form so Canadian modellers can finally have a decent woodchip car available. A special thanks goes to Justin Babcock for provinding first hand information about these cars.


Electronics


We started a lot of projects this year, but most aren't completed. Among them is working grade crossing signals. Louis-Marie made a special program which is ready to be put in action as soon as we build the signals. He had to work with extremely complex track arrangements to make it possible and realistic.

Louis-Marie also created a system for ambiant sounds. It's not complete yet, but so far it's promising. I hope we will be able to put it in service in 2017.

Also, a weighing station was added at Ciment St-Laurent which now provide more operation interest at the large plant.


Social media & the community


I generally focussed my energies on this blog and some old forum. I'm not the kind of guy seeking the crowd and I was happy with that. However, it quickly became apparent this year I couldn't even connect with other modellers and railfans living next door. It was quite awkward and I finally decided to interact a little bit more.

Some of you probably know I started to use Facebook groups to show our work. Though I still have that website for it's lack of archives and "m'as-tu vu" show off attitude, the advantages do exist for model railroaders. The most positive aspect is there is so many people there that when you talk about something or have a problem, it is almost certain someone has an answer. In that regard, I was pleased to be in contact with well-respected modellers with ease.

2016 also marked the first time I attended a model railroad show. It may sounds weird a guy involved in this hobby since his childhood never attended this kind of event, but yes, it's possible. It was nice to meet other modellers and their work in real. Trevor Marshall and the S Scale Workshop group made a  huge impression on me.


Thinking Out Loud series


This was the most imprevisible thing that happen this year. Born of necessity and boredom because the layout room was off limit for months because of home improvement work, that series helped me to crystalize my philosophy in model railroading. It's was a collection of impressions, of experiences learned the hard way and of observing others' work and philosophy.

Writing these articles made me realized what was essentiel in model railroading for me and many others that don't find solace in mindless collecting. While this series was motivated by a search of the perfect prototype for a specific space, it quickly went beyond that to the point I now have a very clear idea of what makes sense to me when I see a layout or want to create one. I still have many projects in my head about how I'd like to handle a future minimalistic layout. I tested a few ideas on Hedley-Junction, but that project is limited by outdated parameters fixed many years ago when we had very little idea of what we wanted to achieve.

Thinking Out Loud was also an excellent occasion to discuss ideas with other modellers working on very different projects but sharing common principles. I'd like to sincerely thank Simon Dunkley for his incredible insight. His generosity in sharing his own ideas and thoughts was and is still highly appreciated. I'm really happy to see that things we discussed and that I implement in Clermont this year are now the proof we weren't just discussing philosophical bullshit! Rick de Candido was also a driving force behind the series and analyzing his very personal take on model railroading really shown how thoughtful he has been and how appearance can be truly deceptive when you judge a layout by it's size! Finally, Trevor Marshall also provided very interesting ideas during our discussion at Exporail last summer. Many things we talked are still fresh in my mind and I do hope, someday, to put them in action.

When your hobby is fun...

Maybe the biggest discovery in 2016 was that model railroading was extremely fun. Every week, the three of us were eager to work on the layout. We had new challenges and seeing the scenery finally revealing the extent of what we could do made us proud of our achievements. We no longer were ashamed of our Plywood Central when visitors came to see the layout. It also seems our group now share a  common philosophy about what makes interesting model railroading. It was not the case one or two years ago. The goals are now clear and we agree on many points now. It helps make our efforts pay off. This wasn't achieved by trcikery, cheap compromise or force, but rather by experimenting the real thing first hand. Prooving that less trackage made for a more interesting layout could only happen by removing the track and setting trains. It could have backfired, but so far, everybody that operated the layout found the experience positive and nowadays, all people saying removing turnouts was a  real bad idea are now convinced we were right. In fact, during a recent discussion with another railfan this week, he expressed how he was tired of operating on large layouts full of tracks but lacking true purpose. I've heard that from many other young miniature trains enthusiasts recently and it seems a shift in paradigm is slowly but certainly occurring. What is weird is the fact people that loves big time operation are now advocating it! And I must stress they aren't layout builders, but simply operators... I find it extremely interesting and encouraging!


And 2017?

I won't list what I'd like to do... I sincerely don't care anymore at which pace the layout will progress. What I wish, and I know Louis-Marie and Jérôme think the same, is that we will continue to have fun in this hobby. In our crazy lives, this hobby is often the rare occasion to make things by ourselves, improve our skills and express ourselves by creating something meaningful with our hands. Meanwhile, I do hope documenting our endeavour was a pleasant experience to follow. Be sure all your comments are taken in account and always a push toward excellence for us.

In the name of Hedley-Junction crew, I wish you to find the same happiness in pursuing your long life passion for trains. This hobby never ceases to fascinate me and never gets old. May your passion keep yourself in high spirit for another year!

Friday, December 30, 2016

MLW RS18 Madness - Part 10

Today was THE day that could make this project abort or continue. My first cab silicone mold failed beause I used the wrong mix ratio. Eyeballing quantities wasn't the greatest idea of all time. Thus, 3 days ago, I made a second mold using what was left. If it failed, buying more silicone would have been extremely costly. For a while, I had serious doubts because the silicone didn't cure on top of the mold and stayed tacky. I decided to let it cure for another day and while it was still tacky, it seemed to me the mold was probably cured. To make a long story short, the mold was almost perfect!


As you can see, I decided to make a one part mold. Generally, for a cab, you prefer a two parts mold. However, I say very little advantage in going that way. First, Atlas RS11 shell doesn't let you see through the cab and second, I have not enough experience with molding to take a risk and make mistake.


However, to save on resin and be able to install the cab over the drive, I decided to build a sacrificial styrene box that would make an empty space inside the cab. While the technic is quite crude, it did work. The styrene "cube" is designed in such a way you can remove the ends and bottom but keep the sides embedded into resin. Since it's easier to glue styrene to the plastic hoods, it will make assembly far lot easier and sturdier.


I'm quite satisfied very little air bubble occured on the cab. The ones that did apepar were filled with Magic Sculpt putty.


I also started to detail the other Atlas shells. Since I now have all the parts required, I suspect it should take one day to make them ready for painting. The Mehano shell will require more attention, but shouldn't take that much time. I really would like to complete all these models by the end of the holidays. It's a little bit optimistic but certainly feasible. Installation of LokSound decoder will be done later when budget will permit.

Wednesday, December 28, 2016

MLW RS18 Madness - Part 9 - The Return

Mehano-built RS11 in CP Rail livery ready for a bash
 
When I started my RS18 madness project back in 2013, the layout theme wasn't centered on CN Murray Bay Subdivision but rather CN Limoilou yard and Bridge Subdivision. Back then, I purchased 4 Atlas RS11 (new tooling), one Kato/Atlas RS11 and one Proto 1000 RS18. Of them, only 3 were converted even if the others were partially bashed.


Shift in interest and operation made the whole project more or less a priority and my efforts were put on completing my M420 kitbash. However, a recent discussion with Jérôme about the possibility to sometime backdate the layout to the 60s and 70s gave the needed impetus to push this project toward completion.

Many crude details will have to be replaced

Meanwhile, a new locomotive entered the fleet as a Mehano CP Rail RS11 that was own by Louis-Marie's brother-in-law. The model is far to be stellar in term of accuracy, but I had enough parts on hand to significantly improve it. While and experimental unit, I do plan painting this one as a dilapited green & gold CNR unit. It is important to note that the original CNR RS18 had were far less customized than units generally bashed by most modellers (CN wet noodle or zebra). When shopped, louvers and grilles were altered while the original were far closer to a RS11 than you would think. Don't be fooled by Exporail RS18 which is nothing more than a modernized version under a nostalgic coat of paint.

Cleaned up Mehano shell before surgery.

As people know, I'm also an impatient man. Since I want to make the minimal amount of modification but still a decent amount of prototypicalness, my units will all be numbered in the 3600 series which shared the same battery boxes and handrail arrangement than RS11. I seriously see no need to replace delrin handrails with brass ones.


Also, when I did some shopping for detail parts recently, I was shocked by the ludicrous increase in cost. Generic parts like 3-horn chime and Pyle headlight now cost more than rebuilding a cheap boxcar with Intermountain parts. And as always, most parts are always out of stock which is probably even more irritating.

Resin parts duplicated from brass details

Since I had a Smooth-On Mold Max 20 kit sitting on my shelf, I decided it was time to replicate parts in resin. While recasting a 3-horn chime is a little bit too much, I settled on Pyle headlights - which are constantly required when bashing diesel locomotives - RS18 numberboards and  RS32 louvers (because they are better rendered than Atlas RS11 ones which are extremely crude).


The result was far beyond my expectation thought I can see room for improvement. Thus I decided to recast an entire RS11 cab and to replicate battery boxes. All of them will be used to improve the Mehano shell.


Once again, I'm satisfied choosing the hard way to do things. I love to build locomotives and I'm glad these little engines were ready to be improved. As much as I advocate restrain in collecting, I'm still a model builder at heart and trying to replicate locomotives that operated over Murray Bay Sub is within the frame I set for myself.

Friday, December 23, 2016

More Greenery for Christmas


Yesterday was our last working session before Christmas and I decided to experiment a little bit with the foreground scenery in Clermont.


After looking at many pictures of the area, it was quite evident a lot of tall grasses and weeds grew along the tracks back in the 1960s-1980s. My memories of the early 1990s called for a quite manicured track, but it seems it wasn't that much the case.


I started by applying a coat of white glue straight from the bottle with a paintbrush and pressed light yellow dead grass over it. A second fine layer of short fresh green grass was added to show life is back in the springtime. I'm not sure if the colors are right for the season, but at least it looks good. I'll have to experiment again on grass when I'll continue the scene.


Later, I insert small rocks into the floral foam landform and applied a generous coat of dead leaves. Some fine and medium size scenic ground foam was sprinkled here and there to represent small plants starting to grow with the first warm days.


The next step followed by adding reddish Super Trees armatures cut to size to make a transition between the grass and forest cover. I'm planning to add more weed there later to make this transition softer.


Later, some trees were selected and painted with spray cans. I'm always surprised how you must paint your trees a lighter tone than reality to make them pop up on a layout. A few were darkened to represent dead and fallen trees. As usual, it took far more trees than I first thought! It's crazy how many you need. I'm glad I'm not modelling summer!


Total amount of time? Three hours for a 3 feet by 1 feet patch of layout. And for the first time, you really feel the track is indeed running throught scenery. It's an amazing sight and it really separate the scenes efficiently, making the layout looking longer.


I have no idea on which side I'm going to continue the scenery, but with the turnout repaired, I see no reason not going further east. Meanwhile, I'll have to create an asphalt road and print the backdrop in Clermont. I'm not sure I'll be able to get it done during the Christmas holidays.


Final Tuning on Handlaid Turnout

As you know, we recently received a nice handlaid curved turnout for Clermont. While the turnout itself was well made,  the guard rails were insufficently spaced from the stock rails. After some careful filing, it was able to handle 4-axle locomotives without problem but with 6-axle ones it was still problematic. While we wouldn't have cared, Murray Bay was indeed served by such engines (GMD1 and RSC-24).


We thought we were better to let that issue aside for a while and Louis-Marie examined what he could do. Finally, he felt confident enough in his soldering skills (he's an electronic guy after all) to move the guard rails. We were a little bit afraid of destroying the turnout, but after a few minutes and with the help of custom jigs, the promptly corrected.


I'm now happy to report the 24"/20" radii curved turnout can now handle big power like M630C and, indeed GMD1. Styrene ties have been glued and soon a nice coat of camouflage brown will bring it to life.

Thursday, December 22, 2016

Improving a Life-Life 40ft Boxcar - Part 2

The rebuilt boxcar visited the paint shop last week and good it's obligatory coat of Krylon red primer (aka the poor man's red oxyde/mineral brown/boxcar red).


When the paint was dry, a coat of Future floor finish was applied for decalling. I'm not fond of other gloss coat for many reason. Future can be applied easily with your airbrush (or even brushed by hand), it's easy to clean but better, when you set your decals, they have a tendancy to "sink" into the Future coat, making the decal ghost lines disappear much better than with other gloss finish.

Wednesday, December 21, 2016

The Revenge - Rebuilding an IHC 50ft Boxcar - Part 4


It's when paint and lettering are done that you can really see if your efforts were legitimate. In this case, I'm rather surprised to see it's now quite hard to detect the IHC lineage behind this car.

Lettering was done using mainly CDS dry transfers and completed with various generic freight car data decals from Microscale.


Some adjustments are required to fit the underframe back in place, but the most important things to do is weathering. I have a bunch of boxcars being rebuilt, so I'll wait they are all done.


Oh, and for comparison, let's look back at this car in its original state and wearing one of my early attempt at weathering done after watching Mike Rose's DVD on the subject many years ago.


Monday, December 19, 2016

Improving a Life-Life 40ft Boxcar - Part 1

If a company ever had the most misleading name - until the Proto 1000 & 2000 brand - it was Life-Like which models were most of the time less than life-like... I remember I didn't like their cars when I was a kid, preferring Bachmann cars which were slightly better looking and running. But well, they were at least more preferable to Model Power and IHC.


When we started the club in 2006, we went to a flea market and bought a lot of cars. Among them was a poor model of intriguing lineage that had been repainted in the old Canadian Northern scheme. Sure I new it was a foobie - and a bad model too - but I felt some sympathy toward it and made the purchase thinking I could do something one day.


Last week, when looking again at that model we never ran, I found out the door was a good quality one glued on a Life-Like shell. But the weirdest discovery was the underframe wasn't the original one but something else from an unnamed different maker. It means someone went out of his way to make this model slightly better than it was...


Since I had Youngstown 8' doors on hand, I decided to improve this model by replacing the doors and taking advantage of it's 10'6" interior height. But at the end of the day, only the car sides and underframe remain, everything else was scrapped and replaced with Intermountain parts. At this point, I could have made my own car sides and it would have been faster and more accurate! Fortunately, the improvements didn't cost a lot.


Among the obvious modifications, I added a forklift bar to the door, new tracks and experimented with a different pattern of ladders and grabirons on the ends. To do so, I decided to experiment forming fine plastic rod out of sprues heated over a candle. This isn't an easy to master technic but it is useful and I think some practice will make it more efficient.

Now the model is in the paint booth and I hope to decal it before Christmas if possible.

Friday, December 16, 2016

Various Announcements

RS18 projects are just like super heroes movies... they get reboots every 5 years!

As you know, when I made my first set of 3 RS18, I still had in store 3 other locomotives still undergoing conversion. They were all put on the shelf for an indefinite hiatus, but now I'm back working on them. I have a lot of MLW projects in minds and completing this set of three locomotives is now back on my priority list.

They will be equipped with ESU Loksound decoders. I'd like to try their most recent versions which seems promising. In fact, I would have been curious to test the TCS WOW decoders with the sound paired up with the real effort. Who knows, lots of possibilities there.

All locomotives will be painted in the well known CN wet noodle scheme of 1961 as they were frequent visitors on Murray Bay.

Meanwhile, my boxcar rebuilding program is going fine. So far, 4 boxcars have been completely rebuilt. 3 are painted and decalled, one is in the paint booth and two are ready for detailing. I'll have more pictures soon!!!

I also recently ordered 12 Rapido cylindrical hoppers. They will replace our foobies and bring the cement fleet to a decent number. I'm also thinking about backdating some Procor car from the white paint scheme to the gray one.

Finally, the 3D model of the 878-series woodchip car (CN Rail version) is completed. I'm also working on figuring out the brake rigging under the car. I can't promise nothing, but I certainly hope this model will see the light as a resin kit. It would be a great addition to most Canadian modern layouts.

And pictures? No! I prefer to keep surprises for the next post!

Thursday, December 15, 2016

Ballasting Clermont


Some evenings very little happens on the layout, some other tremendous progress is accomplished in a matter of a few hours. Last night was one a productive one that improved greatly the scene in Clermont.


The track ties were weathered with acrylic paints, then ballast was applied when it was paint was dried. Once again, I didn't use any commercial products. I far prefer to mix various kind of real soils so give some variation in shade to the scenery.


The team track was mainly ballasted with dirt and powdery ballast. The siding got a sand foundation covered with the aforementionned powdery ballast. Finally, the main track only got the powdery ballast with very little hints of contamination where we thought the track would start to sink into mud due to bad drainage.


Multiple image of Murray Bay subdivision back in the 1960s up to the 1980s show a track with cheap and powdery ballast and lots of weed on sidings. This is the look we wanted, particularly in Clermont which should represent a backwood end of the line.


Static grass of various colors, olive-colored ground foam and shreaded leaves and other vegetal debris were used to add some variation.


We went quite overboard with static grass over the team track. The idea was to have a semi-buried in gravel track near the loading spot and lots of grass at the feedmill to show how little traffic is generated by that small time customer.


After that, I started to plant various trees in the hillside. I painted some of them to represent younger trees and installed a few dead ones here and there. I observed the nearby park recently and found out the level of dead or fallen tree is quite amazing in a forested area. Having been raised in the countryside, I remember the blaskened dead stumps here and there and tried to mimick that. As much as I could, I tried to plant a stump for each fallen trees of significant size to make it realistic.


I also started to experiment with Super Trees. While nice for summer trees, it's a little bit tricky to make them look like credible early spring trees. I'm actually experimenting with light green foliage and paint. It's not perfect but once mastered, it should give depth to the wooden areas. I suspect I'll need twice as more trees on the hill than what I planted.


I used small broken parts of Super Trees to make bushes. Often, they have a reddish bark and I tried to replicate it with red primer and camouflage brown spray paint. I find them very effective to build up the vegetation near the right of way. Some flower "branches"  were also converted in rustic small fruit trees that can be found in the wild. I thought they were ugly, but with a coat of paint, they really look their part.


Globally, I'm well satisfied with the progress done in less than 4 hours. More vegetation is needed like tall dead grass and small yellow wild flowers growing over the roadbed. When I visited Clermont towo years ago, they were everywhere and made a neat impression. I've seen Trevor Marshall using a lots of flowers and weeds on his layout and modules and think they are a good way to bring depth and color to a layout when done tastefully.


We must admit we choose a difficult time of the year to model. Yes, it is partly inspired by Mike Confalone, but we went a step further, just when the vegetation start to grow again. We did loved springtime, but wanted some life and coloration. As you probably figured over the years, it's not like me to do things the usual way and I prefer the challenge of doing what nobody does.


I must admit the scene is coming together perfectly and the weathered cars and locomotives now look awesome with some decent scenery. There is still a lot of work down the hill, but the peninsula is already starting to look like a signature scene to me and that's great because it is the first thing every visitor see when entering the layout room.


Meanwhile, we are running out of supplies and Louis-Marie cooked us a big batch of dead leaves!