Small terminals of the late 19th century such as Stanstead Branch and Connors generally used old downgraded locomotives such as 4-4-0. Turntables were thus generally about 60ft long. Several craftsman kits of such turntables are available from several manufacturers, generally from UK, but they cost an arm and a leg. Also, they are generally of foreign design and need to be Americanized.
I wanted something more simple, that could be build leisurely in a few days, around a simplistic mechanism that can't fail. Fortunately, I remembered the old Bob Hayden's article about how he built a branchline turntable using a jack plug as a pivot and bridge girders. That was exactly what I had in mind.
 |
| St. Mary's turntable (credit: Dave Tomlinson Collection, trainweb.org) |
After looking at several pictures online, I elected to replicate the St. Mary's turntable in Ontario, which I found both suitable and low key to not overwhelm the scene. For the layout, I didn't want the turntable to be the center of attention, but rather a support character. I also remembered that Stanstead turntable was about 65 feet so I made mine that length. It would be suitable for many small and medium steam locomotives and also for small wooden passenger cars. Better plan ahead because you never now what you will do with a layout in the future.
 |
| Original styrene frame and jack plug directly soldered to rails |
Using a leftover of Central Valley bridge ties strip, I started to build a styrene substructure on which the pivot would be glued. Unfortunately, it was a little bit wobbly and would required much more bracing to counter the torsion. Trevor Marshall suggested to use brass channels and I decided to give it a try. I'm generally not a fan of working with brass, but I decided to overcome my irrational fear. Using 1/8" x 1/4" rectangular tubes (mini HSS), a frame was assembled and soldered in less than a hour. Instead of relying on glue, screws were used to fasten the brass frame to the plastic one, creating an excellent bond between different materials.
 |
| Brass frame screwed in place |
 |
| A neat and sturdy assembly. I also add weight, which is good. |
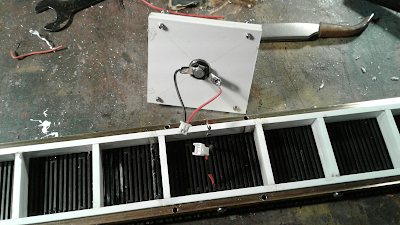
The male part of the jack plug was mounted on a 5mm thick laminated styrene square plate. Instead of gluing the plug on the plastic, a tight was drilled so the jack could be screwed tightly, ensuring a perfect perpendicular mounting. That plate was then drilled and screwed onto the brass frame. This is stronger than glue and if maintenance is required (a solder fails in the future), it can be easily removed. Connectors were also soldered to the wires and plug to add another layer of modularity.
 |
| Mechanisms should always be easy to access and maintain |
 |
| Completed substructure assembly |
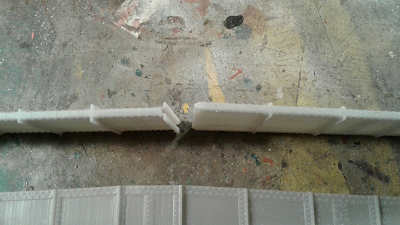
When came the time to create the girders, I looked at my stash of plastic bridge spare parts. I have a lot of extra girder plates, but they all looked wrong for the purpose. St. Mary's has tapered girders that would be hard to kitbash and building them from scratch would take quite a long time and be costly because of resin rivets required. I fired up my 3D modelling software and designed my own girders to fit the bridge structure. They were quickly printed and assembled.
 |
| Girders are printed in two halves to fit my printer |
 |
| Tongue and groove make alignement easy |
The next big challenge was to mount the girders on the turntable. Should I glue them on mounting blocks or think about something more practical. Chris Mears suggested to use neodymium magnets and I gave it a try. It sure worked wonders and I absolutely love the idea it's possible to paint, details and weather independantly the girders from the bridge. Much easier to handle, no need for masking tape and better, you can improve the painting and weathering long after the turntable is installed on the layout. Also, if I ever want to reuse it for a different layout or prototype, just print new girders and voilà.
 |
| Six pairs of magnets are sturdy enough for normal use |
Yesterday, I had fun painting and weathering the turntable. Girders were rusted and received all kind of effects first. Then, I applied two coats of hairspray (chipping medium), a coat of faded black (with bluish hues) and chipped the paint to replicate a structure that was painted maybe two decades earlier and should need a good coat of paint.
So far, the project is almost completed. I need to cut rails to lenght, add wooden planks on the deck and glue wooden handles so railroaders can turn the turntable. I'm quite pleased. I felt it would be a nightmare and it was not. I can testify Bob Hayden's method is both easy to implement and a sound design. Trevor Marshall suggestion to use brass was indeed the way to go and Chris Mears musing about magnets was another creative way to make a task easier. It was a fun and creative project that was exciting to tackle and see take shape before my eyes.
I can't wait to install the turntable on the layout this week and call it a day!


No comments:
Post a Comment