Sunday, May 31, 2015

A Bright Idea

I recently sent submission pictures to a garage kit contest (these are habitually sci-fi, comics and anime character figures cast in resin). I quickly hit a wall when I discovered the harsh truth: my photographing skills are at Polaroid level! Seriously, my digital camera couldn't capture subtle shading effects at all. With trains, weathering is more harsh thus I didn't notice the problem taht much. It was time to improve my method.

The first step was to read the actual camera manual. Until recently, I would just select macro or landscape and turn off the flash. I ended up with unreliable colors and had to photoshop everything which took a lot of previous time. Then, it was time to understand basic stuff light exposure and white color balance. Taking decent picture of the garage kit took me about 18 hours during four days. Seems quite a lot of time, but it was useful because I tried every settings possible and compared the results. I should have done years ago!


The next step was to build a lighting tent to get more control on what I'm doing. I used a old cardboard box and drafting paper. It took about 10 minutes to build, but the result was excellent. Once again, I did a lot of lighting test using various combination of natural and artificial light sources of all kind.

I decided to keep my lighting tent. It is a far more reliable way to photograph my weathering and building effort than using my desk lamp. Seriously, I can't believe I didn't care about basic photographing technics for so long. It would have saved me hours and hours of useless photo editing.

 
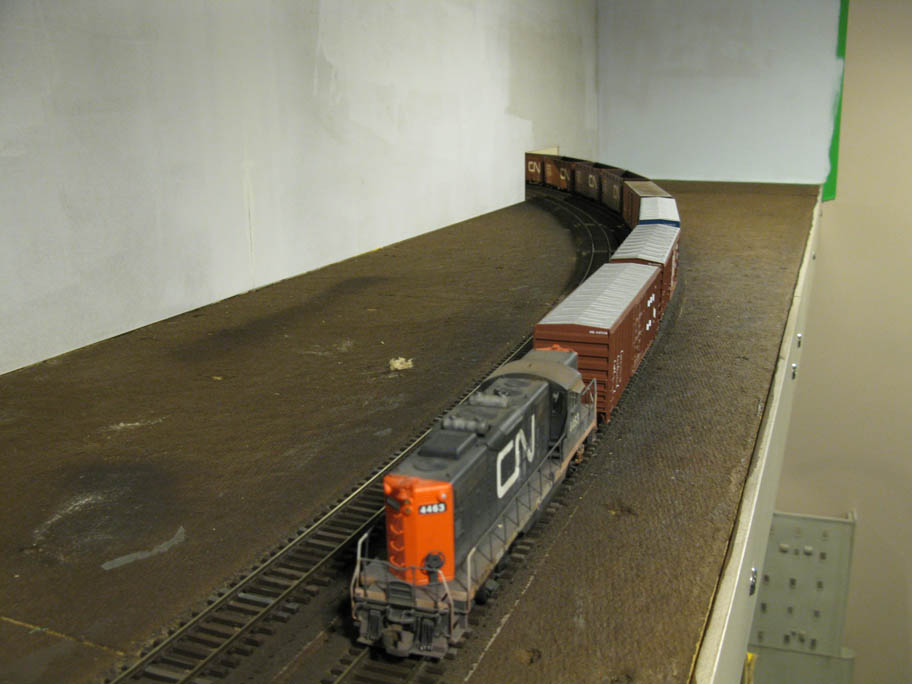
The first train specimen under the lighting tent is a Proto 2000 CN ex-automobile boxcar. I bought this one at a close out sale a few years ago but never found time to build it. Yesterday, I decided to glue it together once for all. Many of these boxcars received what Richard Yaremko calls the "borg treatment" in the early and mid-80s when they were reshopped. Roofwalk were removed too. But some escaped this faith. Since the Proto 2000 car isn't much more than a proxy model, I decided to build it per instruction. I only replaced the stirrups with metal ones from A-line and new metal grabs on car's ends. Finally, I applied consolidated lube data decals to complete the look. I only need to weather it.


Saturday, May 30, 2015

Living In The Stone Age

I'm the kind of guy that is very conservative in term of using method. Most of the time, I'll try to get the most I can from an obsolete tool, even if I know there's far better means available.

Ballast job done a week ago

Once again, I had an epiphany when I decided to switcher from eyedropper to spray bottle to apply the wetting agent to ballast. Yes, we are in 2015 and I was still ballasting and scenicking large surfaces using an eyedropper. It took me a ridiculous amount of time. And only a few minutes yesterday. So lesson learned and I'm moving forward. Laying ballast is a piece of cake now!


I also did some experimentation with my ballast mixes. They are more of less sifted gravel mixes from different origin. I was running of "coarse" ballast (which means fine according to HO scale standard!) and decided to add grout in the mix. Not that much but I quickly found out grout isn't as easy as real stone to ballast. In fact, when there's too much grout, the glue doesn't sink in the material and takes forewer to dry.


On this picture, you can see the right track is full of glue. In fact, it was ballasted and glued more than 90 minutes before the left track. I know there will be a fine layer of glossy PVC over the ballast grains in that section. Another lesson learned, not too much grout in the mix.

This picture was taken 90 minutes after the previous one!

Also, as I ran out of regular ballast, I decided to use my more powered ballast. It is a mix of fine dirt and small stones that looks quite convincing for older ballast. Initially, I was thinking to use it only for sidings, but the results are better than expected and looks much prototypical to me than the regular mix. The regular mix is good to represent freshly ballasted track and I will only use it for that purpose from now on.

Finally, the new ballasted track got its ties color lighten with some acrylic wash before ballasting. I felt the first part was too dark to be convincing and decided to go for a more weathered earth tone. I think I'll continue to do this in the future. I'm always affraid to do bold color constrasts and sometimes it is a pitfall because the end results looks too much plain. I've got to work on that and I remember a painter once told me when I was a teenager that I should leave those fears away and amplify what I see and draw. He was right but that's a lesson that is taking more than two decades to sink in!

Tuesday, May 26, 2015

A Change That Costs Nothing

Retouching photographs to better see what a new change can do to the layout is an effective way... of not wasting your time and material.

The prototype scene

I was curious to see how removing the turnout from Maizerets would impact scenery. Here's the result. From my personal perspective, it looks better and I don't think it would impact operation. I'll see what my fellow club members think about it in the future. Anyway, that kind of modification can be done later. What I like is that this "new" long uninterrupted stretch of track would be a nice place to stage trains or leave cars between operation.

With left turnout

Without left turnout

Sunday, May 24, 2015

Small Track Modifications

Last time I operated the Donohue paper mill, I quickly found out the small runaround track was not longer enough to perform move in an optimal fashion.

Actually, this small stretch of track can hold about 5-6 50ft cars. To be more useful, it should be at least 10-cars long. On the prototype, it is about 420 feet long, which translate to about 58 inches in HO ( 7 to 8 cars). The difference isn't that much, but it often a matter of one or two more cars what would be needed. Also, I must stress that until we build a runaround in Pointe-au-Pic, the paper mill is the de facto terminal. In fact, I'm seriously thinking about making it the "real" end of line. I feel it ain't right to try to cram to much track on a sharp S-curve. I would only keep the wharf team track there.

I remember Jérôme once talked about that and I now think he was right (never distrust a real life railroader). The best way to solve the problem would be to lenghten the siding until the escape track is long enough to hold 2 locomotives + one 50ft car.

Next time I meet Jérôme at the club, I'll probably ask him to do the change to see if operations are improved.

Decoder... is Bliss

Remember the Decoder Blues blog entry? Jérôme was about to collapse from a mental breakdown. No more... At least, not for me!


Yesterday, I decided to tweak my pair of GP9 for better performance. The newer Bachmann diesel locomotives aren't not prize winners, but they are good enough to perform well under strict and realistic operations.

Setting up Decoder Pro and linking it with the layotu was an hassle so I took Mike Confalone's book (volume 2 or 3, don't remember) and decided to manually input his own CV settings for Tsunami decoder on my locomotives. I slightly tweaked the back EMF CVs until I got the performance I wanted (it was 5) and paired up the locomotives... WOW!

Imagine, in less than 5 minutes, I had to two performers in from of me and ready to do switching chores. Sure, I'll need to better match up the speed, but the actual result is commendable.

What really makes these settings great are that when paired up with very heavy freight cars, you get the most realistic operation you can dream about.

You run only the locomotives... and they run finely. Add a few cars, oh, now you need some more power and you can clearly hear the engines strarting to rev up a bit. You are now trying to show a cut of 12 heavy loaded (7 to 10 onces each), I can tell you it will take more effort than you can imagine with your habitual settings. In fact, I felt I was watching a real train in front of me.

All this works together to make you feel the trains really are heavy masses of steel rolling over rails. Each additional car in your consist affect directly the locomotive sound performance. You know exactly what you are doing and it feels right! The next challenge is to find equivalent settings for ESU LokSound decoders. That would truly make my day.

Should I say I had a wonderful 2 hours operating session at Donohue! Oh, and I also came to the conclusion my attention span is about 90 minutes... After this time, I grow impatient and start to rush things. Good to know in the future.


So what's next on my plate? Well, I'm seriously thinking about weathering and adding sound decoders into our Atlas GP40-2W. Right now, I can't afford M420 and if  I want 80s looking locomotives, they are my best bet. Many people complained about the wrong cab dimensions and that's true. But yesterday, when closely inspecting the models, I came to the conclusion the major flaw was that Atlas paint job on the nose wasn't great. If they had painted the black patch over the nose a little bit larger and nearer from the round fillets, it would have greatly improved the general look of the model. If I ever weather them, I'll do this cosmetical change to improve the cab appearance. 

Preparing the Backdrop support


For years, there was a huge hole in the backdrop where the closet doors used to be. Recently, Louis-Marie built a removable MDF panel to fill this void. Last evening, it was time to cut the holes for the track and to finish the job once for all.


The new holes were cut to fit a the largest passenger car we "could" use. A 1/4 inch gap clearance was kept between the car shell and the backdrop. I know, this is quite minimal, but I wanted the hole to be as small as  possible to be easier to conceal later. I've seen too much model railroaders struggle with this classic riddle.


As stated recently, I don't want to add an overpass to hide the holes. In fact, the more I look at this scene, the more I think I shouln't even install a grade crossing near the staging. Only tracks disappearing into the backdrop.
 

Putting the backdrop in place really helped me to visualize better the future scene and I see only a double track gently curving with a parallel road... On the prototype, the grade crossing and overpass are several thousands of feet away from the bridge. Why loose the nice proportion to cram stuff that will need countless hours to build. I was recently reading (again) about Tom Johnson's INRAIL layout and he also came to the same conclusion his layout was overcrowded with repetitive grade crossings. He took the bold approach and wiped out about 50% of them. Yes, it was a shame in some sense because his grade crossing scene are masterpieces, but in the end, the layout gained more scenic coherence.

 
Seriously, this hobby takes a lot of time and mine and getting very limited as I grow older. I prefer to put my effort on what the railroad really needs than waste time and material over fancy useless stuff. What does it means? It means building a convincing model of the cement plant should be a top priority over many other structures. I really want a linear feeling with this layout. The idea that your train is dwarfed by the scenery. I came to appreciate the fact a train can travel a scene which is long enough that you can: 1) see the train crossing the scene for a long period of time and feel it is a long piece of track 2) the entire train is visible in one scene (no more caboose in the countryside while the locomotives are already exiting a urban scape).
 

That said, I'm more than satisfied with the new backdrop panel. It does its job wonderfully and when you operate the trains, you don't feel they enter a hole. This is because when you look at the layout from the tracks, you almost don't see the holes thanks to the perspective. I was unaware of this when I designed the layout, but it was really a good idea.

 
The next step will be to had small "backdrop" behind the backdrop to make sure we don't see what lies behind the scene. We experimented with some scraps of blue sky MDF planks and it is really convincing. When those block receive a similar amount of lighting than the real backdrop, they vanishes into the sky. Now, imagine the scene with trees and telephone poles... no longer our attention will be drawn by the holes.
 

Oh... should I mention I feel the returning loop is quite useless. Since it was built, I almost never used it at all. We never run continous trains. The staging is mainly to build and remove trains from the layout. I wouldn't be surprise if we remove it in the future. You know how I love them!

Ballasting


After a quite long hiatus, we had our first layout meeting in a while. We worked like crazy from 2PM to 11PM. My first task was to ballast tracks from Avenue D'Estimauville up to an non descript point past the bridge.


 I used several time of dirt, sifted gravel and sand to represent different type of soil and ballast. I didn't want to get a uniform look because track in that area is mildly overgrown and not manucured at all.

Ballast prior to gluing

For the time in my life, I decided to place the ballast using a large paint brush... the kind you use to paint your wall at home. It made a huge difference. I no longer consider ballasting a ominous task. With a wide brush, your control is perfect, no grain stay on ties and the application and fast and even.


The longest part was wetting the ballast with alcohol and gluing it down. I used diluted white glue. Works fine for this purpose. Many recommend matte medium, which probably does a good job too, but I have a galon of PVC.


I also mixed a little bit of white tile grout into the mix to make the ballast looks lighter. I stopped half way, but I'll probably use this trick next time I'm using real dirt. Real dirt has an annoying tendency to darken a look when glued down. It looks wet. That can be great to represent wet soil near gullies and pond, but for some application, this look ain't right. Next time, I'll mix white grout with dirt when I'll need lighter soil.


After a few hours, I run a few trains over the track. I love how a ballasted track makes weathered locomotives and rolling stock really pop up on photos.

Before ballast was glued down

By the way, next time I paint my track, I'll make the ties color a bit paler to get a more realistic weathered look.

Thursday, May 14, 2015

Thinking in 3D


I recently discussed my doubts about modeling Henri-Bourassa boulevard overpass. This picture shot last week end shows very well the scene I'm modelling on the layout. You can see the overpass is a very faint black dot in the background. I feel it's better to keep thing simple and this photo prooves me right.

At this point in my modeller's life, I think we over estimate the value of 2D planning. Or, should I say, you need to understand it well to better see their pitfall. Their best force is for planning the layout trackage and relation to industries and general room geometry. I was re-reading some stuff written by Tom Johnson (INRAIL) and Mike Confalone (Allagash) and I came to some realisation. These guys come up with the best scenery and operation pattern you could wish but they do very minimal planning. Not that I'm saying this is a way to go for everybody, but rather it helps them to "model the scenes" in 3D instead of wasting their time trying to figure out in 2D.

I recently and relentlessly advocated the necessity to mock up our ideas in this hobby. I must say my best scenes have been loosely planned on paper and truly expanded in real 3D life. You can't bring the best out a geometric situation looking at it in 2D. You often see stuff in real life that can't be seen if you stay with your bird eye view. Confalone's and Johnson's scenes were built from the operator's perspective. They can't go wrong. The only real thing that needs planning is operation-related (siding lengths, drilling tracks, turnouts arrangements). Failure to do so is a sure way to get bored and annoyed fast!

I've been recently working again on my second version of my small Quebec South Shore shelf layout. The original one was designed when I slapped a bunch of structures, pieces of track and rolling stock together and felt the general proportion was appealing. Yesterday, I caught myself again wasting my life doodling useless stuff on paper and on computer. At some point, I freaked out at my own idiocy and decided to slap together random structures until I got a large and visually interesting grain elevator and feedmill.

Now, I only wish I'll be able to start rebuilding this project as soon as possible. It was a real mine of experience for the actual Hedley-Junction layout. When working solely in 2D, it is very dangerous to fell in the trap of overselective compression and trying to stuff too much things that will eventually make the scene coherence crumble.

Railfanning Sartigan Railway 2

Inbound train arriving in Scott after leaving Charny (CN Joffres)

With Louis-Marie, we've paid a visit to Sartigan Railway (CFS) last weekend. It was a nice occasion to meet the owners and talk about the future of their operation. The inbound train was minimalist - a RS18 locomotive - and a centerbeam flatcar - but it was still an enjoyable time.


Sartigan Railway was founded few years ago to take over operation of this stretch of Quebec Central Railway that was acquired by the Ministry of Transportation.


They operate three trains per week and serves mainly the lumber and grain industries. CFS is a very small railway, much similar to a shelf layout than a large basement railway, but they still manage to attract more clients each year.

CFS employees discussing the repairs

We had the occasion to tour their old MLW RS13 switcher which is actually under repair and out of service for a while. When it will back in service, it will be painted in the quite nice CFS dark blue and silver paint scheme. The Bank Gothic font used is a homage to Canadian Pacific which operated this railway until the late 1980s. Both CFS locomotives are ex-Canadian Pacific that went through various ownership before coming back home.

The blog author finding shelter during a short rain storm

All pictures were taken at Scott-Junction, which is the de facto end of line until operation is pushed further south when rail will be rehabilited.

To be honest, this railfanning trip was more an occasion of chatting and taking pictures of track details and weathering pattern than watching rail operations!

Saturday, May 9, 2015

Stop It Right There!

I've been pondering all week long about the future highway overpass that will hide the staging area near Maizerets. For months, I doodled many possibilities, never pinpointing something interesting.

As you know, I recently commented about how this particular spot on the layout is becoming my favorite spot for its long sweeping curve. Adding an overpass to the scene will kill this nice setting. So after many consideration and doing field searches on the prototype this afternoon with Louis-Marie, I came to some conclusion. No need for an overpass with a weird and unbelievable design. I think it will only attract attention on a spot where I don't want people to look at.

Also, this is truly the staging area in the senes we build up the consists there. Adding useless structure will only make operation artificially harder.

I remember the time when I thought reproducing a prototype was to cram as much as possible prototype key features in the most improbable spatial organization possible. No, I'm not going this way anymore and looking at Maizerets grade crossing this afternoon and the magnificient French Regime Maison de Maizerets made me fully aware modelling the area with less compression would make it better.

I know I'm often stressing this point, but as I experiment more as a model railroader, I feel we put on ourselves a lot of useless constraints. We feel we need everything. We become obsessed with details while we totally miss the point about the global project. Less is not only more, it's about putting your efforts where it really counts.

I now have the chance to model almost full scale the storage siding between Maizerets and D'Estimauville. So far, everybody in the club agree the new scene - as it is - truly capture the prototype to a level we even thought we would achieve. We now have the choice to waste our time on gimmicks that will destroy this balance and divert our effort from building the cement plant. The room is small and the Ciment St-Laurent plant is very huge. Seriously, it takes about 17 feet of track which leaves about another 17 feet to reach the staging. The entire scene needs space to breath and equilibrate the behemoth industry.

By the way, we took many new pictures to make a better photo backdrop. Today was the perfect day for that. Lighting conditions were good and trees starting burgeoning. An interesting feature of late April/early May is that you have a nice mix of green grass and dead vegetation. Also, a few trees have small leaves. I'm not sure it will be easy to model, but I think it will help to blend the backdrop with the background scenery.

Electric Wiring Issues In Maizerets


I’m proud to announce Louis-Marie finally got rid of every little electric wiring issue in Maizerets. That means three good news: operation is now smooth as  silk (at least, in that very area), we can move forward with scenery and our locomotives weren’t entirely faulty (I’m looking at you Bachmann GP9s!). He also addressed other problems here and there. So far, so good.

Anyway, as previously stated, we will proceed with implementing capacitors on our locomotives to help them operate even better over turnouts, particularly for our small GE switchers. I feel the 44-Ton will need a serious mechanical rebuilding program. I’m seriously thinking about scrapping all Backmann “coffee grinder” motorization, replacing it by a Stanton drive and add sound, capacitors and weight under the shell. I’m just a little worried the project may cost a lot of cold hard cash. Wouldn’t it be better to just invest in a new Atlas S2 with DCC sound, kitbash the cab and repaint the shell in Donohue’s scheme? I feel the second option will cost fairly less. Jérôme on the other hand pointed out the GE 44-ton is an interesting prototype that fits our era. He also claims smaller locomotives with less tractive effort make for more challenging operation. I must admit he’s right about that.

Decoder Blues


Well, Jérôme’s patience was pushed to the limit yesterday when he found out tweaking an ESU LokSound decoder with JMRI was probably as weary as being a copist monk in medieval times. Definitely, this is not user friendly at all. Supposedly you need their native application to be able to use a more streamlined interface. He compared the process as playing Minesweeper video game with a 100 x 100 grid! I know almost nothing in that field of model railroading but from what I saw, it wasn’t something you want to tackle late at night on Tuesday.

I can understand his frustration since our ability to program decoders was down for a few months. And now, when everything is back in order, he faces a new wall. But there’s hope!

On the other hand, I was able to program my own P1K RS18 without losing a string of hair (I think it was a Tsunami). Very nice interface… I’ll have to adjust the speed since the factory settings are on par with a toy train. At least, the sound level, bell and horn are now adjusted to my satisfaction. The sound was initially very low, but it now acceptable yet not overhelming. Good to hear Alco motive power at its best. Engine notching will have to be adjusted, but it should be a child’s game. Our locomotive top speed will be 20 mph, so that leaves a lot of room for smooth operation in the future.

Now it’s time to seriously think about completing my pair of kitbashed Atlas RS18. When? I don’t know, with summer lurking and many home improvement projects on the slate, modelling output’s going to be a little bit on the slow side.

That said, I think I'm ready to delve a little bit more into DCC programming that I used to do. I've always taken a casual approach to this matter, but it's time really try to understand how it works to bring operation to a new level. Having not too much locos to program is a gift!

Thursday, May 7, 2015

Weathered CN Roofless Boxcar in Maizerets


The last batch of 40ft roofless boxcars is now completely weathered, except for the woodchip loads. I’m quite satisfied with the result. The cars look like they are at the end of their service life, which was the case.


Weathering was achieved using my habitual recipe:

1.    Spray heavily thinned down acrylic earth/skin tone wash to fade the color.
2.    Spray heavily thinned down acrylic blackish/brownish dirt tone wash in needed area.
3.    Let dry and dullcote.
4.    Use artist oil paint washed with mineral spirit to simulate weathered parts.
5.    Let dry.
6.    Make rush spots using artist oil acrylic straight from the tube.
7.    Let dry.
8.    Rub some pastel chalk were dust and dirt from wheels accumulate.
9.    Paint wheels a dirty/rusted brown shade.
10.    Rub some rust-colored pastel chalk on wheels and voilà!


I didn’t bother spraying a final dull coat because I think oil paints give a very convincing flat finish. I always think dullcote kills this nice effect. The cars won’t see real operation before a few weeks so there’s plenty of time for oil paint to dry and harden.


I still have 4 of these cars to weather. I think I’ll restrain myself a little bit more on them to get more color and weathering variation among nearly identical cars. Overdoing weathering is a sweet pitfall.

Wednesday, May 6, 2015

The Man Who Planted Trees


I did a few scenery tests yesterday in the vicinity of Maizerets. My goal was to determine if lots of trees could be opaque enough to free me from a photo backdrop. The short answer is no. I used a lot of trees made of twigs to fill a height inches deep zone in the background. No amount of bare trees hides the fact there’s nothing behind the hedge. That would work wonders with summer and autumn trees, but not in the leafless season. So I’ll have to print the photo backdrop.


Another find was that you really need some diversity to make your forest believable. I mean most of the trees I used were about the same size. Height varied, but trunks were about the same average diameter. It makes the forest looks very uniform, which it isn’t in real life. I’ll have to think about a method make larger trees and multiple-trunk trees to get a good illusion.

 
Also, very small trees and bushes will be required to fill the space between the ditch and the forested area. It came really apparent to me your backdrop must be multi-layered. My goal will be to focus attention on the track, having the tree line (foreground and background) acts as a visual barrier. I feel having many layers makes your eyes focus on the limit of the forested area, not the blue sky backdrop which isn’t the place you want attention. Anyway, we are looking at our model from a relatively short distance, so when we look at tracks and trains, everything else is blurred.


Hiding the river will be a challenge. I found out the best option is to make larger trees overshadowing the small creek near the track. Their branches will help to focus our attention on the river itself and not the wall limit.


Another issue is how said trees have all the same color. In that respect, I’ll probably overspray a few twigs different shades of brown, grey and other realistic colors to give some subtle variation and mimick various species.


The foreground trees are indeed a nice addition. They truly trick your eyes believing the train is crossing a landscaped area and not only a track nested between an overpowering backdrop and empty space (aisle). I had already planned to resort to this gimmick while planning the layout and I’ll definitely use it in the future. Seriously, you can't underestimate how a few leafless trees can make a piece of track looks far longer and fully integrated into the landscape. This is an excellent scenery divider that doesn’t need to scream “scenic divider” like a tunnel or an overpass.


Talking about overpass, we came to the conclusion our Henri-Bourassa Boulevard overpass near the staging area is gonna be a little bit more subtle than we first envisioned. One of the great qualities of Maizerets is its linear and open space feeling. It makes the scene looks very large and a great place to railfan trains and shoot pictures along the broad curves. It wasn’t planned like this and it’s a great modelling lesson of humility.


No, you don’t need breathtaking vistas to make your trains looks great! I should have learned it already from my Quebec Southern Railway experimental layout last year. Funny how this whimsical layout is still teaching me a lot about model railroading and scene composition. I think it is a primordial step to mock something before setting out for a larger layout. It cost almost nothing, but the reward is rich in the long term.


Just look how the diminutive Rivière de la cabane aux Taupins scene is evolving. It was supposed to be only a small culvert and it is now my favorite railfan spot!