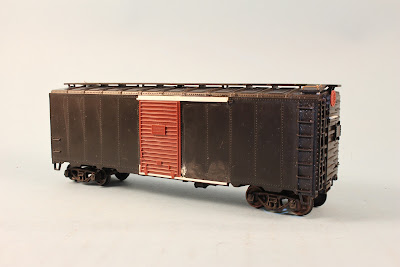
Like most modellers, I've accumulated over years countless Athearn 40ft boxcars to populate my early layouts. With time, I phased them out and condemned them to oblivion. Yes, there was a time I tried to improve some by replacing all the grabirons and ladders with separate parts. However, it was long, tedious and maybe not worth the investment in time and resources.
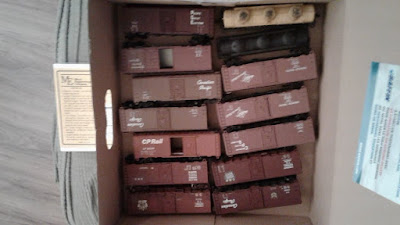 |
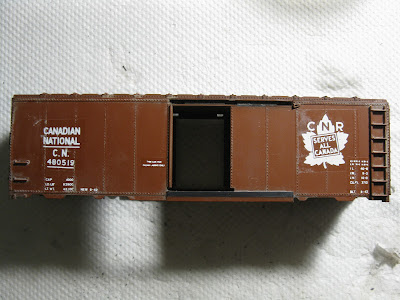
| Maybe these cars will be saved from oblivion one day |
However, a recent discussion with Chris Mears about what matters when modelling freight cars, we agreed that hyper detailed $60 cars weren't required to build a decent fleet and get a good representation of a real freight consist. Indeed, if the focus isn't a single car but a massive amount of them, only the main characteristics should be adequate: correct shape, correct silhouette, correct proportions, correct colors and decent weathering. Remark I haven't yet mentioned the work prototypical because it doesn't matter that much if the good is the big picture... and an impressionist one. However, I'm not that fond of obvious foobies and we will try to address that question later.
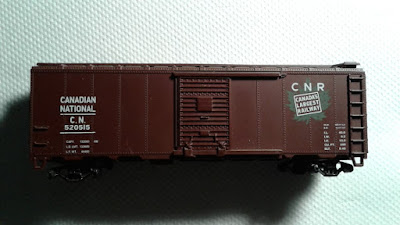 |
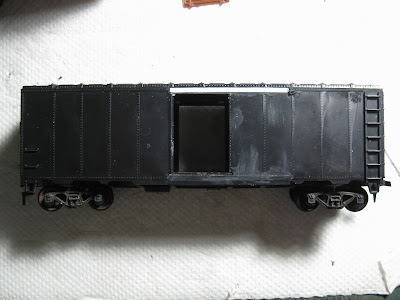
| While not bad, many details scream Athearn at first glance |
The big question is: what makes a car in a consist scream "Athearn Blue Box"... In general, it's the badly done moving doors with their chunky claws and grossly oversized tracks. In second comes the overly thick roofwalk and in third I would say the thick stirrups. Sure, many other details are "wrong", but they aren't so bad they are obvious at first glance and are decent enough to not be obvious.
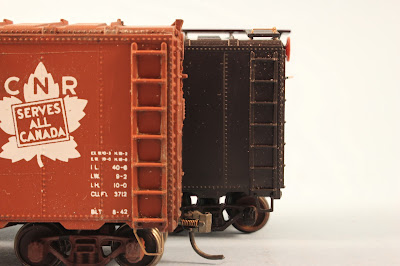 |
| Metal stirrups VS filed down stirrups |
So I decided to make a proof of concept about how someone could improve an Athearn 40ft boxcar with as little work as possible and with very little investment. Here's my recipe:
 |
| Remove the doors, tracks, roofwalk and brakewheel. |
First, every grossly oversized details, including doors and their tracks. We no longer have use for them. Plug the top track slots with 1.5 x 1.5mm styrene and sand smooth. The bottom track must also be removed and sanded down until it's level with the carbody.
 |
| Bottom track sanded smooth |
 |
| Filling the top track slot with styrene |
Plug the roof holes with the of old roofwalk pins. Add some 0.5 mm styrene bits to complete the roofwalk supports. Sand everything down so the new roofwalk sits flush on all supports.
 |
| Plugging the roof holes |
Now, it's time to alter the underframe. Remove the reservoir and valve, keep them, but toss the brake cylinder, we no longer have any use for it. Install an Accurail 40ft car brake rigging on the Athearn underframe. You will need to cement a piece of styrene to support the new brake cylinder. Then, reinstall the reservoir in place making sure your invert their original position. Yes, when Irv Athearn tooled these cars he made a mistake and inverted their position due to an error while reading a floor plan drawing!

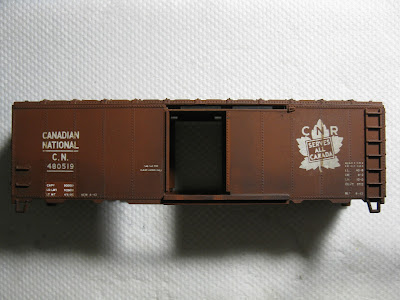
Add weight to the underframe according to your standards then put the shell back on. Glue a 10ft high, 6 feet wide Branchline Youngstown door (available from Atlas). Add new tracks made of 0.5 x 0.5mm (0.02" x 0.02") styrene strips. Fill the gaps on each side of the doors (bottom) with putty and sand smooth. Over the top track, complete the riveted steel band by gluing in place a piece of 0.25mm thick styrene with punched rivets (you can use Archer resin rivets later if you wish). Also, on each door, at the bottom left, complete the door jamb by adding to small bits of styrene.
 |
| This is an Intermountain door, the Branchline ones work better. |
Thin down the stirrup steps by removing carefully material. Start by sanding the bevels on the outside with a fine file. Then, remove the bevel inside with a hobby blade. Be careful.
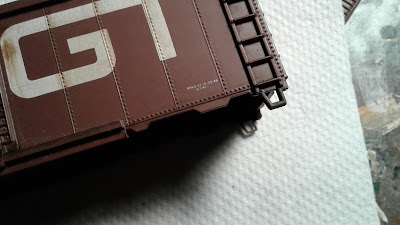 |
| Original thick stirrup step |
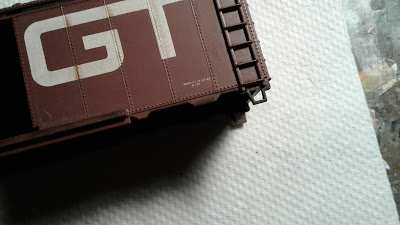 |
| Filed down stirrup step |
Next, install an Accurail wooden roofwalk (from their outside braced boxcar kits). Add small piece of styrene to support the lateral roof walks. I use 2mm x 0.5mm strips glue under the roofwalk and then to the roof. Glue everything in place. If you want more realism, shave off the molded corner grabirons and replace them with Tichy phosphore bronze ones. I think it really improve the general silhouette.
 |
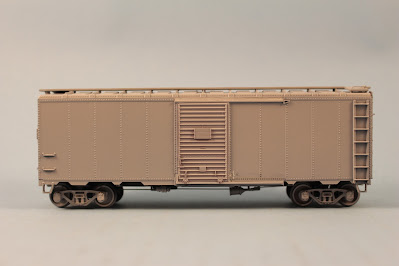
| A completed car ready for primer |
Speaking of silhouette, it's time to lengthen the brakewheel platform by adding a 1mm x 0.5mm x 8mm styrene strip to make it look better. Finally, add the nice brakewheel that came with the Branchline door in place and your car is ready for primer.
 |
| Car in gray primer with Archer resin rivets |
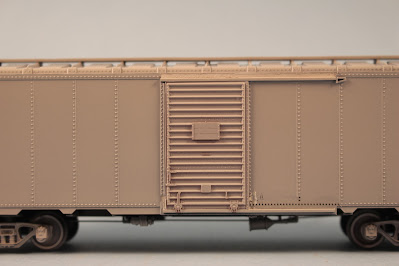 |
| Closeup of door modifications |
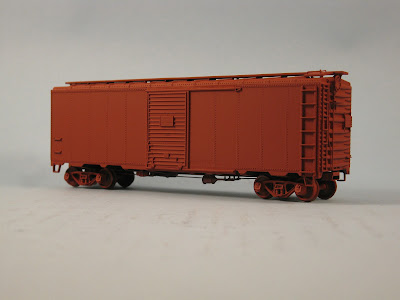 |
| Car in red oxide primer ready for pre-weathering. |
When primed, add Archer resin rivets everywhere they are missing: mainly over the door bottom track and over the top track too on the ridge. Add another coat of primer and you car is ready for paint, decals and weathering.
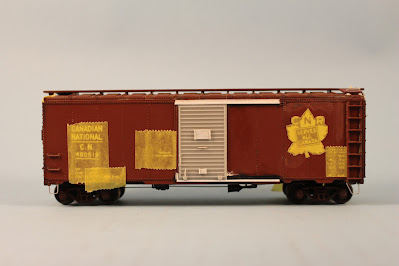 |
| This prepainted car is ready for patch up paint job. |
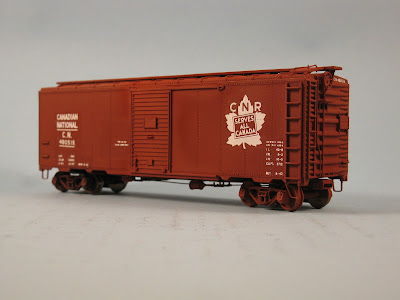 |
| A completed car ready for weathering |
Total cost? Maybe too much, but you had fun and you can add more details if you wish. This car, while not perfect, is now a quite decent representation of Canadian National 1937 AAR style 10ft high boxcars built by the thousands from 1937 to the late 1940s. Later designs had different roofs and ends depending on car builders, but the older ones had, just like the Athearn car, 6ft Youngstown doors, Murphy raised panel roof, Dreadnaught ends (albeit 4/4 instead of the rare 5/5 panels on Athearn car) and wooden roofwalks. If you want to model different cars with different ends and roof, ditch the Athearn car and find something easier to bash. Enjoy!