Saturday, February 28, 2015

Locomotive Cleaning Device

Last week, I cleaned locomotive wheels using an alcohol soaked paper towel laid over track. That's an old trick: you feed power to the locomotive so the wheels turn on the towel. A truck at once. The only problem is to keep the locomotive from running wild by keeping it in place with your hand.

Louis saw me and designed this crude but clever device this week. Probably many modelers already invented this gadget over the decades, so nothing new under the sun. That said, it will make cleaning locmotive's wheels a lot easier and less tiring.


To be honest, a lot of work has been done on the layout over the last year. As much as possible, we tried to operate trains over partially completed tracks. Sometime, dirt is hard to see with your eyes and thus we didn't bother cleaning too much our stuff. A newbie mistake, I know. Since a few weeks, the running performance of my pair of redetailed Bachmann GP9 dropped significantly. That was quite odd since their electronics had been improved and they were already smooth and reliable performers. Well, after cleaning the wheels, about 90% of the problem was solved.

I also took time to clean the entire layout tracks. I didn't do that since the new track plan was implemented last spring. It may be evident, but less trackage means less maintenance. It was a matter of few minutes before everything was shining. No wonder real railways try to keep their network as simple as possible to keep maintenance cost at minimum. Another good reason to follow prototype practices.

Thursday, February 26, 2015

Cabinet Making Part 3 - Final

Here's the latest picture of our completed rolling stock drawers. Black foam lining used as carpet underlay was repurposed to cushion the slanted display.


Saturday, February 21, 2015

Cabinet Making Part 2

Well, Louis-Marie is quite motivated lately and almost completed the car drawers and the DCC cabinet.


Let's start with the DCC cabinet.


To turn on the layout, you now only have to use a small switch. No need to play directly with the equipment as it use to be. A small green LED let you know if power in on or off.


When you open the door, you have access to a programming track and a space to store power cabs.

 
The programming track is a short stretch of track pinned on the door itself.


Some storage space for club comptability and layout documentation is available under the cabinet on shelves.

Next one, the car drawer. Looks good on photo, but far better in real. Each drawer can hold about 30 50ft cars. About 150 cars in total and there's still place to add more drawer. Top drawer is for locomotive.


The ingenuity of Louis-Marie expresses itself at best inside the drawers. He used scraps of 2"x3" lumber and cut them diagonal in half. He then fixed them in such a way cars can be easily displayed when the drawer is opened.

 
Once done, these display "steps" will be fully lined with protective foam sheeting. Let's be honest, it is no new, we already used this method for our original drawers, but never at this extent. I've yet to see another layout equipped with such steps. They have many advantages over simple drawers. Not only you can see better the car you want to choose, but they can't enter in contact, reducing wear and risk to break the small details. It isn't suited for locomotives with lots of details, but do wonder for freight and passenger equipment.


The most amazing thing with all these new improvement is the fact they didn't cost a single penny. Both the cabinet and drawers were made out of recycled stuff that could have ended in the fire pit or garbage bin nest summer.


By the way, I started to build some scenery work on Rivière de la cabane aux Taupiers. Regular and floral foams were used to shape general landforms according to prototype pictures. My goal is now to start working scenery from the staging area and continue toward Villeneuve as the year pass by. No real specific objectif, only moving forward. The next challenge will be to build a large highway overpass over the staging area.


Wednesday, February 4, 2015

Frustrating 3D Modelling

Over the last few days, I revisited my 3D model of a CN Transcona Woodchip Gondola. The goal was to make a new model with more accurate data, which was easier than I thought and yielded great results. The other thing was to make it as optimal as it could be to be printed using the finer Frosted Ultra Detail acrylic used by Shapeways.

Seriously, I think I've been wasting a lot of time on that utopic endeavour. I even wrote 2 long blog entries I deleted. To be honest, I'm quite proud of my 3D model but I fear Shapeways is in no way able to print it correctly. I've read countless forums and blogs to see how others have worked around their own models. I find out most of them end up with very rough models that looks very cheap once painted. The technology isn't advance enough to sustain what I consider to be a decent level of quality for the price.

All in all, printing my actual project in FUD, four shell at once to save on handling and shipping, would cost CDN $90 per car once completed. If the model were pristine I think I would be less reluctant. But paying this price for one car with a semi rough finish worth a 70s Life-Like offering just makes no sense. At this price, I'd rather start buying 40' NSC boxcars from True Line and remove their roof. At least, I'll have 2 superbly detailed and prototypical woodchip cars for one 3D print.

I think there's a long way to go in 3D printing. I'm not giving up hope, but feel the time isn't not right for this kind of project. In another hand, I would glady try 3D printing for items were a smooth steel-like finish isn't a prerequisite.

I'm left with one option: build the car from scratch and find a way to make the process easy to work as an assembly line. It would be time-consuming, but at least, the final project would look smoother.

If you think I'm wrong in my assumption, you can contact me to show me your succesful 3D prints in HO scale. I'm seriously looking for that. So far, I'm not that impressed by what I see around.

I'll be bold, but at some point, I feel I should try to build a few of them. In the past, each time I tried to reproduce some canadian prototype, a manufacturer picked up the project! Maybe I should start to build a Kaslo M420 just in case!

More seriously, I would gladly give a hand to any people wanting to cast this particular woodchip gondola. I think it would be a very interesting piece of canadian rolling stock that would fill a need.


Anyway, that didn't prevent me to work on my woodchip boxcars. Now I have 4 shells painted and partially decalled. One shell is almost completely modified and await grabirons and paint. 4 shells are ready to add details (doors, cast-on details and roof removed) and one shell still need to be prepared.

Today I received many detailing parts from Accurail and Tichy, so no reasons to not complete this project. However, I'll need to buy many decal sheets. It's only a shame that most manufacturers only have sheet with enough detail to complete one car. Once again, I'll end up with dozen of useless Microscale blue CN wet noodle. WILL THEY EVER UNDERSTAND THESE DECALS SHOULD BE PRINTED IN BLACK!!!!!!!!!!!! Once written to them and they told me they had "physical" reference for blue lettering... I've never seen a single one in two decades! Anyway, even the font they use to spell "Canadian National" is wrong. Maybe I should give CDS dry transfer a chance again.

Monday, February 2, 2015

A New Approach About CN Woodchip Gondolas


I’m actually thinking about ordering custom decals for my 3D printed CN woodchip gondola. These aren’t actually cheap to produce. In fact, when ordering, you try to cram graphics all over the small decal sheet to make sure you get the most out of your money. At this point, I’ll end up with more decals than I need for CN gondolas.

This brings us to the next step. When I rebuilt my gondola last weekend, I kind of love the results even with its obvious shortcomings. With Canadian dollar taking the plunge recently, it would be wise to print more gondolas. I would expect each shell to cost about 80$ now, without shipping! No way. But when you think about is, this gondola design is quite simplistic. My main problem was sanding flat surfaces smooth. So here’s the idea, why pay for smooth surfaces when you can build them with styrene. I could only print the required details at a lower cost and glue them on a generic styrene shell. Better, I could invest my money in a better and smoother printing material.

There are only a few parts on this model that are annoying to scratchbuild:
  
First, the underframe could be 3D printed with brake details, little cast on details and coupler boxes. Basically, that will give me a flat car on which I will build the superstructure. If you look closely at prototype picture, it is exactly what those gondolas are: a modern flat car with extensions.

  •  Second, I would print the post. Why? Because they have intricate fasteners that are very small and tiresome to cut and glue if done in styrene. One could only print the lower part and glue styrene shape for the rib but I don’t think it would be significant in terms of cost and assembly time. Also, the end result would be a little bit less neat depending on the skills of the builder. And think about it, if you have 3D printed ribs on hand, you can virtually build many woodchip car variations with a single style component.
  • Third, I would print the car’s top rib and its numerous small ribs. This part is a little could be scratchbuilt, but depending on the price, it’s worth to see what could be the final price.

On the other hand, it could be totally possible to print the car as a single piece. You would get a structural skeleton into which you had the styrene sheeting inside to complete it. The final touch would be to add horizontal bracing on car ends using styrene profiles cut to length.
If possible, I’d like to remove least 50% of printed material to cut the cost by 50% at least. If feasible, I’ll lower that ratio as much as I can, maybe by reworking the underframe thickness a little bit. The big idea is to take advantage of 3D printing for what it's good at; details.


When we start working with this interesting technology, we are all intoxicated by the ready-to-run mirage. Full of wishful thinking, we believe we will get the perfect prototype in one part. That may work for some model, but for larger scale needs, you have to take an alternate road. In fact, 3D printing shouldn't be a convenient way to free us from scratchbuilding and kitbashing, but another tool in our hands.

Once again, we have to be a little bit creative to work innovative solutions around. At least, it’s worth a try. If it works, that will be a fine way to build a larger modern CN woodchip gondolas fleet. I do like the roofless boxcars and their distinctive style, but I love the real gondolas with their ridiculous “CN Rail” logo. They are the one I saw in my childhood and I’m not alone in the club to have a soft spot for them!

Oh! By the way, I had a few friends visiting yesterday. They are mainly interested in wargaming models - namely Warhammer 40 000 - but it was a good occasion to discuss and do some scenery work. While chatting, with them when they played their game, I prepared another set of 4 roofless boxcars and built one more model. I'm following George Dutka's pictures to build them. I still have another shell lying around, so if I'm in the mood, I could get as much as 10 cars.

Sunday, February 1, 2015

Reworking Villeneuve Trackage


You remember probably when I complained about the track geometry in Villeneuve yard's west end. A succession of S-curves leading to derailment. Also, the roadbed was uneven, worsening this issue (wood dust gathered under the roadbed when we drilled the turnout control rod hole).


Yesterday, Jérôme was tasked in replacing the right handed #6 turnout with a left handed #8 turnout. As any track work, it tooks a few hours to make things works flawlessly. But the result was rewarding. The track geometry is now more fluid and cars went through it smoothly.


The only thing that needs to be addressed is the curve on the mainline. It is too sharp and spacing between the main and passing tracks is uneven thus looking awkward.


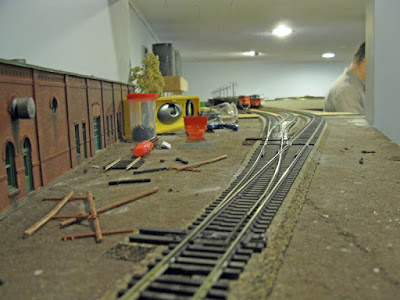
Finally, we discussed the crossing signals arrangement. This will probably be the most important expense this year and we don't want to mess it up. I'm just a little bit sad Walthers modified their post-1960 cantilevered crossing signals. The old one were triangular, just like our prototype. Their new ones have bulky rectangular arms. Well... that's Walthers for you: the modern signals and olders one now share an almost similar design! Big deal! I wonder if I could be able to bash the new offering into a triangular one with too much trouble... I'll see.