Tuesday, May 2, 2023

Thinking outside the Room - Part 2

The Japanese layout discussion also sparked another interesting point, which was about showcasing trains instead of showcasing railway trackage.

In this hobby, it is often assumed that if you want to represent the essence of a prototype, replicating at least one station is the sure way to go. For obvious reasons, it is indeed a strong design position. Stations have signature buildings and industries typical of a specific locality and railway company. They are strong affirmative elements that define the peculiar identity of a company. On the other hand, this strong association means that any deviation can be annoying for most modellers who knows too well their prototype.

From my own personal experience, I find out that I barely interact with station scenes. They are nice to build, nice to look at, but at the end of the day, I find myself always railfanning my own miniature trains in the most mundane settings on the club layout, i.e., along a single track mainline, disconnected from the “signature” elements and grounded into the landscape.

At this point, it is indeed a matter of personal preference and I find no wrong way to tackle design as long as the premise correlates you own interests. Also, modelling mainline has always been an interest of mine dating back to childhood. But let’s play with that idea a little bit and see where it can leads you.

Thinking outside the room has opened a wild and long exchange of ideas between Chris Mears and I. It would certainly be great to share these raw thoughts here, but the format would be hard to translate in blog form. That said, many interesting concepts were shared and are worth exposing here.

 
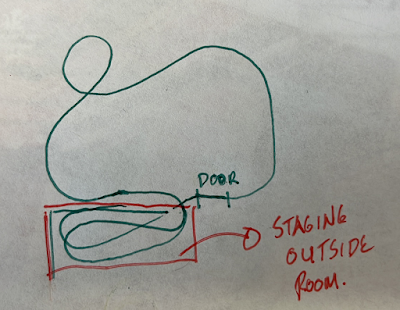
The first thing is that a loop staging outside the room is a no go. It seems I made serious dimensional errors when I made a proof of concept. For some reason, I made the length much longer than it was in real life. Thus, it doesn’t fit the intended space. Another option was simply to expand the loops outward in the basement large woodworking shop. As you can already figure out, this is highly undesirable. Sacrificing a precious working area to run trains in a dusty environment is not a sound nor sane proposition. I’m mad, but not THAT mad!


Thus, it’s back to square one… or is it? Once again, our friend the Japanese N scale layout in Hokkaido will lend a helpful hand. Could the returning loops be incorporated into the layout room? They are huge aren’t they… fitting them in corners is pure madness... No, I’m not into building the next bridge over River Kwai!


But could the loops be located in the center with the layout surrounding them? I know it’s an unusual proposition as it means to remove entirely Armagh from the picture. But is that a viable proposition? Wouldn’t it remove the core of the layout, or worst, dilute entirely the signature scene that hold together the layout around a narrative? Maybe… if the goal was to depict Armagh, QC in the early 1950s or in the 1960s. However, nothing is more removed from my initial intentions than fixing the layout rigidly in a specific reference frame.  Armagh and Monk Subdivision have always been a useful tool to provide inspiration for a generic yet realistic layout depicting the South Shore. It could be anywhere in between Southern Quebec, New England and New Brunswick, which I stated more than once on this blog.

 
Chris' sketch about 3 scenic modules an one left for future use


Reaching that point, one can ask itself if the station scene isn’t too specific to fit several eras and prototypes. The answer, at least mine, would be yes and no. Yes, because it comes with a signboard with a specific location, but also no because most rural stations around the continent shared a good deal of common features. At this point, just replacing the buildings could be enough to trick most people. But they are also a point where things happen such as stop, refuelling, switching, etc… In my own personal experience of trains, they are moving on the mainline about 98% of the time. Not that it’s entirely true, but it’s how I encounter them. They are floating dreams running in front of my eyes, filling up my field of vision and impossible to stop… Once they are there, later they aren’t. Destination unknown most of the time, except for a faint idea about the next division point.


In that regard, maybe the station is no longer the mundane point of view of the railway, but rather something out of the ordinary. As I mentioned to Chris, I’ve realized over the last decade how little I care about switching moves when I’m at home. I don’t care at all, it bored me to death. I just want to see rolling stock moving on the mainline, watching them from a fixed vantage point, immersing myself. If I want to switch, I go to the club layout and get my fun there. So why should compromises be made to get a half decent switching layout with a short length of mainline? Murray Bay has only switching districts and no mainline… thus the home layout should provide something different.

Displaying trains on the mainline...
 
When you think about it, is the layout made to “play” with trains or to “display” trains? Both genuinely worthy goals, using similar structures and components, but not exactly the same. Knowing myself, I’m in the second category and it comes to my mind a small basement layout should provide for that. A good stage with exquisite scenery. Something achievable, easy to maintain, that can be built in a decent amount of time on reasonable budget.

 
No station, but a central staging area...

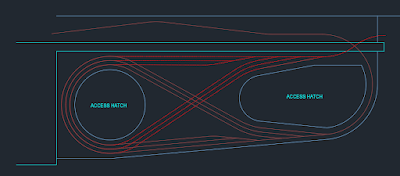
Thus, the central set of staging loops starts to look appealing. Sure, it eats a lot of space, but on the other hand it leaves more space for the scenic layout to develop itself under the IKEA cabinet. With such a layout, there is no longer a need for selective compression since it’s only a slice of railway from the prototype between nowhere and nowhere. A mile or two, it doesn’t matter. The mainline is just finding its ay around the hills and the small rivers to reach a final goal I can’t fathom and which, ultimately, doesn’t really matter.

The "Dragon head" as dubbed by Chris Mears


This is also a proposition that makes sense. The staging “bulge” can be built independently from the walls and be highly accessible for maintenance. It also creates alcoves from which you can watch the trains, which are always an interesting spot to stand.

It is also possible to hint at some rail traffic control by having the first turnout of each staging loop on the layout, as if they were depicting the beginning of a passing track (which, they are indeed). The main layout thus becomes one long occupancy block. A stage for trains to play their game and be displayed. In some way, the scenic portions are now a large panoramic screen surrounding the viewer. It’s an immersion experience, which is one of the things I always loved with model trains… when they trick you to believe it’s the real world.

From a more pragmatic perspective, this kind of layout takes away a lot of construction issues and limitations. It’s simple, yet sophisticated, and I like it that way. In fact, I recall that early ideas about that layout also tried to capitalize on that before the FOMO factor tricked me in adding “stuff”.

Staging loops in the center for ease of access

Another big point in my eyes is the sheer staging capacity provided by the loops. I got the idea from some fanciful European modeller I’d rather keep the name untold, but it works very well for its purpose. Just in term of capacity, the longest track on the loop can hold one locomotive and 37-38 40ft cars. By HO standards, this is huge for a small 16’ x 10’ feet layout. It really captures the essence of big railroading without compromise nor need for a basement empire. Even the Cabot, that very long CN passenger train from the 1960s linking Montreal with the Atlantic, can be staged in its longest iteration… imagine, two Alco C424 pulling 16 heavyweight and stainless cars through the Appalachian Mountains! If I’s a pre-1918 NTR train during the war, we easily reach forty 36ft cars in tow behing a large and mighty 2-10-2 .

 
Serious staging capacity!


As you can see, the language has changed. It’s no longer about modelling “that place”, but about modelling “trains” in their natural environment. For that reason, I like this idea! And for the bulge, I’ll find a way to give it a useful purpose; be it covered with a tabletop to create a lounge or install a clever diorama or rolling stock display on it. The spray booth and other useful tools with find their way in storage under it… You know, you never have enough storage!

 
With some scenery


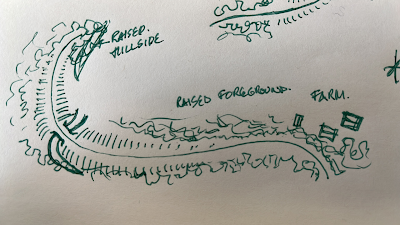
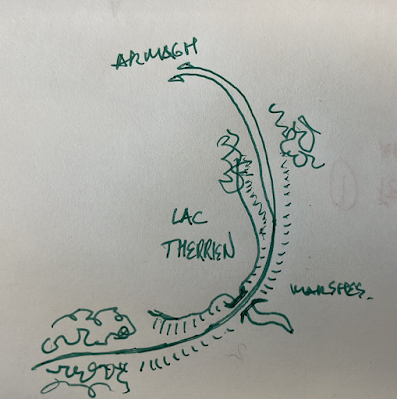
As for the scenic aspect of the layout, it captures three of my favourite spots on Monk Subdivision: the Lac Therrien causeway along the marshes, the neat girder bridge over Abenaki river and the cool concrete culvert spanning Rivière du Sud at Ste-Euphémie.

Lac Therrien near Monk (credit: Google Earth)


But as you can already guess, this bulge design is only one step on the road to finding an acceptable solution for the layout. Stay tuned for the next installment where we will go back outside the room to loop the loop.

Thursday, April 27, 2023

Thinking outside the Room - Part 1

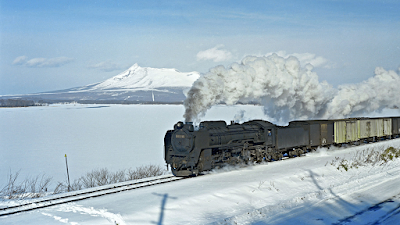
A steam freight train in Hokkaido, circa 1968

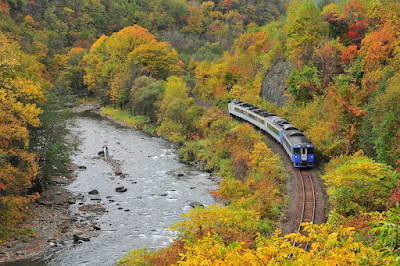
As Sanstead is coming to an end, it’s now time to think about Monk. A series of discussions with Chris Mears took us to Hokkaido during the last years of steam operation in Japan in the late 1960s and early 1970s. We explored ways to create a series of cameo scenes linked together on a scenic N scale layout using Kato components. The goal was not to build something or to plan for a real layout, but to play with a lesser known prototype which share a lot of Canadian-like feature such as topography, rivers, vegetation and mountains. Sure enough, steam era in rural Japan is an impressive thing. It merges together state of the art late steamers with narrow gauge and layout-friendly features such as steep grades, scenic bridges and tunnels. The locomotives of that era are themselves marvels of engineering; the Japanese having pushed to the limit what could be done with narrow gauge. Fair enough, having seen these brutish 4-6-2, 4-6-4, 2-8-2 and 2-8-4 with my very own eyes, I can tell you can’t distinguish them from their standard gauge brethren if you don’t start to look closely at the rail spacing. In some way, they heavily borrow from big American steamers while keeping specifically Japanese details that puts them, in my mind, in a similar category than Canadian steamers. The vocabulary is the same, but the accent is different if I could say.

A train running in a valley in Hokkaido

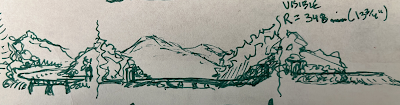
Compressing a river horizontally...

A study in elevation


Such a layout doesn’t need to replicate complex operations. As is fashionable with Japanese layout, you railfan your N scale trains on a generally quite simple track plan. In my eyes, it’s an excuse to see nice trains crossing through a beautiful landscape. For this reason, I can easily imagine a single track mainline with two hidden returning loops acting like shadow stations. The visible part of the layout is depicting a river valley and several bridges and tunnels dividing 3 similar but differently framed scenes. It may sound gimmicky, but when you study rural lines in Hokkaido, you quickly discover than in some areas, it was common to find 4 major bridges per miles. In that regard, the old Shiranuka Line provides inspiration beyond your wildest dreams.


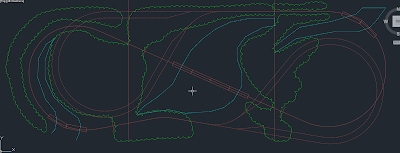
A single mainline layout with hidden returning loops

That said, as much as I love late Japanese steam and find Kato N scale locomotives exquisite and reliable, it is very unlikely I will commit to that. However, all these themes of framing scenes about large steamers traveling a rural landscape with some staging are in fact nothing more than what Monk is all about. Once again, good design is universal and can serve several prototypes over continents.


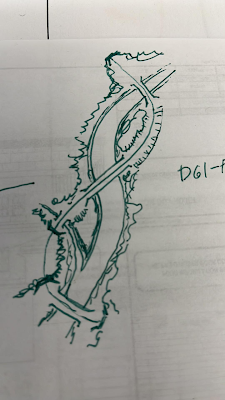
Returning loops in dashed lines

One thing I’ve liked with the Japanese layout is the returning loops used as staging. Many Europeans (and Americans) use that trick to create a sense of going somewhere. It is particularly useful when you want to model traffic between two division points without having to model them or fiddle with trains. The automated reversing ensure traffic moves in both directions. It’s also easy to automate and control trains in a compelling way.


In the case of Monk, there are two options. The first one is to replace my current staging with two loops under the upper level (Armagh). I once explored that idea with Chris Mears and while it’s extremely elegant on paper, it’s a nightmare to build and to maintain. Accessibility is appalling and hiding tack with scenery is a recipe for disaster. It’s not that different from what I have built until now. Trevor Marshall advised me to stay away from hidden staging and tracks that cannot be maintained properly. I’m not sure I listened to him even if I knew he was right. Current maintenance issues on Murray Bay Subdivision do remind me how frustrating dealing with electrical issues is. Mind you, all tracks all accessible and visible on that layout!


Enters option 2, which consist in building the loops outside the room. Not something I was eager to do, but now I’m seeing more and more value to that. Basically, two loops would be built on a table on top of each other. The yard throats would be installed in such a way they don’t overlap, which would make them easier to monitor, repair or maintain in the future.


This option would remove all hidden trackage from the layout which is a good start. But it would also get rid of superposed trackage in some area, eliminating vertical clearance issues. Another good point is that scenery will be much more easier to create since there will be no need for access hatches and other clumsy and annoying contraptions. Also, Armagh scene would be narrower with the elimination of the stating yard that was located being it. More space in the room isn’t a bad proposition.


Finally, the swing gate will only have to deal with a single track and no grade, which will make track alignment easier and less prone to seasonal dilation. Yes, this is a serious issue to keep in my and I wouldn’t mind making the bridge even more simpler.


That said, it means that almost everything I built last year is now completely useless. Is it a big issue? Not really. I’ve learned a great deal about model railroading in the last 18 months, much more than I could have ever predicted. My goals are the same, but I have more sophisticated tools to reach them and it would be foolish to go forward with premises that no longer makes sense and show their limitations.


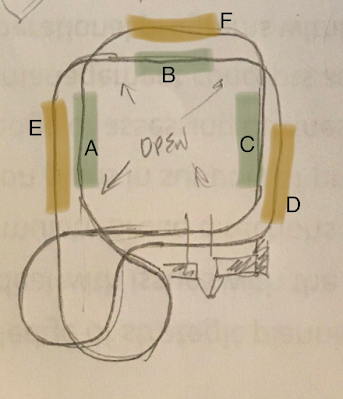
As extra, here's an interesting sketch by Chris Mears who describes it better than me:

I’m fooling around with this a lot. The progression through scenes (green shade) is not ABC..F but AFC-DBE. An alternation so as the train moves through the room it doesn’t move sequentially from wall to wall with half a train still in each wall-scene but like a series of stages so the visible train is only visible on opposite room sides.

Non sequential scenes (credit: Chris Mears)

But let's stop it for today... more interesting thoughts to share in a next installment!


Tuesday, April 25, 2023

Harlem Station Layout for Sale

Just a short post to announce that my Harlem Station layout is for sale.


The layout has been in storage in my house for some year, gathering proverbial dust and not being used. Since I'm about to remodelling the house, I'm putting the layout for sale. If you want to own this piece of modelling replicating faithfully the Erie Harlem Station, please contact me.


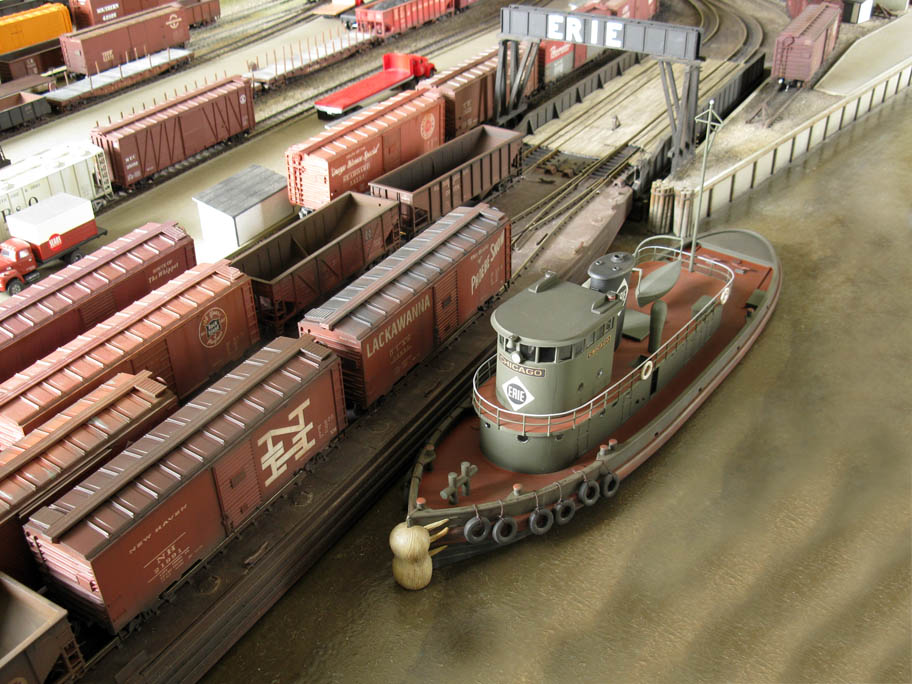
The sale includes the layout itself, a carfloat, a tugboat, a kitbashed pontoon bridge and a transfer crane. Since the layout hasn't been used for a few years, expect the rails to need a good cleaning and maybe to solder some wires that could have go loose over time.


Asking price is $850 CAD or $625 USD. To put it in context, this amount barely covers the expenses to acquire the materials and kits to build it, so it's a quite a deal. Also, I can't provide no means of transportation (I have no car), hence the reason why I'm selling it for such a low cost. That said, I won't start to negotiate on the price since a lot of personal time and resources where invested in researching and building it.


Size is about 5' x 7' and the layout can be split in two modules for ease of transportation. That said, if you can move it in one piece, it's for the better.


Feel free to contact me for any question!

Sunday, April 16, 2023

One scene at once..

I suspect long time readers are probably getting tired of hearing me pushing my drivel about grass. It seems the remaining work on the layout is all about applying more vegetation and after some time, it's just a case of repetition. I have, truth to be told, nothing new under the sun to share with you in terms of technical advices on this subject. However, I think sharing before and after picture may provide some kind of genuine interest and show how subtle changes can make a great difference.

The backroad in Clermont was an afterthought. The village scene and Wieland weren't intended to blend together, but at some point in time, it became almost natural they should connect. Hence, the creation of a gravel road. We had serious reservation about that, but I think it worked out fine. Louis-Marie also played with some forced perspective on the backdrop to make sure the asphalt road didn't end in the middle of nowhere. I honestly thought it would be dubious, but his little cardboard cut out just shows he was absolutely right. It will be improve and turned into a permanent feature.


In the vicinity, the hillside is also now completely covered with leaves and grass. Instead of gluing a carpet of dead leaves, I added some death grass and bushes to add more depth to the scene. I consider the results are much better than the rest of the forest and may, in the future, add some spots there to improve the scenery.


On the left, it's just crushed leaves... lacks texture!

Another spot was the locomotive shop in Wieland. It now has a nice parking lot. As with the road, when the gravel is dry, I also use a large 2" paintbrush to add a layer of powered limestone/unsanded grout to add that light dust layer so typical on mineral surfaces.


Brushing limestone powder changes everything!

The old off spot cars siding has also received more dead grass made of jute and various static grass fibers to be closer to prototype. Same thing happened with the ditches. I simply glue more material over the first layer of scenery. It adds colors, volume and textures.


Monday, April 3, 2023

Long Dead Grass in Wieland


Writing posts several weeks after the fact is never an easy task. It seems like all your thoughts are muddled and you lose the subtle ideas that crossed your mind when accomplishing the task. Nevertheless, it’s my duty to write about these things, even if time has passed.


You probably remember that I experimented a lot with grass and texture over the last few months. As expected, this prompted me to revisit the Murray Bay Subdivision and to apply the lessons learned. The was still a lot of open fields that required more texture. Some basic grass had been applied a few years ago, but it wasn’t satisfying. The color was slightly off and it lacked volume. Indeed, dead plants in ditches are much more than simple lawn.


Using Chris Mears proverbial support as a starting point, I started to apply diluted white glue in patches over the first layer of grass. Then, I made a custom mix of very long 12mm grass, 6mm fibers, jutes and smaller grass. It was haphazardly blended together in a random way to have some variation. I dabbed that mix over the glue and started to create clumps here and there. Different mixes were tried to ensure greater variety, but always using the same basic ingredients for a consistent color palette.

When dry, the vegetation was misted with hairsprays and dead leaves and fine green foam were sprinkled over to add more color and textures. These would replicate dead leaves who don’t fall during winter. 


The same approach was used to blend the new photobackdrop with the layout. This time, colors were carefully blended to match the vegetation on the picture. That was crucial to create a sense of continuity between the 3D and 2D worlds.


I still need to add more vegetation to complete the scene, but I must admit I really like the idea that you can build a scene in several steps over a long period of time. I’m not the first one to propose that, but experimenting with it really shows the potential. If you are not happy with the results, just dump more material until it reaches a critical mass!

By the way, I'm also the harbinger of a sad news about Charlevoix Railway. As we are speaking, the yard in Clermont has been dismantled completely after more than a decade of inactivities. It was to be expected, but in my mind, it would just rot and rust there for eternity. The return of freight service on the line was always a pipe dream, but we can now safely say it is no longer even a dream. hat said, no news if Wieland will be dismantled since it was still used by MoW. However, nothing is safe and maybe the old CCF snow plow is about to disappear from the landscape...