Monday, November 28, 2022

Stanstead - Steady Progress and Stone Carving

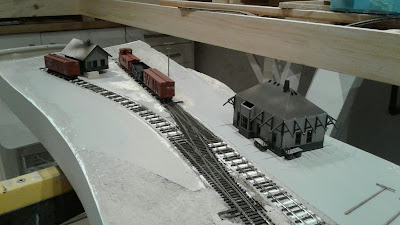
Work has continued on the Stanstead module. Maybe not at the pace I wanted due to waiting for some scenic material to be shipped at my door. Nevertheless, progress is progress and meanwhile I worked on kitbashing Roundhouse Overland passenger cars into something closer to GTR practices of the time.


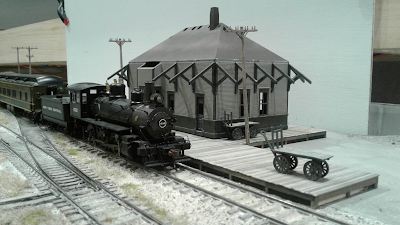
Among the chief achievements is the station platform made of 6mm plywood covered in Mt Albert scale lumbers individually stained. It took two good evenings at a leisure pace to get it done. However, I've learned from my mistakes and decided it will be screwed in place when the wet scenery is in place to make sure it won't warp due to water.


I really like the result and you can get a sense of the place just looking at this picture. Such a classic sight seen on so many old time pictures. The platform is a little too clean to my taste, but weathering will come later.


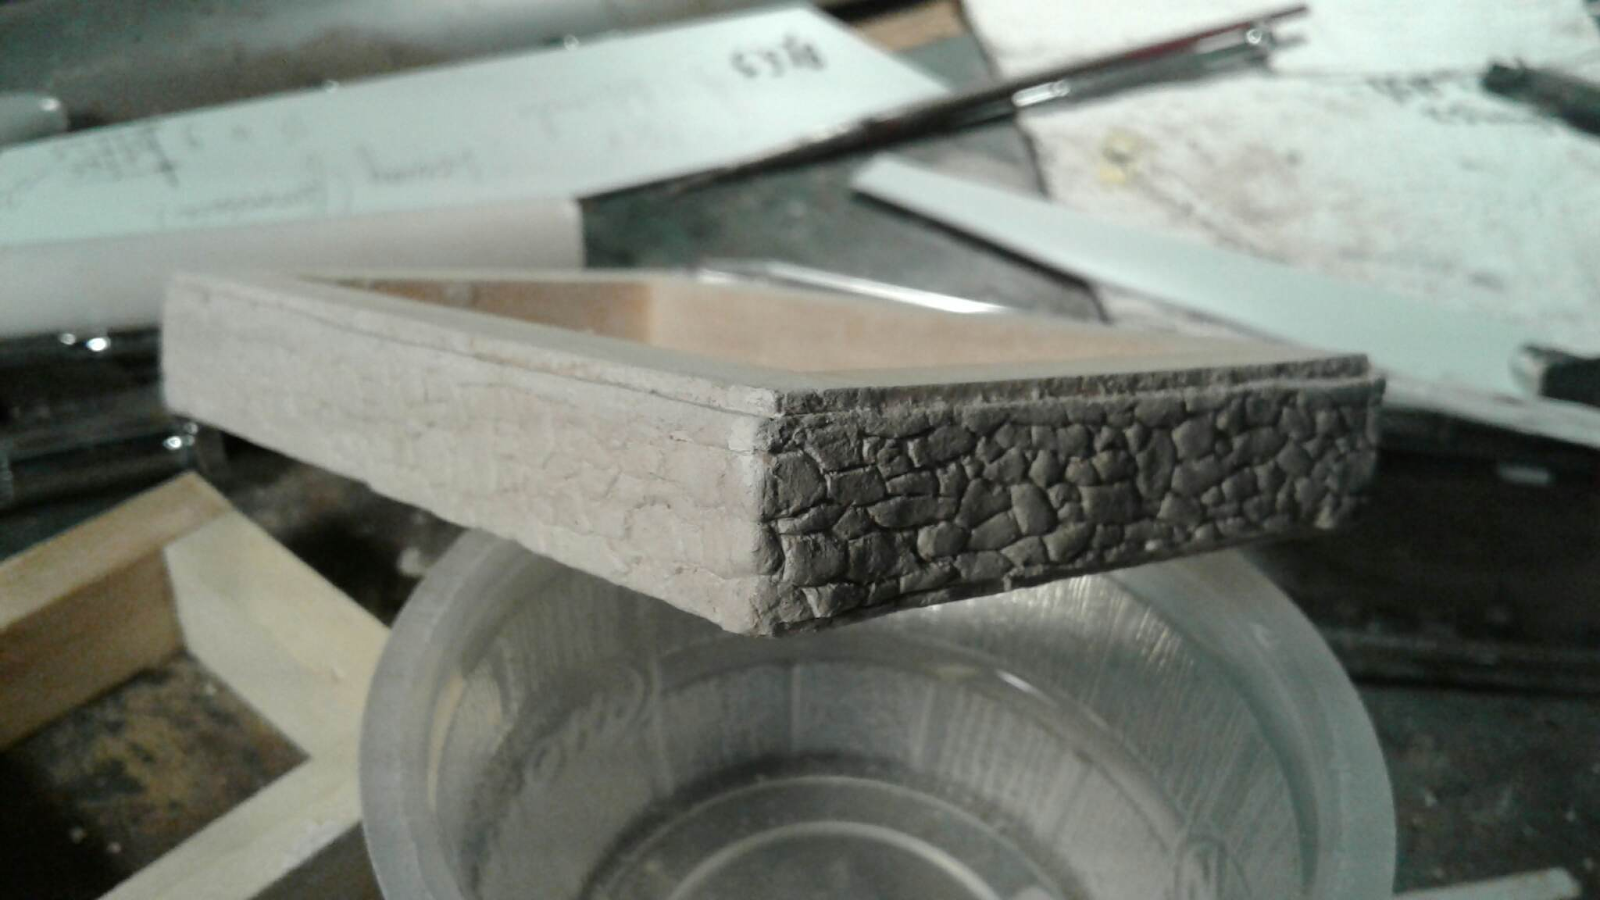
I then tried to carve stone foundations for the water tank and the freight shed as depicted on the few pictures I have of Stanstead station. I started with a frame of pine covered in carpenter's glue on which I wrapped a 1mm layer of DAS air drying clay. With a small piece of sharpened styrene, I started to sculpt individually each stone according to pictures found online. Working in heritage building preservation certainly helps with this step.


When dry, the clay was painted dark gray and I started to pick up each stone in a different color. About 4 colors varying from warm light gray to rusty brown were used. At that point, mortar lines were added using unsanded light beige tile grout fixed in place with water.


Weathering was done by streaking the surface with AK Kerosene and Oil wash. It's a blackish grungy color that works well with old weathered stone work. Streaking was achieved by using their Odorless Solvent to work the effect around. Finally, dark olive green PanPastel was brushed at the base of the wall to add a layer of damp moss growing there.

The final product is not bad, but it looks a little bit dark on the layer and I'm really tempted to mist it later with a vey light white wash to blend it better with its surrounding. I may be tempted to do the same with the structures. Adding a wash really made them look dark and gloomy!


Monday, November 21, 2022

Stanstead - Where Vegetation Grows

Time to move forward with covering the ground with vegetation. The layout being set in late summer/early fall, a mix of dry and green grass is required.

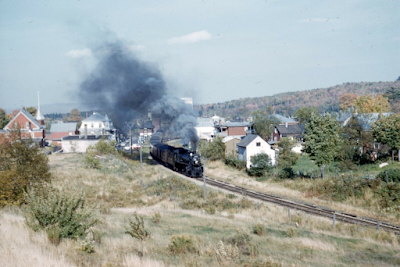
CPR, St-Gabriel-de-Brandon in the 1950s (source: unknown)

Looking at several prototype pictures from my "inspiration" folder, it became evident that burnt dead grass was often lining the tracks on the gravel shoulder, followed by straw colored dying grass, then some dull greens. Thus, I decided to go forward with that recipe.

I worked by stretches of about 2 or 3 feet at a time, repeating the same procedure over and over, making sure to implement a few variation to break the pattern. Most grass was applied by hand directly in white glue, using a random daubing motion. I really like that step.

Ground foam was also sprinkled here and there to model small plants and I added some tall grass on the lower portion of the roadbed and ditches. That's probably where I made a first mistake. I used very dark green long static grass thinking that vegetation in the ditches would be greener, but looking at pictures again, I found out they also die rather quickly (at least, the very long shafts dries early). Using my airbrush, I toned them down a little bit and added leaves over them to create bushes.


Speaking of bushes, it was my first time using polyfiber and creating them. Quite easy and effective. They were sprinkled with Noch leaves and foam. I only add very bright green leaves, thus I decided to change their color by mixing them with some PanPastel into a small container. A really effective way to alter their color! However, I made them brown and they should have been closer to a yellowish green. I'll probably fix that in the future by making another batch of leaves. As you can see, ones should always follow pictures in such cases.

I haven't yet covered the fields because I want to experiment with basket liners as often shown in UK modelling books. It looks like a very interesting way to create tall grass in an effective and realistic manner.

Sunday, November 20, 2022

Stanstead - Ground and Scenery

So much things happened in Stanstead I lost track of the blog. To make a long story short, I made steady progress during the week, including finalizing the wiring and installing push rods to control turnouts. With tracks working well, it's time to move forward with scenery.

At first, I glued several small rocks and sands on the roadbed sides to replicate earth that was piled up there to build the grade. It's crude, but works as a layer foundation for future vegetation.

I also glued small plaster rock faces on the hills to replicate granite outcrops. The idea came to me after seeing such outcrops on Google Earth where the old Stanstead station used to be. Also, I always like this sight of fields with rocks and cows. Some ground foam of various size and colors were added around them to model the moss that grows generally around them. With a sponge, I also dabbed light grey spots to replicate lichens. I'm quite happy with the results! 


Then it was time to ballast the tracks. This time, I wanted something different, looking like the dirty and loose ballast used at the turn of the century. That ballast was generally sourced in some "gravelish" sand pit or nearby cut. Made of soil, it was natural, not crushed stone. To replicate it, I mixed 1/3 sand color tile grout (unsanded type), 1/3 sifted dirt from my backyard and 1/3 crushed limestone dust. I kept the small pebbles (1mm) from the dirt as you can often see them on old prototype pictures. The grout helps to keep the color light. I'm not a fan of how natural ballast gets very dark when glued, so grout is perfect to counter that.


Unfortunately, even if I had sealed the MDF turntable pit ring, it did swell a little bit when the glue was drying, ruining all my previous fine tuning. Still some work to do...


Thursday, November 10, 2022

Stanstead – 3D Print VS Scratchbuiding

The station is 3D printed and the freight house is scratchbuilt

The 3D printing debate is still raging, with some purists considering it a form of repudiation of craftsmanship. Others, on the other hand, like any new technology, consider it a panacea and forget it’s only one tool in the toolbox. More nuanced point of views do exist too and a few do recognize they don’t have the desire to develop the skills required to learn how to be efficient with 3D printing. I won’t argue with that. It can be a monumental waste of time in certain circumstances.
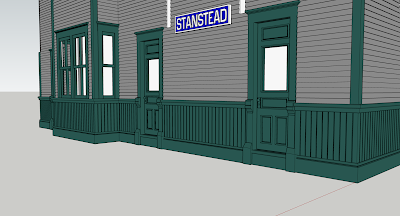
 

3D modelling enables you to go fully prototypical with details

As an experiment, I decided to 3D print Stanstead station. It was not my initial plan and to be honest, I had already purchased clapboard siding sheets for the project. However, after building a cardboard mockup, I quickly found out getting the roof perfect was hard. Also, replicating the intricate mouldings and plinths on the wainscotting would be almost impossible. As for doors and windows, it was all compromises which I didn’t want to make. I thought 3D printing would be a suitable way to get things done quickly and accurately.


Before printing the full station, I printed a slice of it.

It took half a day to create the 3D model. I simply extruded the clapboard profiles, created window and door types and added a few details. I elected to print the walls and roof as a monolith and created holes so the resin could flow out of the station as it printed (pooling resin in a closed volume is never a good idea). Roof brackets were printed individually thought for ease of printing and painting. My theory that it should be printed like a freight car shell. The roof eaves would be added later (printed or styrene). The model took 4 hours and half to print and had a cost of a few dollars. Assembly was straight forward, details accurate and geometry relatively straight. I modelled the interior partitions walls, so the model was already reinforced against warping which is a real issue with resin.


The station is printed as a single part to make it sturdy

Painting was fast and honestly; I consider printing the station was a good decision overall. The design and printing phase was enjoyable, took less time than a full scratchbuilt and was much more accurate, enabling me to recreate intricate architectural details that Tichy and Grandt don’t offer.
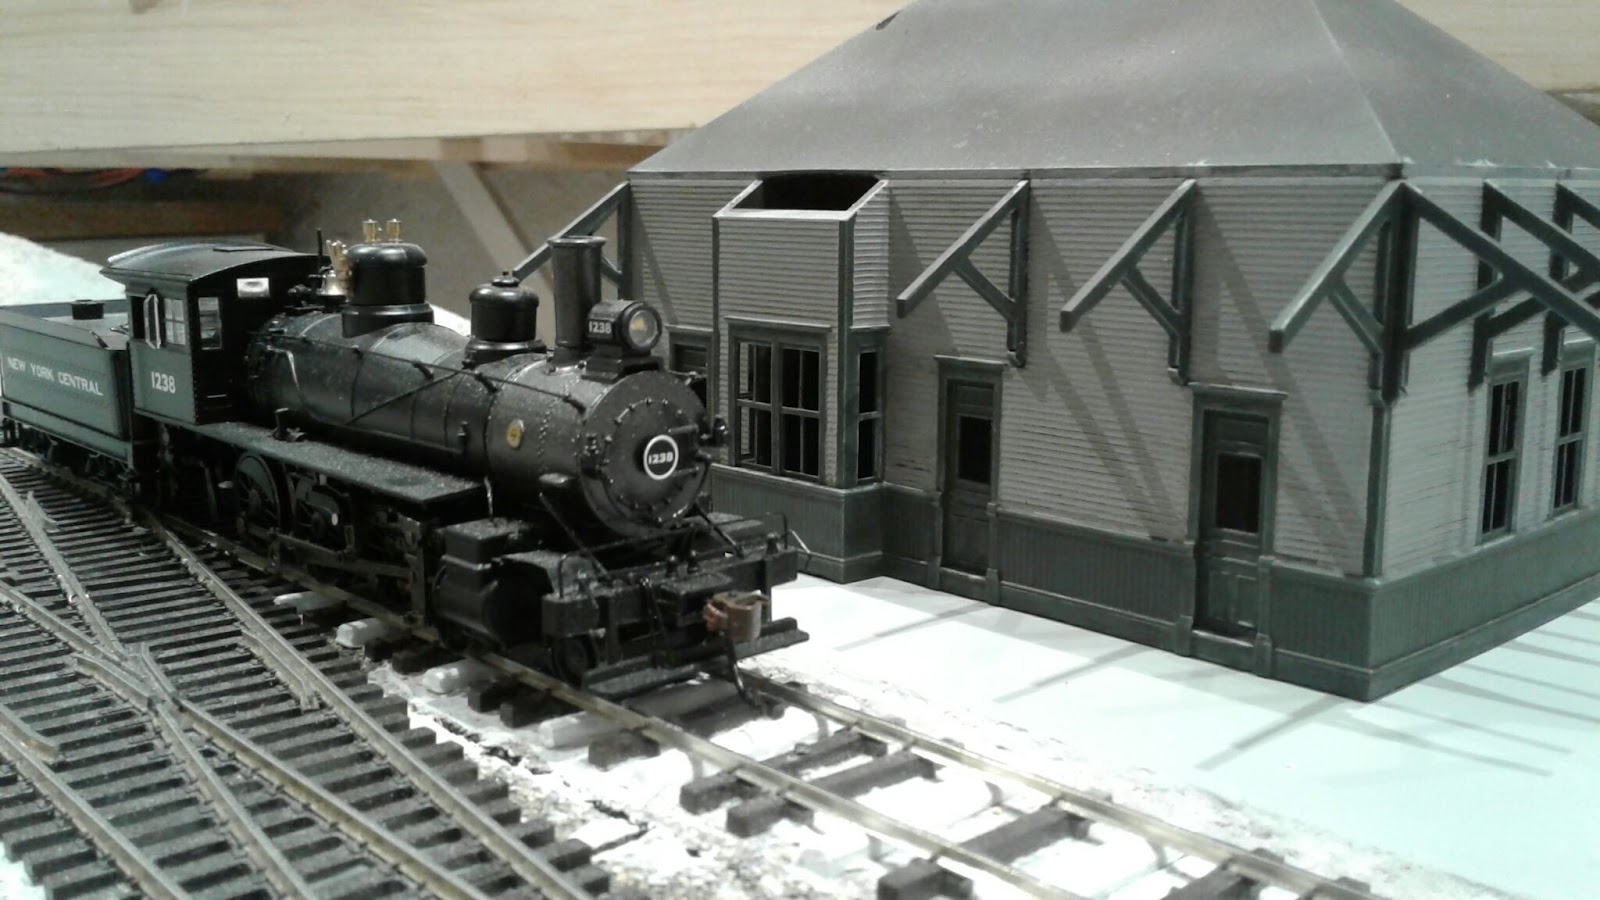
 

A partially painted station to see how it looks on the layout

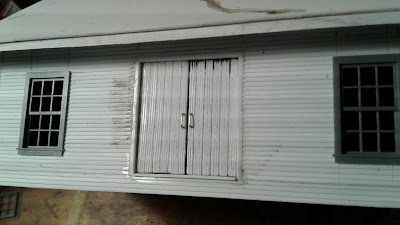
When came time to build the water tower and freight house, I decided to go full scratchbuilt with styrene. These structures are simpler and use basic components. I used Tichy windows and doors, all the rest was crafted by hand, including the large doors. It took about 8 hours to put together the freight house and maybe 3 hours for the water tower. These structures involved a lot of guesswork since I had only poor photographic evidence to work with. It consumed a lot of time even if they were simpler than the station.
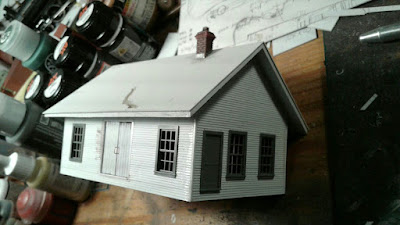
 

After 8 hours and lots of compromises

Custom distressed wooden planks are fun to make by hand

The tower was straighforward and enjoyable

Was it enjoyable? The water tower was… but the freight station was not as I had to make a lot on annoying compromises to fit the commercial detail parts I used. At the end of the day, it made the freight house look a little bit awkward. Since I didn’t have a 3D model, it was impossible to validate my design choice and the building proportions, which was a hindrance until the end. Even with a coat of paint, I’m not sure I like the building. I may simply print it from scratch and sell the original styrene one point in the future. Even if I would scratchbuild it, I think creating a 3D model helps to iron out the details as it’s a useful mockup that can be modified and improved.

The freight house after some paint.

At the end of the day, I don’t see any clear winner. Each technique has its pros and cons. 3D printing is fast and accurate if you know what you are doing. It’s cost efficient too, but produce a lot of toxic waste and fumes that must be handled carefully. That’s an aspect I hate of 3D printing. Scratchbuilding is cool, fun, intuitive, but can lead to unsightly results. It’s also more costly in material (though cheaper since a 3D printed is not cheap), more involving and, depending on if you work with commercial parts, less accurate. When I look at it, I consider each technique has its merits, and to be honest, they are complementary. The water tower sprout and freight house chimney are good examples of things that are better printed. Windows and doors are also nice to print since it removes the accuracy issues caused by commercial parts. 
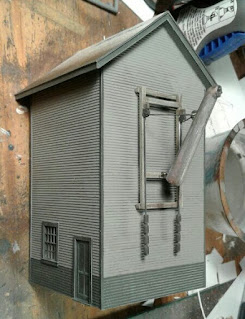
Completed tower with a Heljan water sprout

I’m quite glad to have experimented both techniques at the same time on the same type of objects. It really put things in perspective.
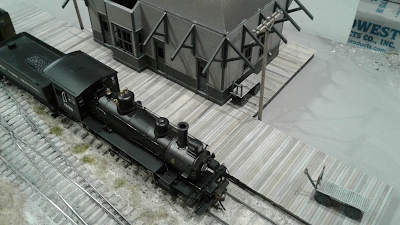
Tuesday, November 8, 2022

Stanstead - A Custom Turntable - A Follow Up

Stanstead may be seen as a race, or a marathon… but at least some experiment with a deadline and a need to move forward instead of getting bogged down. As a module, it is nothing more than a general rehearsal before delving more into Monk Subdivision later. The time limit is somewhat artificial but is basically tied to Christmas and having time to figure out the electronics that will be the brain of Monk.


One of the big challenges has been to build a suitable turntable. This is something that was on the back of my head for years but which I never dared to do. I was convinced I would use the tried-and-true Bob Hayden’s method with the phone jack plug once explained in a Model Railroader article many years ago and previously shown in a post written a few days ago.


I decided early on the turntable would be 9 inches long to fit most of my locomotives which translates roughly to 65 scale feet. I felt it was a quite prototypical length for a branchline turntable built in the late 1800s. A quick search online shown me the old CPR St. Mary’s pitless steel turntable would be a perfect fit for the project. I had only one goal, make the turntable as mundane, small and subdued as possible. I didn’t want it to be the center of attention, but merely a supporting character. Having had the joy to operate once on Trevor Marshall’s Port Rowan layout, I knew they simpler these elements are, the better they blend into a compelling scene.


As for designing the turntable, I decided to build it on the go, not bogging me down trying to figure out each detail (analysis paralysis isn’t it!). I started with a decent understanding of what I was doing then elected to go forward quickly and troubleshoot issues has they would arise during the building process.

Last time I wrote about the turntable, it was painted and ready to be installed. I thought some more info on the painting process could be shared.

The girders were primed dark brown, then with a sponge, I added lots of colors including light blue, orange, red oxide and purple. When you look at a read rusted girder bridge, you can see a lot of color variation going far beyond earth and rust colors. When dry, I applied 2 coats of hairspray and a light coat of weathered black (mainly black with white, blue and green mixed in it). After an hour, using an old brush with water, I started to dab the black paint to create chipping effects. I didn’t go overboard as I wanted a weathering level adequate for a 20 years old steel structure that wasn’t repainted since installation. After that, I drybrushed the rivets with a light color to make them pop, applied a few washes and some rust weathering powder on top of the lower and top chords. Classic stuff if you ask me. Later, I’ll add wooden handle as per prototype since it’s an Armstrong type turntable.


Fitting the turntable to the layout was more complicated than anticipated. I removed all the scenic materials, including fiberboard and cork until I reached the original plywood board. As this is a recycled baseboard, several layers had been added over the years. A 1/2” plywood plank was cut to size and a hole drilled to host the female part of the jack plug. Once again, that part was mounted on a 2.5 styrene sheet secured on the plywood with screws. Unfortunately, the turntable bridge was too high and I had to carve a niche into the plywood with a chisel to sink the styrene mounting plate.

The pit rail on glued on the MDF ring


 At first, I wasn’t sure I wanted a pit rail but it became obvious it was prototypical and that I needed it to make sure the bridge was perfectly aligned. The jack plug can induce some wobble than must be countered. The pit rail was mounted on a ¼ MDF ring that I sealed with carpenter glue. A strip of cardboard was temporarily glued on the outside and would be used as a guide to install the rail and make sure it was perfectly circle. I used Atlas code 55 rails slided into Peco code 83 ties cut in half. Before gluing, I carefully curved the rail by hand to give it the correct curvature. You don’t want tension forces in your rails when the radius is about 4.25”. The pit rail joint was soldered and the assembly was cemented with 5-minutes epoxy glue. When dry, the MDF ring was then glued and screwed into place. Why screws? MDF is notoriously knowns for warping, thus adding 8 screws and glue made sure it wouldn’t bulge in the future.


Finally, pit assembly was permanently fastened on the layout board with screws in the right alignment and the approach track was laid in place. Old grey leftover timbers from a very old wooden bridge project were used, cut to length and assembled to create a retaining wall at the end of the approach track as was usual for turntable that didn’t have a concrete or stone walled pit.


On prototype, the spacing between the rail is minimal

The last step will be to add brass bearings (probably brass tubing) under each end of the turntable. These will slide on the pit rail and ensure the bridge is always perfectly aligned and horizontal. The girders are about 1.5mm over the rail head.