You may consider the Stanstead Branch as the spiritual successor to the Connors layout since it is based in the same era, depict a similar end of line terminal and follow the same modelling philosophy of its predecessor.
Modelling 19th century or early 20th century tracks with commercial products may seem to be a daunting task. Regular and rectangular ties spaced closely and evenly hardly capture that whimsical look found on old pictures. As for ballast, any crushed rock stuff won't do the deal since ballast used to be simply dirt collected nearby the railway.
With that said, we must acknowledge my tendency to try to tweak commercial products kicks back facing such a challenge. I'm not a purist regarding handlaid track... it's not my cup of tea though it probably shines the best when dealing with turn of the century stuff. Back then, ties were often barely treated and tie plates were not yet a thing on branches and older lines. In a perfect world, handlaying code 55 would be the winning ticket, but there are other ways to achieve a decent result using Peco American Code 70 track and turnouts.
First, let's take a look at the following picture showing a Boston & Maine yard in Cambridge, Massachusetts somewhere around 1890 and 1900. Tie spacing is quite uneven and seem to follow grossly a 24" spacing (if not more), which was a common practice on branchlines, sidings and yards back in the days.
 |
| B&M Boxcar in East Cambridge, MA (source: Historic New England) |
Another interesting detail is the tie shapes. Most of them are tree trunks that got the top and bottom squared, but kept their round sides. Remark how many of them aren't regular, but follow the imperfection of the tree. These are roughly rectangular beams, but not squared ones. Also, the tie width varies from very thin to very large. Some have trapezoidal shapes too or twisted ends. How can we model that?
Well, let's start with some Mike Confalone's wisdom who tells us we should always remove one ties out of 5 or 6 from commercial tracks, cut the web and space them unevenly to get a more natural and realistic look. In our case, lots of ties must be removed because we go a step further by replacing some commercial ties by new custom ones made of styrene.
 |
| A coat of paint blends commercial and custom ties together |
The replacement ties, which I like to call "funky ties" will have all the idiosyncrasies observed in the aforementioned picture. They are twisted, have rounded edged, sometimes they are tapered and they have large cracks. I start by crudely shaping a bit of styrene, then, using a #11 blade, I shape the sides to give them the curved profile typical of a tree trunk. Finally, several passes of razor saw add wood grain which is further improved by adding cracks with a metal pick and blades.
 |
| Yes, this is a tie... |
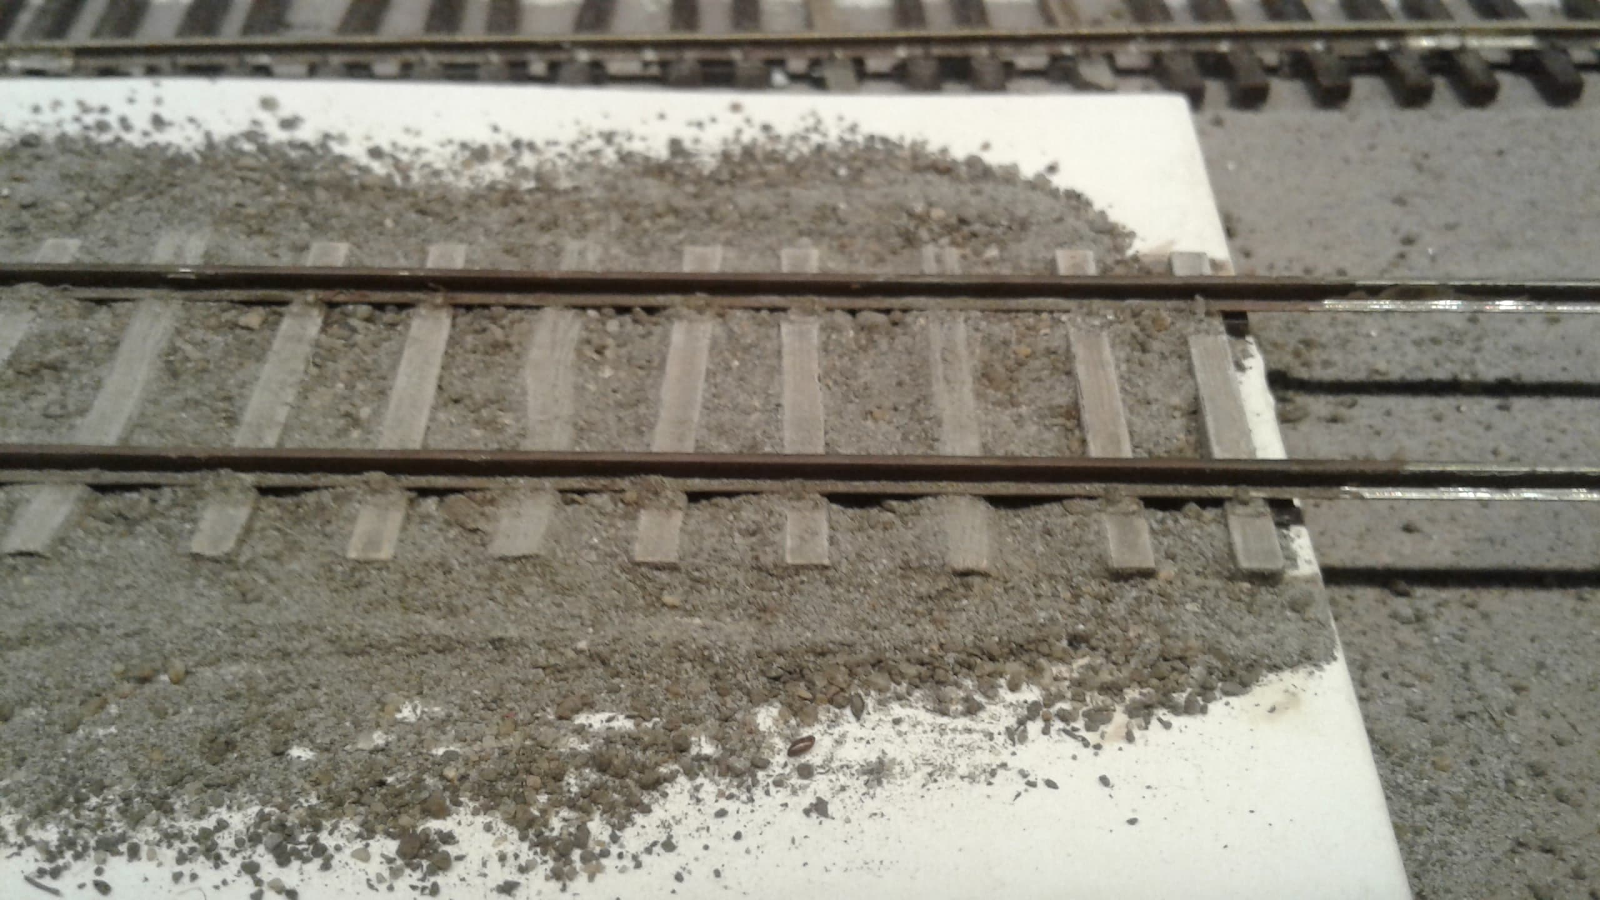
On my first mockup, I replaced a lot of ties with custom ones, but didn't go to crazy with the tie spacing. Also, the funky ties weren't that much funky because I didn't want a parody of a track. However, once ballasted, the custom ties blended so well with the Peco ones it was very hard to tell them apart, nullifying the desire of an imperfect trackwork. However, I really liked how the ballast made of sifted dirt from my yard blended with fine limestone dust replicated well the cheap soil used back in the days.


Having learned from that first experiment, I decided to make a second mockup and go all in with funky ties. The new ones were outrageously distorted and full of cracks. I also spaced the Peco ties further apart to get that 24"-28" look. Also, instead of replacing 1 ties out of 3, I made my life easier by only replacing one out of 5. My thoughts were that having a few very weird ties would make a much stronger impression than many very regular ones. Also, I didn't care that much with tie alignement and some weren't perfectly perpendicular to the rails and it was OK. That time, once ballasted, the ties looked much better and very close to the prototype picture. It seems we have found a winner here.
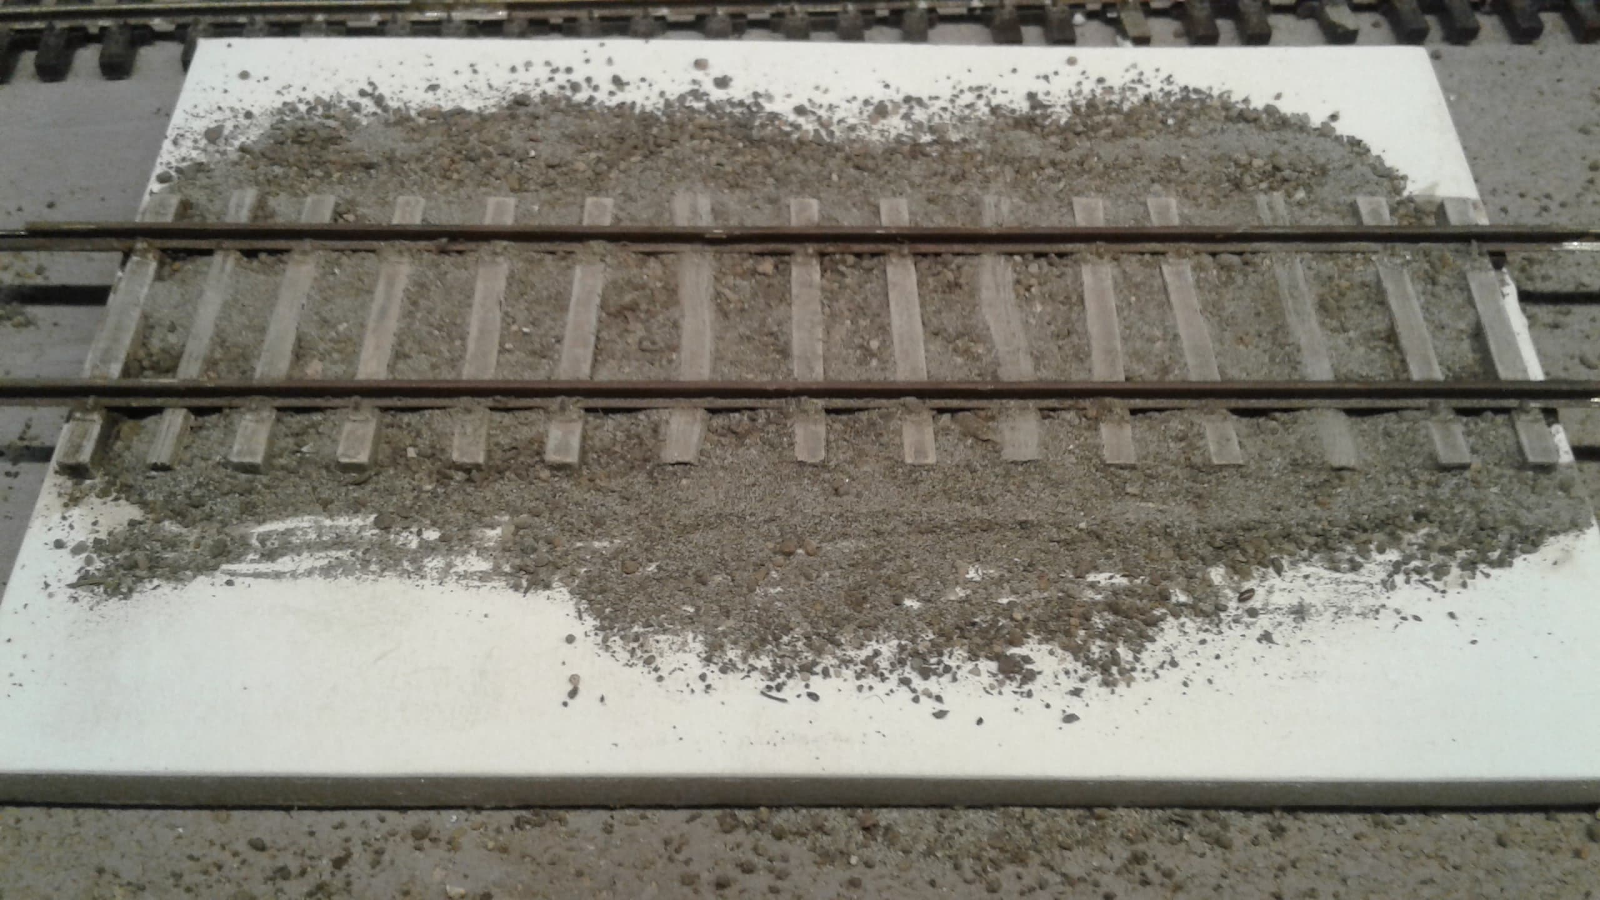 |
| Ballast blends everything together |

Let us summarize the lessons learned:
1) Track spacing is the most important parameter and you can get away without replacing ties if you go forward with this. Remember you will have to separate every ties, which is time consuming and makes laying track harder.
2) Only replace 1 tie out of 4. More than that is useless and less makes it unnoticeable.
3) You custom ties must be very funky. They should be noticeably larger or thinner than the commercial ones. Make them over twisted, tapered and cracked. Don't panic if they look weird and overdone because once painted and ballasted, they will blend with the rest.
4) Paint you ties to look like untreated wood. An easy formula is painting the ties with a tan and white acrylic blend. Don't make it dark, keep it very light. When dry, apply a coat of AK Interactive AK263 Wash For Wood and let it dry. Then, drybrush the ties with off white to make the grain pop up, particularly on custom ties. Once again, don't be shy, the ballast with stain the ties and make then blend perfectly with their surroundings.
Some have trapezoidal shapes too or twisted ends. How can we model that? I would make a pattern of what you want and cast a mold of it in latex and make the ties you want from resins.
ReplyDeleteI carved about 20 twisted ties years in a matter of maybe half an hour, they would indeed make decent patterns to be casted.
DeleteOr 3D print them. The normal "lines" caused by inexpensive 3D printers might just look like wood grain in this application.
ReplyDeleteI'm having fun sculpting them out of styrene. I wouldn't mind printing them, but I'm not good with modelling irregular shapes and textures.
DeleteProbably not something you’re interested in, but I remember an article decades ago in RMC about using natural twigs as tie stock for a logging line or such. The modeler used a belt sander to create a flat surface, glued them down then sanded the tops. I could picture using your carving approach on them for the outlier ties. -Mike
ReplyDeleteI'm aware of that technique and once entertained the idea of using it when I was experimenting in S scale. However, I have serious reservations about mixing plastic and wood as they weather differently and have different grain. I fear they would look out of place instead of blending. Also, I'm not equipped with a belt sander, so it would be hard to get a consistent result in a timely matter. That said, if I were handlaying, I would certainly go that way.
Delete