Wednesday, November 2, 2016

Ye Olde Shed - Now in Clermont

The shed is now completely painted and weathered. I settled on a completely rusted roof instead of a mostly pristine galvanised steel. So far, I find the rust a little bit too "fresh". I'll probably wait until the oil paint completely dry before adding a coat of dullcote and alcohol + india ink . It will tone done the red oxide color a little bit and blend it with the greyish walls.


I hope to "plant" the shed on its spot this evening to test if it feels OK with the setting. I'm also in the process of designing the nearby farm house. I want it to be a very mundane two-storey structure from the late 19th/early 20th century.

A few hours later... on the layout


 I decided to install the shed on the layout this evening. Louis-Marie was really impressed with the structure. Being raised on a farm he could directly relate with the new shed.


The nice thing is the lighting over there is closer to daylight and made the colors much more realistic than at home. In that regard, it means I won't waste my time adjusting the paint color. It is right as it is.


I think the new structure blend perfectly with its surrounding and the rural backdrop. It plays it role perfectly without being too cute or catching all the attention. It's fun whn your intuition is right and that's one of these moments.


I took many pictures soo I could evaluate how the scene is evolving. Feel free to criticize.


Now I have to bash the farm house using the structure you can see on the photos.  It's a big challenge because the house will have to materialize that particular architecture typical of French Canada without looking like a caricature. The big problem will be getting the windows right. My goal is to represent an old wood framed house that got defaced in the 1960s-1970s with cheap Masonite clapboard (ColorLok) and flimsy aluminium sash windows. In a word, an average house that lost all its architectural detail during a lazy home improvement going bad! Rural counties are full of these faded beauties... so stay tuned for a new face lift special.

Our next victim is the farm house

Friday, October 28, 2016

The Little Shed on The Prairie


Life is a strange thing and modelling isn’t an exception. For months, we used an old Revell stable as a mock up in Clermont to represent a small shed standing at the crossroad. Our intent was to replace the cheap plastic model with a fully scratchbuilt structure. However, as months went by, it was evident the Revell structure had the right size and right proportion for that spot. And thus, we decided to reuse it but slightly alter its appearance so it would be less recognizable and closer to what can be found in Charlevoix.

The Revell stable is typical of 1950s-1960s kits full of small cast on details. They were included back then to add a sense of realism to the structure, but in fact they made them less generic thus harder to fit a vast array of purpose. In fact, when you remove all these cheesy details, you find out a very basic and common wooden shed that can be found from California to Newfoundland.


In my case, a generic weather-beaten wood shed was required. Thus, I decided to replace the side walls full of cute door by windowless sides of wood planks. The new walls were made out of a 1.5 slab of styrene with irregular width styrene “planks” distressed with a metal saw blade. One fine aspect of the original structure was the rotten ends of the planks and I reproduced that very realistic effect on my new walls.


Modified Tichy windows were used to replace the crude openings left in the shed gables. Lance Mindheim always reminds people how oversized window details can kill a structure and I fully agree with him on that one.


As for the rood, the coarse wood shingle texture was covered with prepainted corrugated paper cut to size and glued with CA. As any realistic roofing job, it is labor intensive but the final result pay off.

Now, about paint and color there's a lot more to say. I've always been unsatisfied with traditional method to stain wood in such fashion it gets the weathered silver appearance seen on shed and barns all over the world. That finish is crucial to achieve if you don't want your building to look like a bunch of stained matches glued together.

I painted the parts with Krylon Camouflage tan color and weathered with a mix of thinned black and burnt umber artist oil paints. It always gives a nice weathered look. For a more greyish look, Harold Minky in RMC a few years ago advocated using a white base primer before applying the weathering solution for a silvered wood effect. If I'm not satisfied by my paint job under the layout lighting, I could use it.


Corrugated paper sprayed with metallic paint makes great roof metal sheets
The same word of advice applies for roof. Older galvanized roof loose their silvery appearance over time and get bleached. While looking again at Mike Confalone's Knox Farm building, you can see he got it right. So I had to fix up that detail too before weathering. Pictures posted here show the "brand new" galvanized look which can be useful for many other applications.


While you can live with some discrepancies, wrong colors may totally kill a model and you're better paying a good deal of attention to that. There ain't fool proof methods. Each project required some thought just like you do when weathering a car or a locomotive.


So we now have a nice dilapidated wood shed standing near the track just as we wanted. It’s always fun to reuse old structures and find them hidden qualities. Never underestimate how a good paint job can salvage many, many thing and bring out their best qualities.

Thursday, October 27, 2016

1993 CN Murray Bay Subdivision Track Diagrams


Documenting a project is never a straightforward process. We would all love to have all the prototype information on hand from day one so we could design things with facts rather than fuzzy impressions. However, documenting a subject is a never ending task that would paralyze anybody which seek more than accumulating knowledge.

In our case, finding track diagrams took us some time. To be honest, we worked with Google Earth satellite views and good old childhood and teenage memories. Most info we had was too old or too recent for our era. Until a few months ago we got access to 1980s timetable and some track diagrams.

But now, Jérôme digged up 1993 track diagrams of CN Murray Bay Subdivision. While a little bit modern, very little change took up place on the subdivision at that time. It is fun to compare our own track plan and the diagrams to see what could have been and what we got right.

The most interesting fact I discovered is that Donohue tracks in Clermont were mostly own by CN. It may looks insignificant at first, but give some ground to our stance of often using CN locomotives to switch the plant.

Upon closer examination, I’m surprised how what we did isn’t that far from reality. Indeed, having the real diagrams with us when planning would have been nice, but in fact space limitations would have made a direct replication of the prototype almost impossible. Compromises would have certainly been quite similar to what we did and in retrospect, I feel no regrets getting copies of the diagrams so late in the process.

As Hedley-Junction progresses, I’ve come to the realisation it’s not a matter of making an exact replica that counts but rather getting the feeling right about what we do and designing it in such a way it fits our interests, goals and personal limitation. The actual layout is extremely far to be perfect, but well worth our efforts. I’d like to complain our building pace is far too slow, but I now understand it is our normal pace and trying to cram more hobby time in our lives would end up in burnout and frustration rather than a positive activity.

For the sake of documenting Hedley-Junction, I gladly post the old diagrams down here:


Wednesday, October 26, 2016

Ciment St-Laurent - Part 1

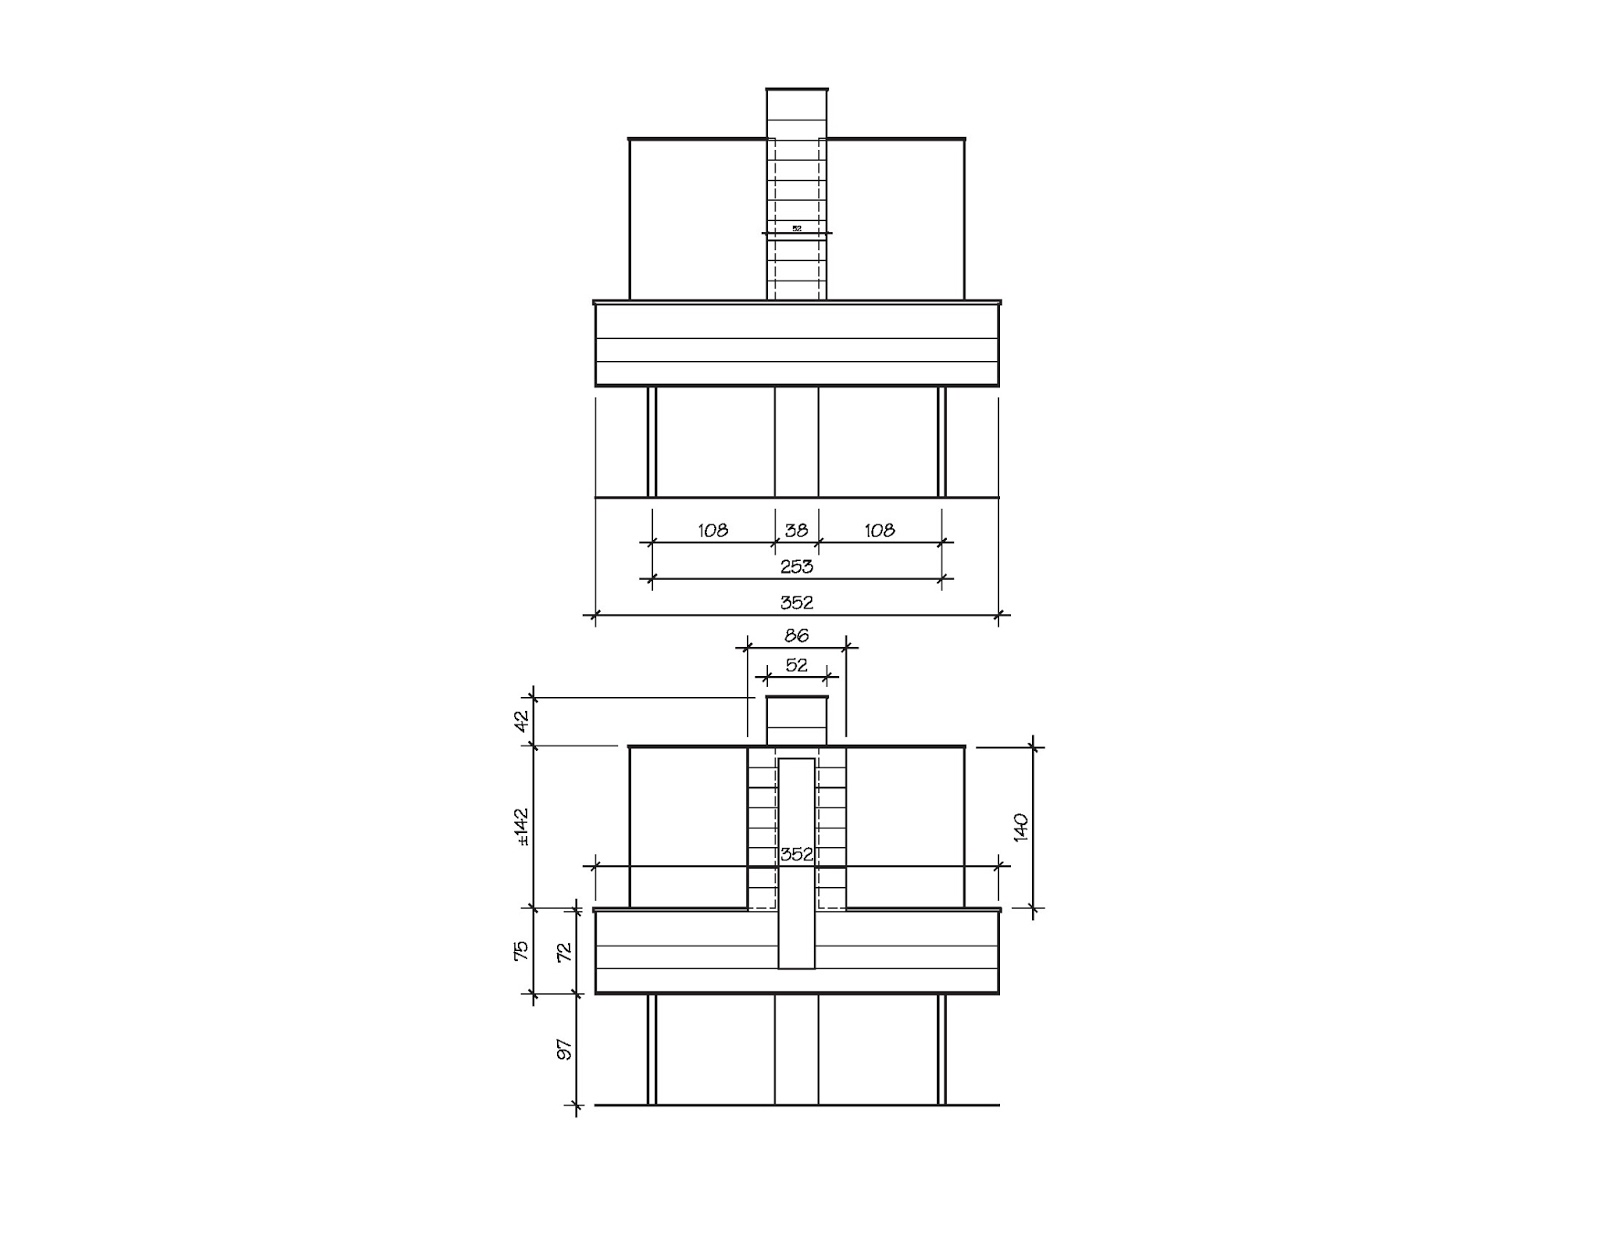
It's time to start the Ciment St-Laurent plant project. This large structure will be the focal point in the small layout room depicting Villeneuve and Maizerets. Not only it will dominate the landscape, but it will also generate the largest traffic on the railway including coal, gypsum, cement and many other bulk commodities. We are actually thinking about building the core with MDF, but I’m starting to think we could use some large Plexiglass sheets I have for concerns about dimensional stability over time. I’ve not been impressed by ¼” MDF lately and if we use it, bracing will be a pivotal aspect of the final design. It could also be an idea to try my hand using a laser cutter to make the parts. However, since a lot of fun comes from the process of building a structure, I think we would loose a meaningful project.


The plan and elevations are drawn from pictures, satellite imagery and insurance maps drawn in the 1950s when the prototype was under construction. While I don’t claim 100% accuracy, it should be extremely close to the real thing.


Since many people like to add cement plants on their layouts, I decided to share the plans. The drawing are metrics and at scale 1:5. If printed full-scale on a 11” x 8.5” sheet, they should be quite precise.

Tuesday, October 25, 2016

Terraforming Clermont Again

This modelling season is starting at a very slow pace for us isn’t it! But we are talking about a hobby and as seriously as we take it, this ain’t our main occupation.

 
Nevertheless, work resumed last weekend and Louis-Marie was able to complete electricity adding long needed feeders to some sidings. This is the kind of invisible work that makes your layout more fun to operate.


Meanwhile, I revised Ciment St-Laurent plans, making new scale drawings. I gave a few instructions to Louis-Marie about how to build the structure. Our main concern is to ensure it can be lifted easily to access tracks for maintenance and scenery. So far it should work, but I’m going to trust Louis-Marie in finding a more suitable way to materialize the concept. That won’t be a piece of cake.

 
As for myself, I decided to work on Clermont once again. Since we enlarged the peninsula last spring, we focussed our efforts on Maizerets while waiting to find custom made turnouts. So far, we’ve been unlucky and decided to keep the track as is for the time being. If a generous soul has clue or a knack at making curved turnout, let me know. At this moment, I have enough on my plate and have no interest in scratchbuilding a mechanical device. It means the second siding is no longer viable and the propane dealeriIs going to become a team track/feed mill as once envisioned. Space is at premium and we will try to find a way to cram a credible structure without overwhelming the scene. I’m looking forward doing that.


While all this sound hypothetical, some scenery work is under way and florist foam was used to terraform a fairly large area linking Clermont and St. Lawrence river. At this point, I made the new terrain slightly higher than the roadbed. In real life, it is the contrary, however, because of the sharp curve, it’s better to have surrounding grounds higher to hide that fact. Once trees will be planted, it should take a different look.


You will also find out this scene blends with the paper mill in the background. It was never planned, but I like the idea which as been masterfully explored by fellow modeller Rob Clark on his fictive Cornhill & Atherton Railroad layout. It is based on "shakkei", a Japanese word used to described the concept of "borrowed scenery". The idea is simple, for a layout, it means you use another scene as a backdrop from the foreground scene. In this case, the sky, hills and mill at Donohue merge into Clermont in such a way it creates the impression of a vast and realistic space.