Donohue's guard post has been on my mind for many years now. We had several discussions and explored many ideas, including a prototypical replica of Donohue's office by the parking lot (which was too big for the layout) or the tiny brick guard post. In the end, we settled down on the guard post but found out it was very similar in look to the Ciment St-Laurent scale building. Something different would be neat.
 |
| The Atlas tower was cool, why not replicate it in brick? |
Meanwhile, we used the top level of an Atlas signal tower as an office since it looked like one of these typical guard post in the area. However, as the scenery work progresses, we have no choice to replace it with something more permanent.
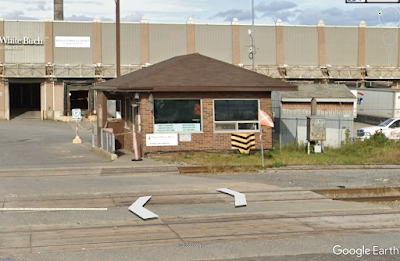 |
| White Birch Paper guard post in Quebec City |
Fortunately enough, many local paper mill in the area have smaller brick guard post with pavillion roof. In Quebec City, the White Birch example is quite a classic sight and feel right at home in Clermont. In Beaupré, a similar structure did exist until the plant was demolished in the late 2000s. All these mills were built in the 1920s, in the same era as Donohue. Thus I felt a 1920s style guard post would look great and offer some counterbalance to clapboard and corrugated steel structures disseminated all around the layout.
|
| The Atlas tower was cool, why not replicate it in brick? |
Using the Atlas tower as a template and recycling its windows, I made it slightly large to accommodate an old 1950s Revell signal tower roof that was laying around in the hobby room. I felt it would look great.

Walthers excellent brick patterned styrene sheets were used for the wall and 3mm x 3mm chamfered Evergreen styrene strips provided for a sturdy foundation. In this case, I made the foundation separate from the building. This way, it will be embedded into scenery and mud, then later on the structure will be put in place. For perfect alignment, I provided for a small styrene tab that lock the brick walls on the concrete footing.
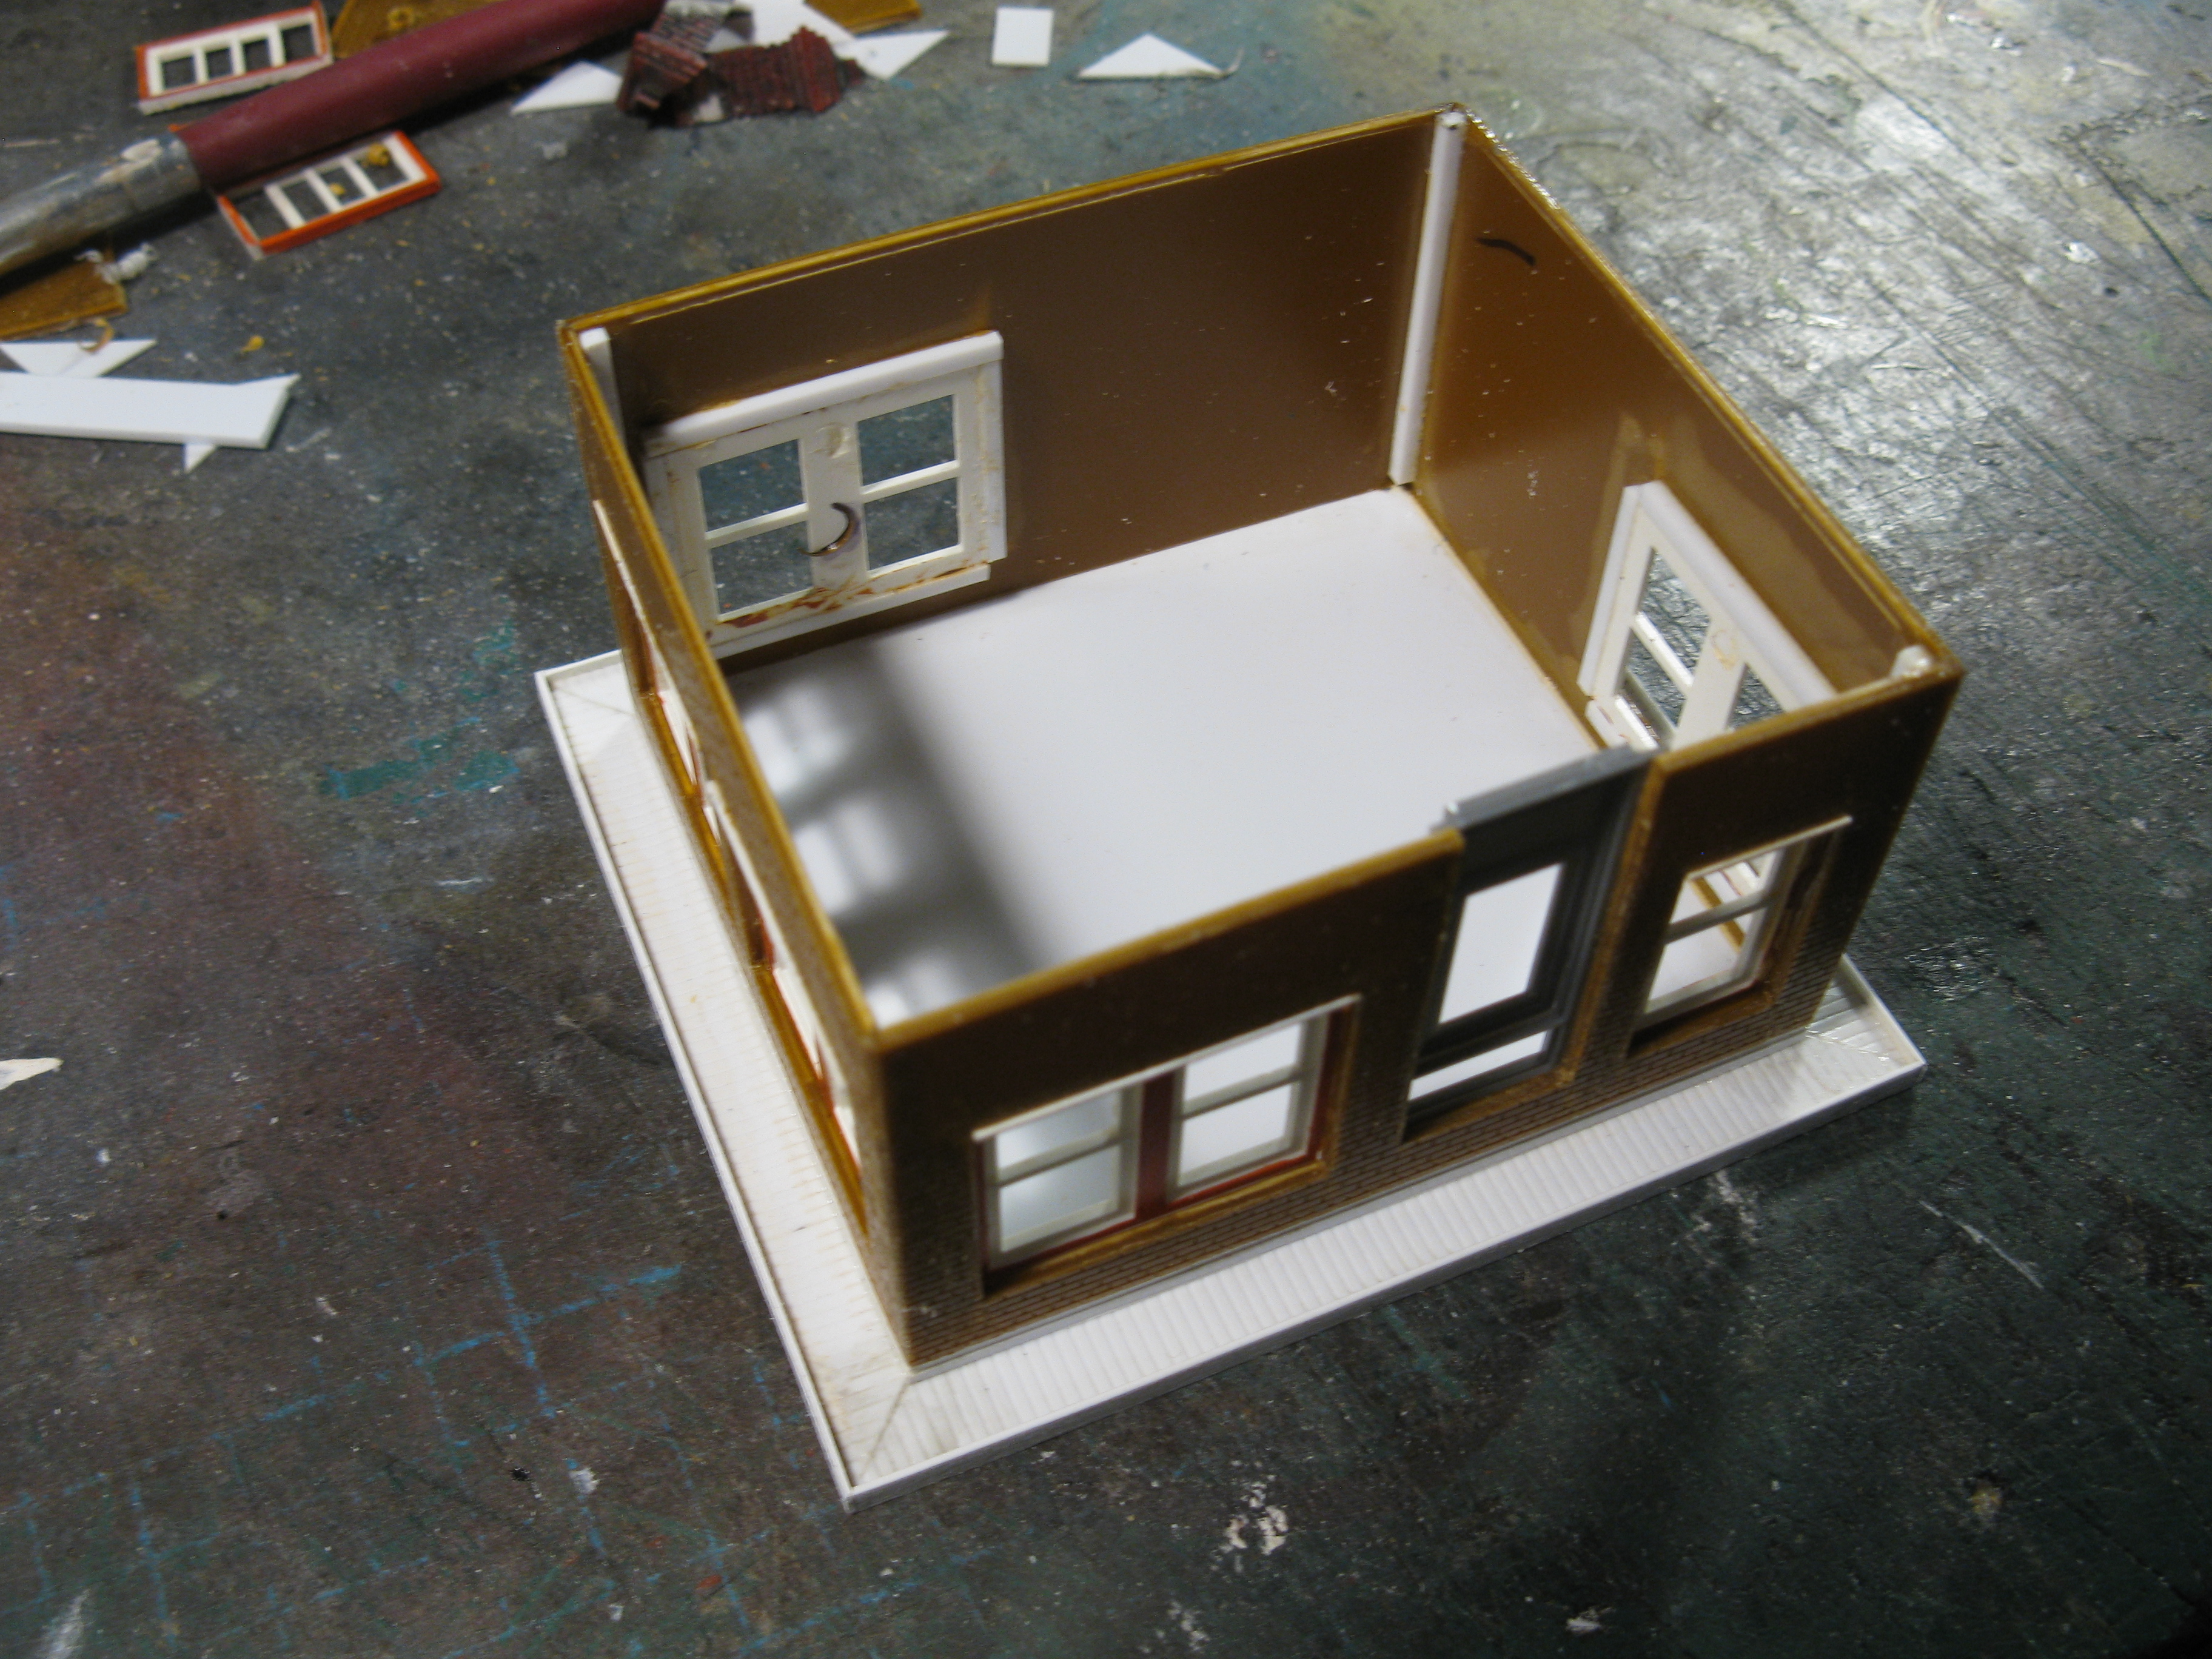 |
| Always install recessed windows in brick walls. |

Atlas windows were cut in halves to get that paired sashed window look so typical of 1920s architecture while Tichy provided a somewhat older type door with a transom. I also built a styrene recessed frame inside the wall openings so windows wouldn't sit flush with the brick wall. This is a typical construction detail that is too often overlooked. Windows in brick walls are very rarely is never flush. Also, having trims like a window on a wood siding wall is also very unlikely. Unfortunately, too many people use standard windows for wood buildings on brick structures, which kills the realism greatly.

Painting was inspired by my experiment on Drummondville structures built for a friend earlier last winter. I prime the model with a faded greyish black, add a layer of uneven base color then paint brick individually to add variation and colors. At first, it always looks garish, but after adding oil paint mortar wash (in this case a beige color), everything is toned down as it should be. The same method was also applied to the roof.
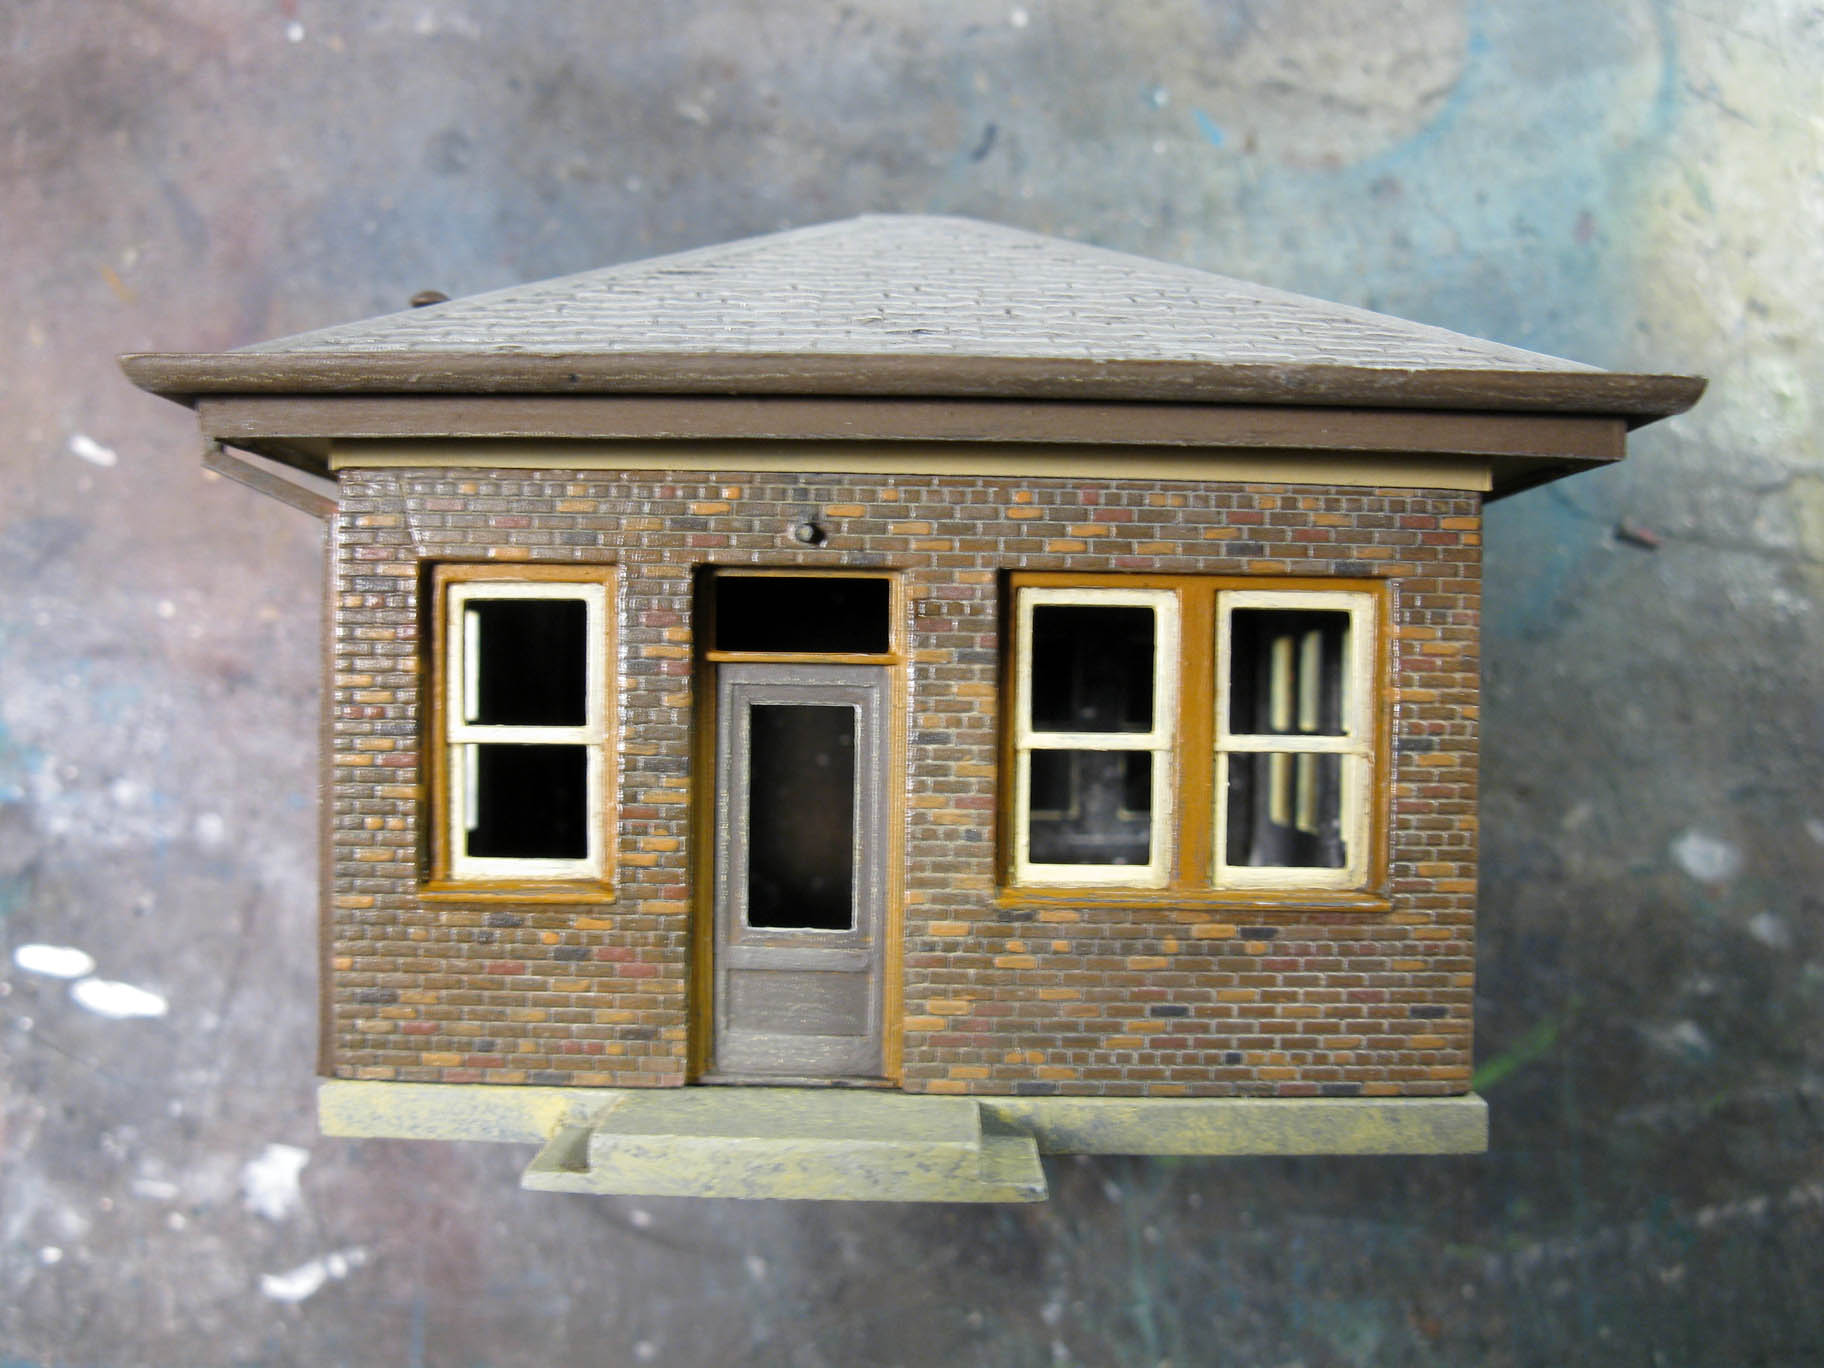
Painting the window was done using Raw Sienna acrylic paint. I wanted muted colors so nothing would look out of place. Sashes were painted beige instead of pure white to also blend them better with their surrounding. It was also common to paint sashes cream on historic buildings. In that regard, had I been a purist, I would have modernized the building with 1980s brown/bronze curtain wall windows and commercial aluminium door. However, I wanted to keep the retro look this time. Both approaches have their merit. In this case, it was all about translating the Atlas signal tower into a brick version.

Finally, I elected to weather the windows a little bit more than I had anticipated. Real wooden windows need constant care and I felt a paper mill with financial difficulties in the 2000s wouldn't care about spending money on them. Using armour modellers techniques but with a different medium, I used a light gray pencil to graze the sill and frame surfaces to create a chipping effect. After that, I repeated this step but with a dark gray pencil to replicate exposed and weathered wood starting to rot. Using these two colors yielded realistic results. The structure may be well preserved with original components, but it doesn't mean it's in great shape either.

In the next few days, I will add window glazing and I'm seriously thinking about adding a basic interior with a desk, a guard and wall for a toilet. I generally don't care about interiors, but in this case, the guard post is completely glazed and very close to the operator. An empty shell wouldn't cut the deal.
The brick painting looks incredible!
ReplyDeleteThanks!
Delete